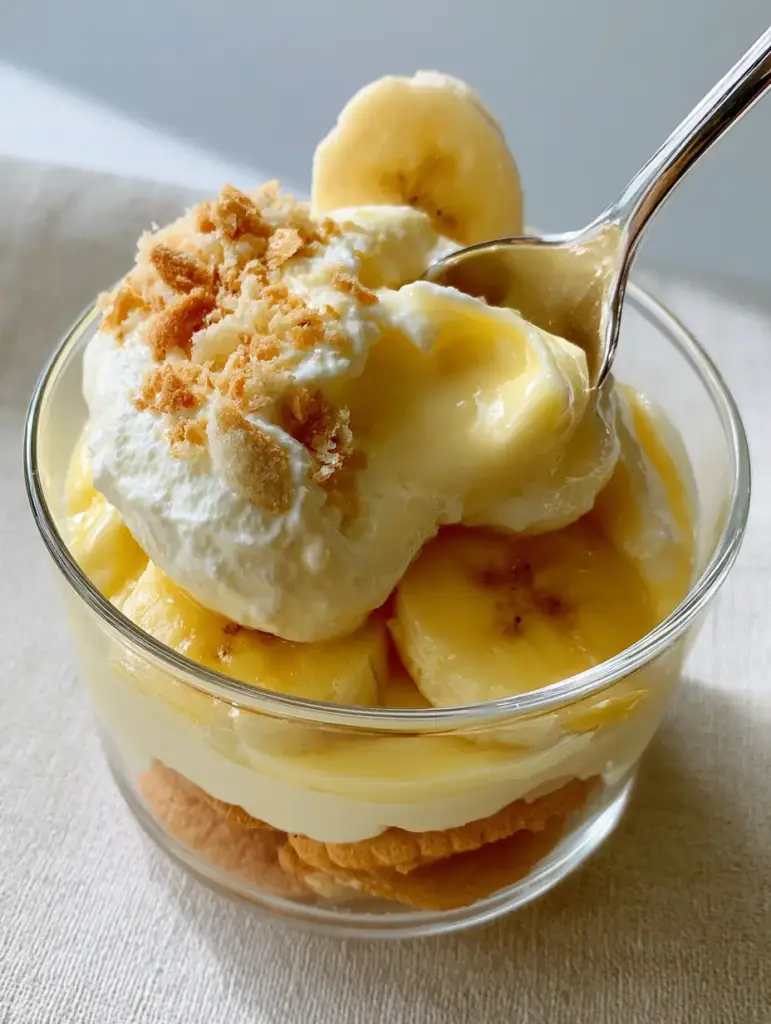
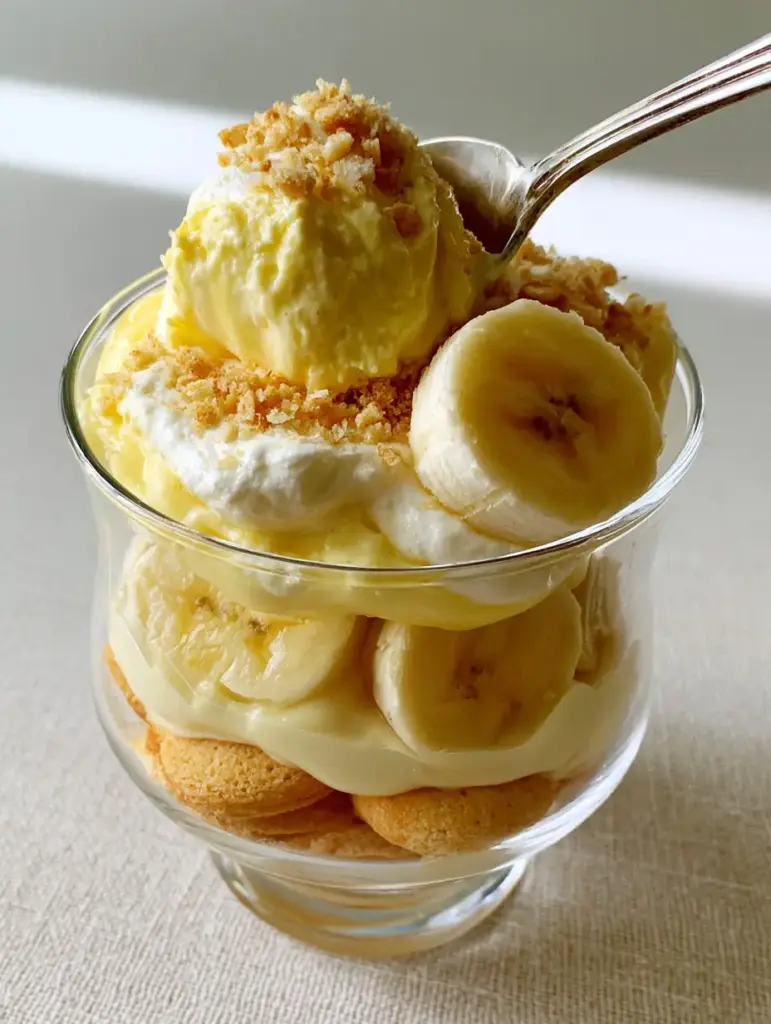
There is something fundamentally nostalgic about a clear glass dessert cup overflowing with the golden hues of a perfect banana pudding. It is not just a dessert; it is a structural masterpiece of textures, ranging from the snap of a vanilla wafer to the velvet-like embrace of a cloud-like custard. This recipe captures that exact handheld moment—a luscious portion scooped with a silver spoon to reveal the intricate, appetizing layers beneath.
When you look at a truly great banana pudding, you see the craftsmanship in the assembly. Our version focuses on a thick layer of fresh, plump yellow banana slices nestled between a crisp wafer base and a pale-yellow custard that has been folded with heavy cream for a light, airy finish. This is the definitive guide to achieving that unedited, professional food photography look in your own kitchen.
The Structural Anatomy of a World-Class Banana Pudding
To recreate the visual depth seen in high-end culinary photography, we must treat each layer as its own distinct element. This recipe moves beyond the basic “stir and pour” method to create a dessert that holds its shape while remaining incredibly soft on the tongue. By the time you reach the bottom of the glass, every bite should contain a harmonious blend of fruit, crumb, and cream.
- Crisp Vanilla Wafer Foundation: We use whole golden wafers to provide a sturdy, buttery base that slowly softens into a cake-like texture over time.
- Plump Yellow Banana Slices: Selection is key here; we choose bananas at the peak of yellow ripeness—without the brown spots—to ensure a firm bite and vibrant color.
- Whipped Pale-Yellow Custard: Unlike heavy, dense puddings, our custard is lightened by folding in freshly whipped cream, creating that “cloud-like” visual appeal.
- Textural Contrast Garnish: A final dusting of finely crushed wafer crumbs adds a professional finish and a concentrated burst of vanilla flavor.
The Essential Elements for Your Layered Masterpiece
Creating a professional-grade banana pudding requires a balance of pantry staples and high-quality dairy. Each ingredient serves a scientific purpose in the final architecture of the dish, ensuring it doesn’t collapse once the spoon dives in.
Whole Golden Vanilla Wafers: These act as the structural “bones” of the dessert. They absorb just enough moisture from the custard to become tender while retaining their sweet, toasted profile.
Fresh Yellow Bananas: You want bananas that are bright yellow with no green tips. This ensures they are sweet enough to flavor the dish but firm enough to be sliced into clean, distinct rounds.
Whole Milk (480ml / 2 cups): The base of our custard, providing the necessary fats for a silky mouthfeel. Using whole milk is non-negotiable for achieving that rich, pale-yellow hue.
Egg Yolks (4 large): These are the thickening agents that provide the custard’s signature color and decadent, velvety texture. They emulsify the sauce into a stable, scoopable cream.
Granulated Sugar (150g / 3/4 cup): Beyond sweetness, sugar helps tenderize the egg proteins, ensuring the custard remains smooth rather than rubbery.
Cornstarch (30g / 1/4 cup): This provides the necessary “lift” and stability. It ensures the custard is thick enough to support the heavy layers of bananas without weeping.
Heavy Whipping Cream (360ml / 1.5 cups): Half is used to lighten the custard, and half is whipped for the top layer. This is what creates the “cloud-like” texture described in our visual blueprint.
Pure Vanilla Extract (10ml / 2 tsp): A foundational aromatic that bridges the flavors of the wafers and the fresh fruit.
Unsalted Butter (30g / 2 tbsp): Whisked in at the very end of the cooking process to give the custard a glossy, professional sheen.
Tools for Achieving Professional Culinary Results
To get those distinct, clean layers visible through a clear glass, you will need a few specific tools. Precision is the difference between a messy bowl and an appetizing handheld photo. If you enjoy precision desserts, you might also love making apple crumble cupcakes which require similar attention to layering.
- Heavy-Bottomed Saucepan: This prevents the milk and egg yolks from scorching, ensuring your custard remains a pristine pale yellow.
- Fine-Mesh Sieve: Essential for straining the finished custard to remove any accidental bits of cooked egg, ensuring total silkiness.
- Clear Glass Dessert Cups: To showcase the physical layers as described in our visual prompt, individual glass vessels are superior to a large trifle bowl.
- Offset Spatula: This helps you level the custard layers without smearing the sides of the glass, keeping the visual presentation clean.
- Electric Hand Mixer: Required to achieve the stiff peaks in the heavy cream that give the pudding its “velvety, cloud-like” volume.
Step-by-Step Guide to Achieving Velvety Pudding Layers
Phase 1: Crafting the Golden Custard Base
Begin by whisking your egg yolks, sugar, and cornstarch in a medium bowl until the mixture is pale and thick. In your saucepan, heat the milk over medium heat until it just begins to simmer—look for small bubbles forming around the edges and a light steam rising from the surface.
Slowly temper the eggs by drizzling a small amount of hot milk into the yolk mixture while whisking constantly. This prevents the eggs from scrambling. Pour the entire mixture back into the saucepan and whisk vigorously over medium heat. You are looking for a “pudding-like” consistency; the whisk should leave distinct trails in the custard.
Once thickened, remove from heat and stir in the butter and vanilla. Pass the custard through a fine-mesh sieve into a clean bowl. Cover the surface directly with plastic wrap to prevent a skin from forming and chill for at least 2 hours until cold and set.
Phase 2: The Aeration Secret for Cloud-Like Texture
Once the custard is cold, it will be quite firm. In a separate chilled bowl, beat 1 cup (240ml) of the heavy cream until stiff peaks form. Stiff peaks mean when you lift the beaters, the cream stands straight up without drooping. This is a lighter approach than a traditional homemade banana pudding which can sometimes be too dense.
Gently fold the whipped cream into the chilled custard using a rubber spatula. Use a “cut and fold” motion to keep the air intact. The result should be a velvety, pale-yellow whipped custard that looks significantly more voluminous than the base you started with.
Phase 3: Precision Layering for Visual Impact
To assemble, place 3-4 whole golden vanilla wafers at the bottom of each glass. This creates the crisp base seen in our smartphone photo prompt. Next, arrange a thick layer of fresh banana slices against the glass. Press them slightly so they are visible from the outside.
Spoon or pipe the whipped custard over the bananas, filling the glass about three-quarters full. Top with a final generous dollop of the remaining whipped cream. For an extra touch of decadence, you could even drizzle a bit of caramel, similar to the profile of Biscoff salted caramel cheesecake.
Phase 4: The Final Garnish and Textural Finish
Just before serving, take 2-3 wafers and crush them into fine crumbs. Sprinkle these over the top of the whipped cream. Add one fresh, perfectly circular banana slice to the side of the cream to signal the flavor profile. The contrast between the finely crushed crumbs and the smooth cream is what makes the dish pop under natural daylight.
Expert Tips for Success with Banana Pudding
- Temperature Control: Ensure your custard is completely cold before folding in the whipped cream. If the custard is even slightly warm, it will melt the cream and turn your pudding into a soupy mess.
- Oxidation Prevention: To keep your banana slices yellow and plump, slice them right before assembly. If you must slice them early, a very light toss in pineapple juice (which is less tart than lemon) will keep them bright.
- The “Soggy Factor”: If you prefer your wafers to have a “snap,” serve the pudding within 2 hours of assembly. If you prefer the classic “cake-like” wafer texture, let it sit for 4-6 hours.
- Visual Clarity: When filling your glasses, use a piping bag or a large freezer bag with the corner snipped off. This keeps the custard from smearing on the glass, maintaining those distinct physical layers.
The Ideal Shelf Life and Storage Practices
Banana pudding is best enjoyed the day it is made. However, you can store it in the refrigerator for up to 48 hours. Keep in mind that the bananas will eventually begin to release moisture (weep) and the wafers will become very soft. This recipe does not freeze well, as the custard will lose its velvety texture and become grainy upon thawing.
If you are looking for a banana-based dessert that lasts a bit longer in the fridge, consider a banana pudding lush which uses a cream cheese base for added stability. For those who want the flavor profile in a more durable, portable form, our banana chocolate muffins are an excellent alternative.
Perfect Pairings for Your Layered Dessert
This light and airy pudding is a fantastic palate cleanser after a rich meal. It pairs beautifully with other classic American desserts or finger foods. If you are hosting a party, consider serving this alongside perfect chocolate chip cookies to give guests a variety of textures.
For a brunch spread, this pudding acts as a sweet side to savory dishes. If you are looking for more fruit-forward options to round out a dessert table, a strawberry banana cheesecake salad offers a similar flavor profile with a different structural twist.
Frequently Asked Questions about Banana Pudding
While you can, the ‘cloud-like’ texture and pale-yellow color in this recipe come from the homemade egg-yolk custard folded with whipped cream. Instant pudding is often denser and lacks the same culinary depth.
Use bananas that are yellow with no brown spots for better longevity. You can also toss the slices gently in a little bit of pineapple or apple juice to provide an acidic barrier without the sharp tartness of lemon.
For that classic Southern ‘cake-like’ wafer texture, assemble the pudding 4-6 hours before serving. If you prefer the wafers to stay crisp, serve the pudding within 1-2 hours.
You can make the custard up to 2 days in advance. However, for the best visual layers and fresh fruit texture, assemble the final cups no more than 8 hours before your event.
This usually happens if the custard wasn’t cooked long enough to fully activate the cornstarch, or if the bananas used were overripe. Overripe bananas release more moisture as they sit, which can thin out the pudding.
The Ultimate Layered Banana Pudding Recipe
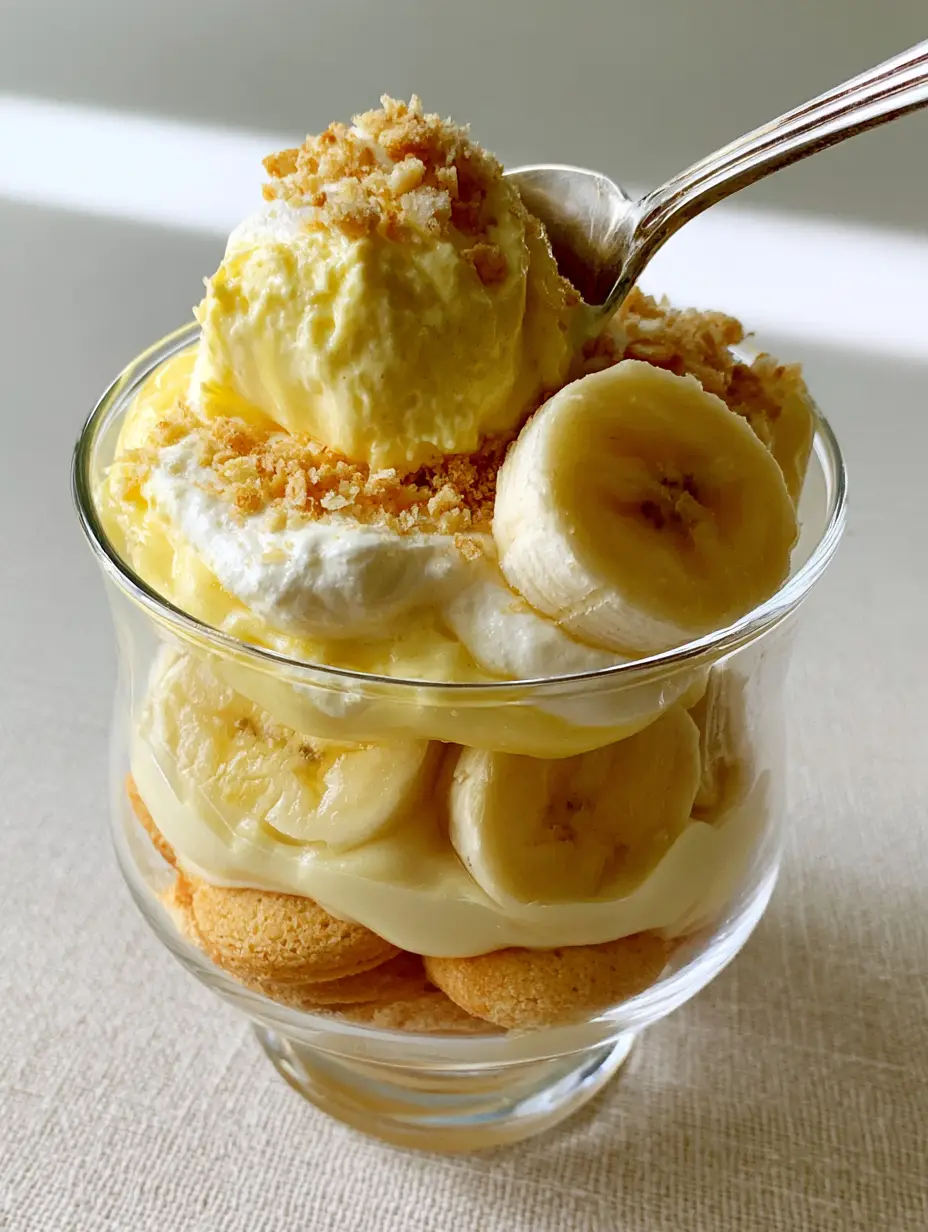
Banana Pudding with Whipped Custard and Crisp Vanilla Wafers
Ingredients
Equipment
Method
- Whisk egg yolks, sugar, and cornstarch in a bowl until pale and thick.
- Heat milk in a saucepan until simmering, then slowly temper into the yolk mixture.
- Return mixture to the pan and whisk over medium heat until it reaches a thick, pudding-like consistency.
- Stir in butter and vanilla. Strain through a sieve and chill with plastic wrap directly on the surface for 2 hours.
- Beat heavy cream to stiff peaks. Gently fold half of the whipped cream into the chilled custard to create a cloud-like texture.
- In glass cups, layer whole wafers, then banana slices, then the whipped custard.
- Top with remaining whipped cream, crushed wafer crumbs, and a fresh banana slice.
Notes
Use a piping bag for clean layers in the glass cups.
Bringing the Visual Blueprint to Your Table
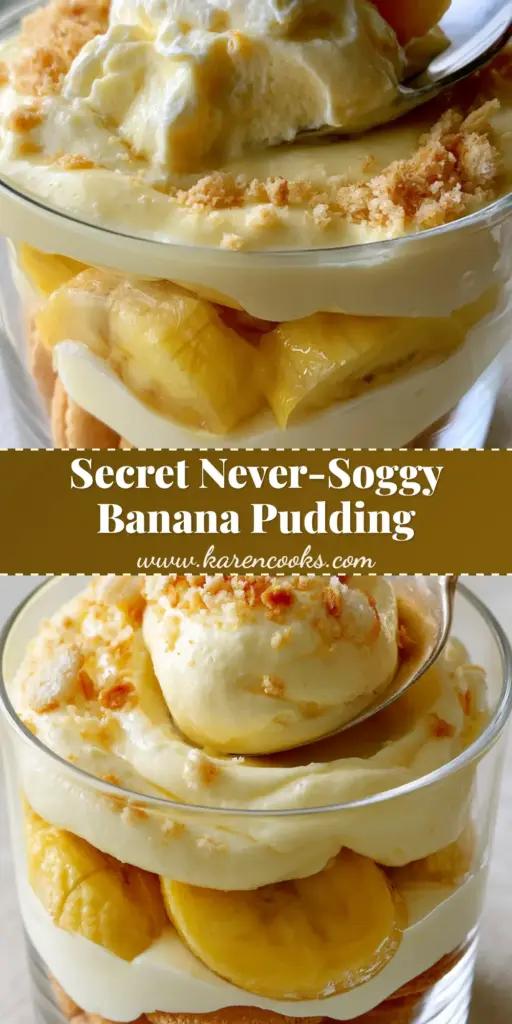
Mastering this banana pudding is about more than just following steps; it is about observing the sensory cues. Listen for the whisk hitting the bottom of the pan, watch for the pale-yellow custard to thicken into a glossy ribbon, and feel the lightness of the folded cream. This recipe is designed to be as beautiful as it is delicious, perfectly suited for a handheld photo in the soft daylight of your kitchen.
If you enjoyed this deep dive into layering and texture, please leave a comment below and let us know how your layers turned out! Don’t forget to share your creations and follow us on Pinterest for more culinary inspiration and visual recipe blueprints.