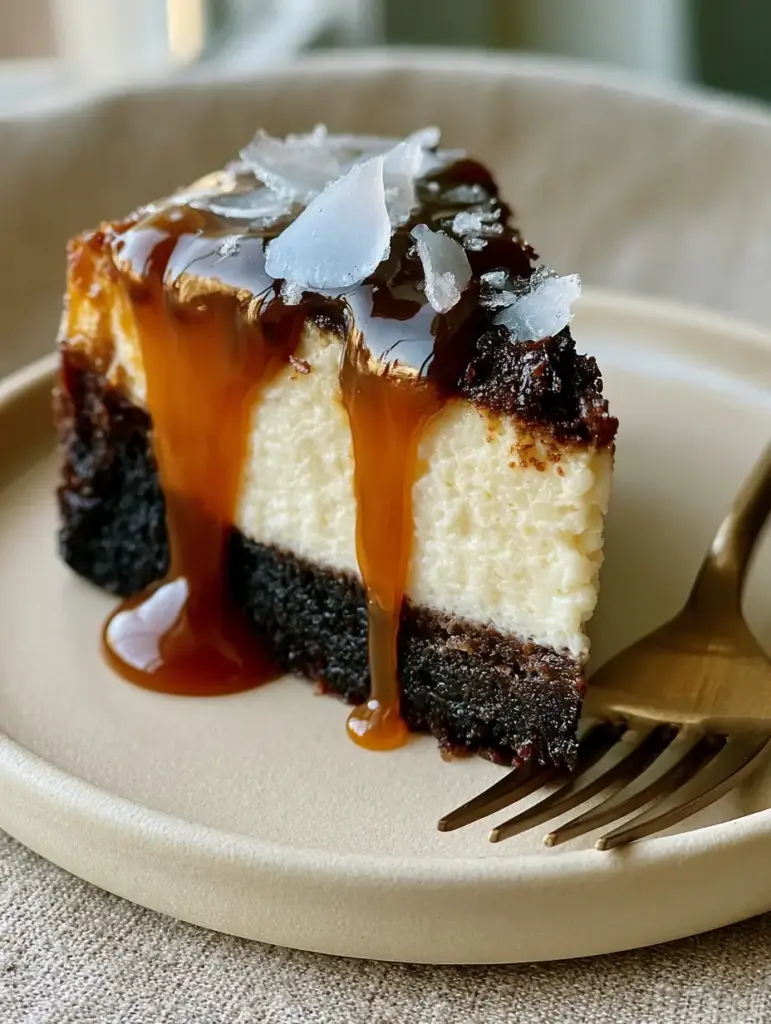
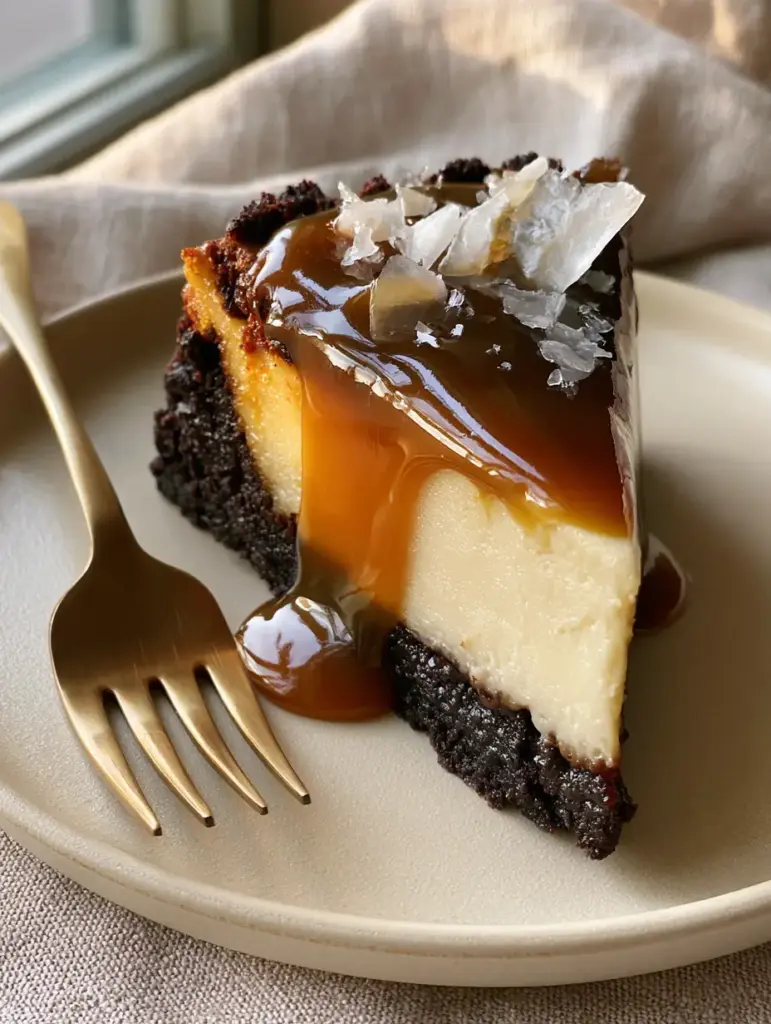
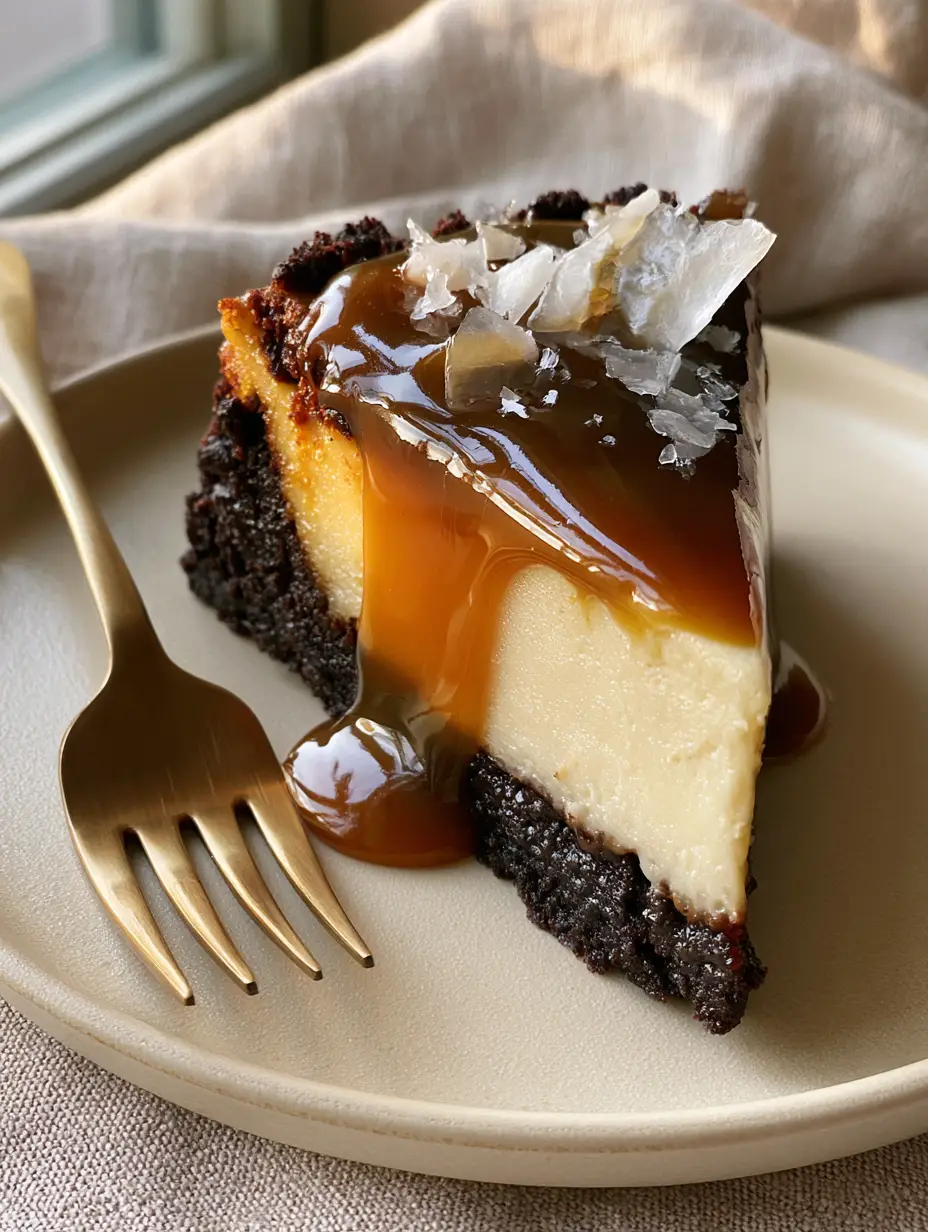
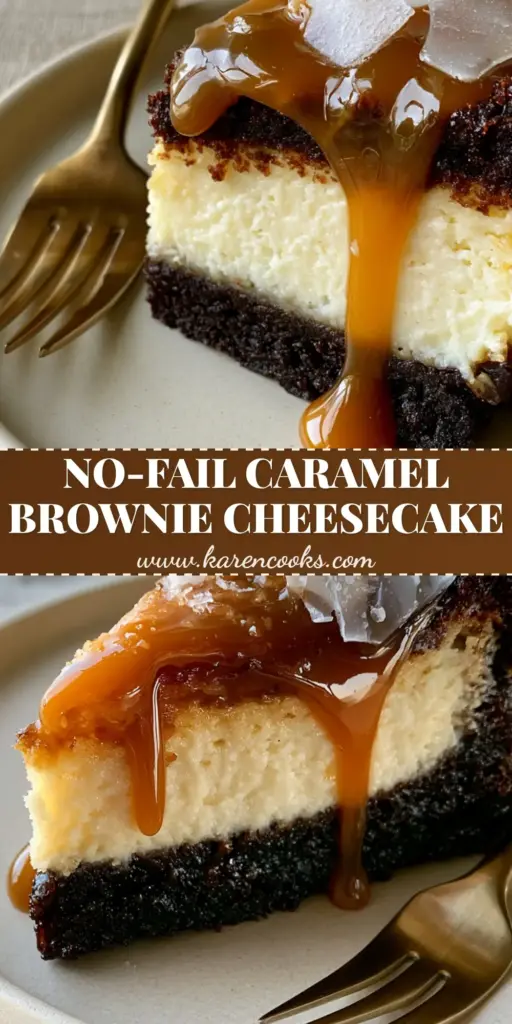
The Caramel Brownie Cheesecake is the holy grail of dessert architecture. It combines the chewy, dense texture of a gourmet brownie with the silky elegance of a New York-style cheesecake, all crowned with a cascading amber waterfall of homemade salted caramel.
If you have been searching for a show-stopping center-piece that tastes even better than it looks, this is it. Every bite offers a contrast between the dark, bittersweet chocolate foundation and the tangy, velvety cream cheese heart.
We designed this Caramel Brownie Cheesecake to be visually immaculate. From the distinct, sharp layers to the glossy caramel drip caught in a smartphone-perfect moment, this recipe ensures professional results in your home kitchen.
Why This Caramel Brownie Cheesecake Is a Total Game-Changer
- Triple-Texture Experience: You get a dense fudgy brownie, a velvety smooth cheesecake, and a sticky glossy caramel in every single forkful.
- Visual Precision: This recipe is engineered to create the “immaculate layers” seen in professional food photography, featuring a flawless, crack-free surface.
- Perfectly Balanced Salt: Large, translucent flakes of Maldon sea salt cut through the richness, preventing the “sugar crash” sweetness.
- Proven Success: Using professional culinary cues, we guide you through the exact sensory changes to look for, ensuring your layers never muddle or crack.
The Core Elements of Your Gourmet Dessert Layers
To achieve the specific visual result of a thick, glossy amber sauce and a dense dark chocolate base, each ingredient serves a scientific purpose. Do not skip the room temperature requirements; they are the secret to that velvety texture.
Unsalted Butter (225g / 1 cup): Used in both the brownie and the caramel. It provides the fat necessary for a tender crumb and a rich, buttery mouthfeel in the sauce.
Dark Chocolate Chips (170g / 6oz): Melted into the brownie base to ensure it remains “dense and fudgy” rather than cakey. High-quality cocoa solids are essential here.
Full-Fat Cream Cheese (680g / 24oz): This must be the brick-style cheese for the cheesecake layer. It creates the “velvety smooth” structure that supports the caramel weight.
Heavy Whipping Cream (120ml / 1/2 cup): Added to the caramel sauce to achieve that “thick, glossy, amber-colored” drip that moves slowly down the side of the slice.
Maldon Sea Salt Crystals: These specific large, translucent flakes provide the visual “sparkle” and the necessary crunch to contrast the soft cream cheese.
Granulated Sugar (400g / 2 cups): Divided between the brownie and the cheesecake. In the caramel, it is dry-burned to reach the amber stage for deep flavor.
Large Eggs: Four total. They provide the protein structure for the baked layers. Ensure they are room temperature to avoid curdling the cream cheese batter.
Essential Tools for Bakery-Style Results
To replicate the “flawless, crack-free” texture seen in our guides, you will need a few specific tools. Precision is the difference between a good dessert and a masterpiece.
- 9-inch (23cm) Springform Pan: Essential for removing the cheesecake without destroying the immaculate layers.
- Parchment Paper: Lining the bottom ensures the brownie base doesn’t stick and remains a solid foundation.
- Heavy-Bottomed Saucepan: For the caramel. It distributes heat evenly, preventing the sugar from burning before it reaches the amber stage.
- Stand Mixer or Hand Mixer: To aerate the cream cheese just enough without over-incorporating air, which causes cracks.
Crafting the Ultra-Fudgy Dark Chocolate Foundation
The first step in our Caramel Brownie Cheesecake is the base. We aren’t using a dry crust; we are building a foundation of pure chocolate decadence.
Step 1: Melt and Emulsify
Preheat your oven to 350°F (175°C). Melt 1/2 cup (115g) of butter with 6oz (170g) of dark chocolate. The mixture should be glossy and smooth, smelling intensely of cocoa.
Step 2: Incorporate the Brownie Structure
Whisk in 1 cup (200g) of sugar and 2 eggs. Fold in 1/2 cup (65g) of flour and 1/4 cup (25g) of cocoa powder.
Visual Cue: The batter should be thick, dark, and look like molten lava.
Step 3: The Par-Bake
Spread the batter into your lined pan. Bake for 15 minutes. It should be set on the edges but still slightly soft in the middle to ensure it stays fudgy after the second bake.
Achieving a Velvety, Crack-Free Cheesecake Layer
While the brownie cools slightly, prepare the middle layer. This is where we focus on the “velvety smooth” texture mentioned in our visual blueprint.
Step 4: The Cream Cheese Base
Beat 24oz (680g) of cream cheese with 1 cup (200g) of sugar until smooth. Add 2 eggs one at a time, mixing on low speed. High speed is the enemy of a crack-free cheesecake!
Step 5: The Tangy Finish
Fold in 1/2 cup (120ml) of sour cream and 1 tbsp (15ml) of vanilla. The sour cream ensures that the cheesecake is creamy rather than heavy. Pour this over the brownie base.
Step 6: The Low-and-Slow Bake
Lower the oven to 325°F (160°C). Bake for 45-50 minutes.
Sensory Cue: The edges should be set, but the center should still have a slight “jiggle” like Jell-O when you gently shake the pan.
Mastering the Golden Amber Salted Caramel Sauce
The “thick, glossy, amber-colored salted caramel sauce” is what brings the “wow” factor. We are going for a deep amber, not a pale gold.
Step 7: The Sugar Caramelization
Heat 1 cup (200g) of sugar in a saucepan over medium heat. Stir constantly as it melts into a liquid. Watch for the color change; once it hits the color of an old penny, it is ready.
Step 8: The Finishing Drip
Whisk in 6 tbsp (85g) of butter, then slowly pour in 1/2 cup (120ml) of heavy cream.
Visual Cue: It will bubble violently; this is normal. Continue whisking until it is a smooth, glossy sauce.
The Final Flourish: Maldon Salt and Assembly
Once the cheesecake has chilled for at least 6 hours (or overnight), it is time to assemble. Release the springform sides carefully.
Pour the cooled caramel over the top, letting it slowly drip down the sides. Finally, take your Maldon sea salt and scatter the large, translucent flakes across the top. This provides that professional, “handheld smartphone photo” aesthetic.
Expert Tips for a Flawless Caramel Brownie Cheesecake
- Avoid the Over-Mix: When making the cheesecake layer, mix only until the eggs disappear. Extra air causes the cake to rise and then collapse, creating cracks.
- The Temperature Gradient: Let the caramel cool for 15 minutes before pouring. If it’s too hot, it will melt the cheesecake surface; if too cold, it won’t “drip.”
- The Clean Cut: To get those “immaculate layers” in your slice, dip a sharp knife in hot water and wipe it clean between every single cut.
- Room Temp Everything: Cold cream cheese will result in lumps that no amount of whisking can fix without over-aerating the batter.
Storage, Reheating & Freezing Advice
The Caramel Brownie Cheesecake is a sturdy dessert. It can be kept in the refrigerator in an airtight container for up to 5 days. The caramel may soften slightly, but the flavors will actually deepen.
For freezing, it is best to freeze the cheesecake and brownie layers without the caramel. Wrap tightly in plastic wrap and foil for up to 3 months. Thaw in the fridge overnight before adding the fresh caramel and Maldon salt.
What to Serve With This Decadent Slice
This dessert is incredibly rich, so it pairs beautifully with a bitter espresso or a cold glass of milk. If you love this flavor profile, you might also enjoy our Milky Way Brownies for a similar chocolate-caramel hit.
If you’re hosting a party, consider a dessert spread with Biscoff Salted Caramel Cheesecake or a lighter Strawberry Banana Cheesecake Salad to balance the textures. For those who can’t get enough of the drip, our Turtle Cheesecake is a perfect companion recipe.
Frequently Asked Questions
Yes, but ensure it is a high-quality, thick ‘caramel dip’ rather than a thin ice cream syrup. The visual ‘drip’ effect requires a sauce with high viscosity.
Use a long, sharp knife dipped in very hot water. Wipe the blade completely clean and dry between every single cut to maintain the immaculate layer definition.
To prevent cracks, ensure all ingredients are at room temperature and mix on low speed to avoid incorporating air. Baking at a lower temperature and using a water bath can also help maintain moisture.
Store in an airtight container in the refrigerator for up to 5 days. For the best texture, let the slice sit at room temperature for 15 minutes before serving.
Over-baking the brownie base during the par-bake stage can lead to a hard crust. It should still be slightly soft in the center when you add the cheesecake batter.
The Ultimate Caramel Brownie Cheesecake Recipe
Caramel Brownie Cheesecake: The Ultimate Triple-Layer Decadence
Ingredients
Equipment
Method
- Melt butter and dark chocolate together until smooth. Whisk in sugar and eggs.
- Fold in flour and cocoa powder. Bake in a 9-inch pan at 350°F (175°C) for 15 minutes.
- Beat cream cheese and sugar on low speed. Add eggs one at a time, followed by sour cream and vanilla.
- Pour over brownie and bake at 325°F (160°C) for 45-50 minutes until the center has a slight jiggle.
- Caramelize sugar in a saucepan until amber. Whisk in butter and heavy cream. Let cool slightly.
- Pour caramel over chilled cheesecake and sprinkle with Maldon sea salt crystals.
Notes
Use a hot knife for clean slices between each cut.
Closing & Call to Action
This Caramel Brownie Cheesecake is more than just a recipe; it’s a masterclass in textures and flavors. Whether you are making it for a birthday or a “just because” weekend treat, it is guaranteed to impress.
If you enjoyed this recipe, please leave a comment below and let us know how your layers turned out! Don’t forget to follow us on Pinterest and pin this recipe to your favorite dessert boards for later!