When you cannot decide between a decadent, dark chocolate brownie and a classic, buttery chocolate chip cookie, these brookie cookies are the only answer. This isn’t just a simple mash-up; it is a meticulously engineered dessert that captures the best of both worlds in every single bite.
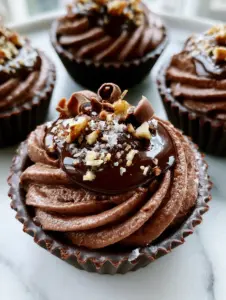
Imagine a base of golden-brown, soft-baked cookie dough topped with a deep, dark chocolate brownie layer that boasts a paper-thin, crackly meringue crust. As you pull one apart, the gooey underbaked center reveals large pools of melted semi-sweet chocolate that ooze out against the neutral beige linen of your cooling rack.
To finish, a light dusting of flaky Maldon sea salt cuts through the richness, creating a sensory experience that is as visually stunning as it is delicious. Whether you are prepping for a bake sale or just satisfying a late-night craving, these brookie cookies set a new standard for home baking.

Why These Hybrid Cookies Are a Total Game-Changer
- The Ultimate Texture Contrast: You get a chewy, golden cookie bottom paired with a fudgy, melt-in-your-mouth brownie top.
- That Iconic Crackly Top: We use a specific sugar-beating technique to ensure a glossy, “paper-crust” finish that shatters when you bite into it.
- Gooey, Molten Centers: By using chopped semi-sweet chocolate chunks instead of just chips, we achieve those professional “chocolate pools” seen in high-end food photography.
- Balanced Sweetness: The addition of flaky sea salt and dark cocoa powder ensures these are sophisticated and rich rather than cloyingly sweet.
The Anatomy of the Perfect Double-Layer Dough
Creating the perfect brookie cookies requires high-quality ingredients that perform specific chemical roles during the bake. We aren’t just mixing two batters; we are balancing fats and proteins to ensure the layers bond without becoming a muddy mess.
For the Fudgy Brownie Layer:
High-Fat Dutch Processed Cocoa: This provides that deep, dark chocolate color and a smooth, mellow flavor profile that mimics a professional bakery’s results. 1/2 cup (45g) is all you need to transform the batter.
Granulated Sugar: Beyond sweetness, whisking this with the eggs is what creates the “meringue” structure for that crackly top. You will need 1 cup (200g) to achieve the desired glossy finish.
Unsalted Butter: We melt the butter to keep the brownie layer dense and fudgy rather than cakey. Use 1/2 cup (113g) of high-quality European-style butter for the best mouthfeel.
Dark Chocolate Chunks: Use a chopped bar rather than chips here. The 4oz (113g) of chopped chocolate melts into the batter, contributing to the “oozing” center described in our visual blueprint.
For the Chewy Cookie Base:
Brown Sugar: The high molasses content in 3/4 cup (150g) of packed brown sugar provides the moisture needed for a soft, bendable cookie base. This is the secret to that “golden-brown” hue.
All-Purpose Flour: This provides the structural skeleton. We use 1 1/4 cups (155g) to ensure the cookie holds its shape under the weight of the brownie layer.
Baking Soda: A small amount (1/2 tsp or 3g) encourages browning through the Maillard reaction, giving us that professional toasted flavor.
Semi-Sweet Chocolate Chips: These hold their shape better than chunks, providing a necessary structural bite within the soft cookie base. Use 3/4 cup (130g) for maximum impact.
Essential Equipment for Professional Results
While you don’t need a commercial kitchen, a few specific tools will help you achieve the “extreme macro” look of a perfect brookie. A standard baking sheet and parchment paper are the foundations of any good baking project.
An electric hand mixer or stand mixer is vital for the brownie layer; you cannot achieve that crackly top by hand-whisking alone. You need enough power to dissolve the sugar into the eggs until the mixture is pale and voluminous.
Finally, a medium-sized cookie scoop (about 2 tablespoons) ensures that every one of your brookie cookies is uniform in size. This consistency allows them to bake evenly, ensuring the centers stay gooey while the edges set.

Mastering the Layered Bake: Step-by-Step
1. Preparing the Golden Cookie Base
In a large bowl, cream together your softened butter and brown sugar until the mixture looks like wet sand. Add the egg and vanilla, beating until the color lightens significantly, which usually takes about 2 minutes.
Gently fold in your dry ingredients—flour, baking soda, and salt—being careful not to overwork the gluten. Fold in the semi-sweet chips last, ensuring they are evenly distributed throughout the dough.
2. Crafting the Glossy Brownie Top
Melt your butter and dark chocolate chunks together in a double boiler or microwave in 20-second bursts. In a separate bowl, use your mixer to beat the eggs and granulated sugar on high speed for at least 3-4 minutes.
You are looking for the “ribbon stage,” where the batter falls off the whisk in a thick, slow-dissolving trail. This is the only way to get that shiny, paper-thin meringue crust mentioned in our visual prompt.
3. The Assembly Technique
Scoop a 1-tablespoon ball of cookie dough and flatten it slightly on your prepared baking sheet. Top it with a 1-tablespoon dollop of the brownie batter, using a small spatula to smooth it toward the edges.
Don’t worry if they look a little tall; they will spread and meld in the oven. Space them at least 3 inches (7.5cm) apart to allow for the airflow needed to crisp up those edges.
4. The Precision Bake
Slide the tray into a preheated 350°F (175°C) oven for exactly 11-13 minutes. Look for the “visual cues”: the brownie top should be set and crackled, but the center should still look slightly “wet” or soft.
Immediately upon removing them from the oven, sprinkle a few flakes of Maldon sea salt onto the glossy surface. Let them cool on the pan for at least 10 minutes to allow the gooey center to set up enough to handle.
Secrets to That Iconic Crackly Brownie Crust
- The Sugar Secret: If your sugar isn’t fully incorporated into the egg foam, you won’t get the crackle. Beat longer than you think you need to!
- Temperature Matters: Ensure your eggs are at room temperature. Cold eggs will seize the melted chocolate and ruin the glossy finish of your brookie cookies.
- Do Not Overbake: The “gooey underbaked center” is a feature, not a bug. If the brownie layer looks firm and matte, you have gone too far.
- Quality Chocolate: Use chocolate with at least 60% cocoa solids for the brownie layer to achieve that deep, dark chocolate visual contrast.
Storage, Reheating, and Freezing
These cookies are at their peak of “ooziness” about 20 minutes after baking, but they store remarkably well. Keep them in an airtight container at room temperature for up to 3 days.
If you want to recapture that “melted chocolate pool” experience, pop a cookie in the microwave for 8-10 seconds. The heat will soften the fudgy center and the chocolate chunks without drying out the cookie base.
You can also freeze the unbaked cookie dough balls for up to 3 months. However, for the brownie layer, it is best to bake it fresh to maintain that delicate meringue crust structure.
What to Serve with Your Brookie Cookies
These rich treats are the star of the show, but they pair beautifully with other dessert table staples. For a themed party, consider serving them alongside festive pumpkin treats or even a tray of homemade cookie sandwiches.
If you are looking for a beverage to cut through the dark chocolate, a cold glass of milk is classic. However, for a more “adult” dessert pairing, try serving these with a festive cocktail to balance the richness with a bit of citrus acidity.
For those who love a “salty and sweet” combo, these brookies are also great when crumbled over vanilla bean ice cream or served as a side to elevated campfire treats.
Frequently Asked Questions
Yes! To achieve the ‘gooey underbaked center’ seen in the photos, the cookies should be removed while the centers still look slightly soft. They will firm up as they cool on the hot pan.
You can, but you may lose the distinct ‘paper-thin’ crust and the structural integrity needed to stay atop the cookie dough. For the best macro-worthy results, our scratch-made recipe is recommended.
Instead of using only chocolate chips, use a high-quality semi-sweet chocolate bar chopped into large, irregular chunks. Chunks melt more significantly than chips, creating those iconic ‘pools’.
This usually happens if the butter is too warm or if the dough wasn’t chilled. If your kitchen is hot, chill the assembled brookie balls for 15 minutes before sliding them into the oven.
The crackly top comes from beating the eggs and sugar together until they reach the ‘ribbon stage.’ If you don’t beat them long enough to dissolve the sugar and create a meringue-like structure, the top will remain matte.
The Ultimate Brookie Cookies Recipe

Brookie Cookies: The Ultimate Fudgy Brownie and Chewy Chocolate Chip Hybrid
Ingredients
Equipment
Method
- Cream softened butter and brown sugar until fluffy. Add egg and vanilla, beating until well combined.
- Fold in flour, baking soda, and chocolate chips until a soft dough forms. Set aside.
- Whip eggs and granulated sugar for 3-5 minutes until thick and pale. This creates the crackly top.
- Fold in melted butter, cocoa powder, and melted chocolate chunks. Mix until glossy.
- Place a scoop of cookie dough on the pan and top with a scoop of brownie batter.
- Bake at 350°F (175°C) for 12 minutes until the brownie top is crackled and the center is gooey.
Notes
Do not overbake if you want the 'oozing' chocolate center.

Join the Community of Home Bakers!
I hope these brookie cookies become a staple in your kitchen just as they have in mine. There is something truly magical about the way the dark chocolate brownie layer shatters to reveal that soft, golden cookie base.
If you make these, please leave a comment below and let me know how that crackly top turned out! Don’t forget to share your photos and follow me on Pinterest for more decadent dessert inspiration and baking tips.
Happy baking, and may your chocolate always be oozing!