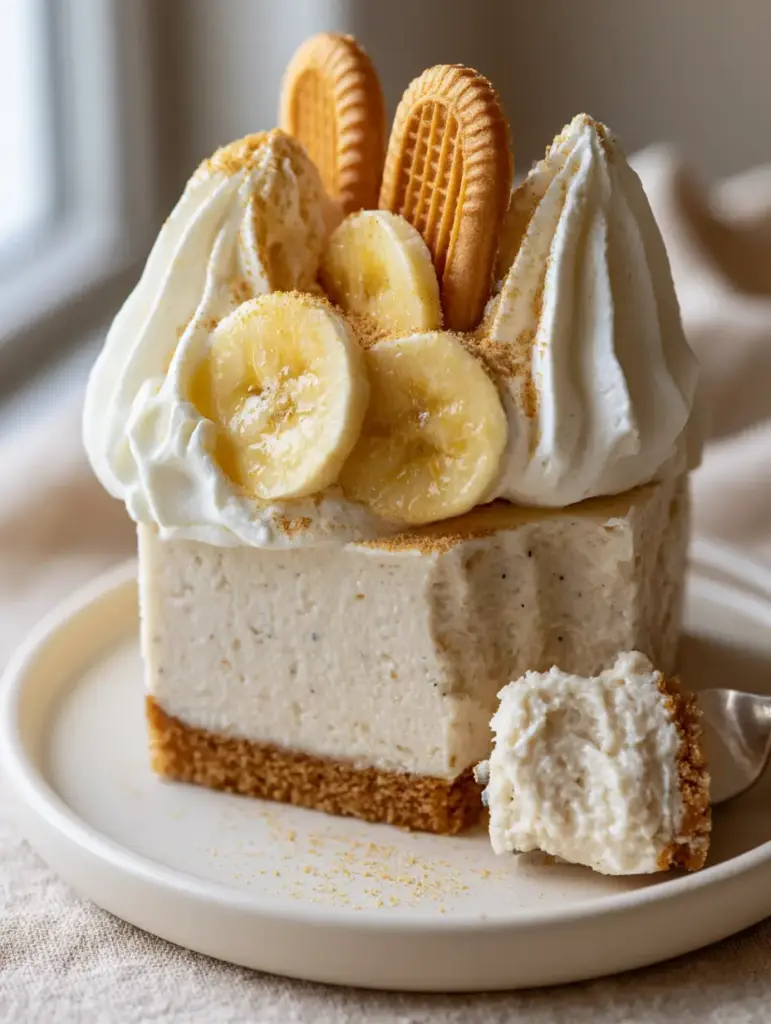
This no-bake banana pudding cheesecake is the ultimate fusion of a classic Southern banana pudding and a rich, velvety New York-style cheesecake. If you are looking for a dessert that delivers high-impact visual appeal with zero oven time, you have found it. This recipe creates a dense ivory-toned banana cream cheese mousse that sits atop a perfectly compressed Nilla Wafer crust, finished with stiff whipped cream peaks and fresh banana coins.
Whether you are a seasoned baker or a beginner, the no-bake banana pudding cheesecake is a foolproof way to impress guests. By skipping the water bath and the baking process, we preserve the bright, fresh banana flavor and achieve a texture that is both light and incredibly firm. It’s the perfect companion to our strawberry cheesecake banana pudding for your next summer gathering.
Why You Will Love This Visual Masterpiece
- Textural Contrast: The crunch of the compressed golden Nilla Wafer crumbs balances the velvety banana mousse.
- Visual Precision: Tiny vanilla bean seeds are visible throughout the filling, providing a gourmet aesthetic.
- Zero-Bake Ease: Achieve stiff whipped cream peaks and clean-cut vertical slices without ever turning on the oven.
- Pinterest-Ready Aesthetic: From the whole golden Nilla Wafers tucked into the cream to the light snowfall of cookie dust, this dish is a viral sensation waiting to happen.
The Blueprint: Essential Ingredients
To achieve the specific dense texture shown in our no-bake banana pudding cheesecake photos, quality ingredients are non-negotiable.
- Nilla Wafers: 2 cups (240g) of finely crushed crumbs for the base, plus whole wafers for the vertical garnish.
- Unsalted Butter: 6 tbsp (85g), melted. This acts as the glue for our half-inch thick crust.
- Full-Fat Cream Cheese: 16 oz (450g), softened to room temperature for a lump-free banana cream cheese mousse.
- Instant Banana Pudding Mix: 1 package (3.4 oz / 96g) to provide that iconic nostalgic flavor and structural stability.
- Whole Milk: 1/2 cup (120ml), cold, to hydrate the pudding mix.
- Vanilla Bean Paste: 1 tsp (5ml). Using paste instead of extract ensures those beautiful vanilla bean specks are visible.
- Heavy Whipping Cream: 2.5 cups (600ml) total, divided. You need high fat content to achieve stiff piping ridges.
- Fresh Bananas: 3-4 large, ripe bananas. We will use these for both the flavor base and the pale yellow banana coins on top.
If you love the combination of cookies and cream, you should also check out our classic Oreo cheesecake or these easy-to-serve cheesecake cupcakes.
Building the Perfect Compressed Nilla Wafer Crust
A common mistake in no-bake desserts is a crumbly base. For this no-bake banana pudding cheesecake, we want a foundation that stays firm even after slicing.
Step 1: Combine your fine cookie crumbs with the melted butter. The mixture should feel like wet sand.
Step 2: Pour the mixture into a 9-inch (23cm) springform pan. Use the bottom of a flat measuring cup to firmly compress the crumbs. Press hard—this creates the “clean-cut” look seen in our 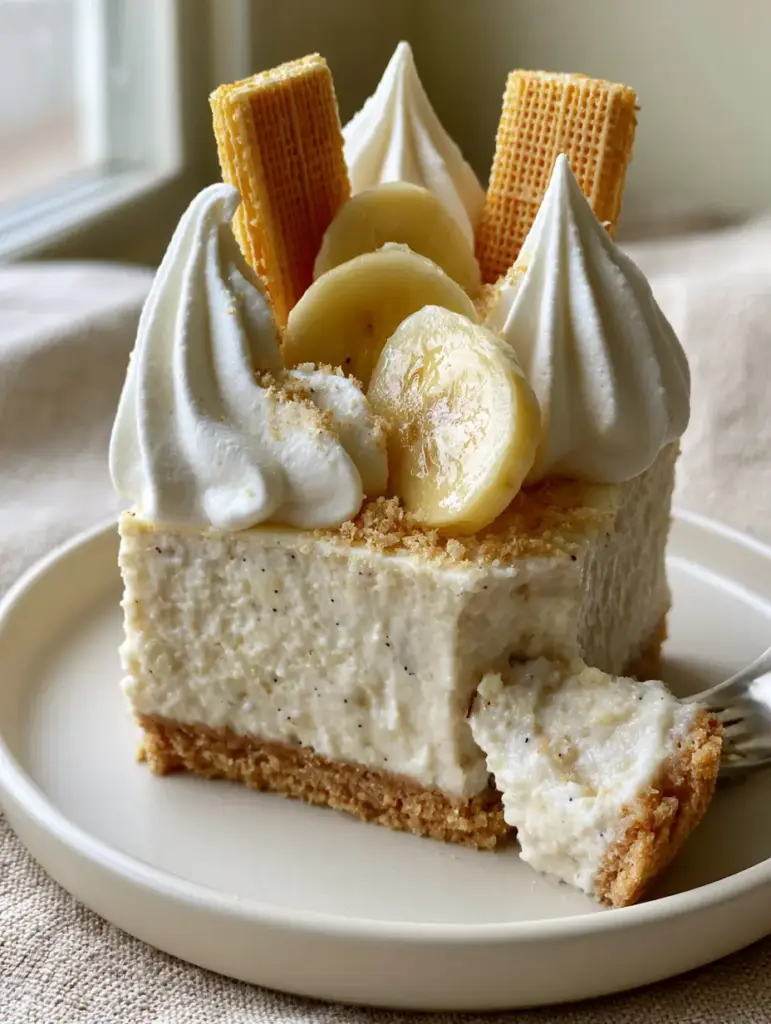
Step 3: Chill the crust in the freezer for at least 20 minutes while you prepare the filling. This ensures the butter sets, preventing the mousse from mingling with the crust.
Creating the Dense Banana Cream Cheese Mousse
This isn’t a floppy pudding; it’s a dense, ivory-toned mousse. The secret lies in the folding technique.
Step 4: In a large bowl, beat the softened cream cheese and vanilla bean paste until completely smooth. You should see the tiny vanilla bean seeds evenly distributed.
Step 5: In a separate bowl, whisk the instant pudding mix with the cold milk. It will be very thick. Add this to the cream cheese mixture and beat until combined.
Step 6: Whip 1.5 cups (360ml) of heavy cream to stiff peaks. Gently fold this into the banana mixture. This adds air while maintaining the “velvety” mouthfeel we desire. Pour this over your chilled crust and smooth the top.
Step 7: Refrigerate for at least 6 hours, though overnight is preferred for those clean vertical slices. If you enjoy this flavor profile, you might also love our fluffy banana cinnamon rolls.
The Finishing Touches: Piping and Garnishing
To match our Visual Recipe Blueprint, the presentation must be flawless. Do not garnish until right before serving to keep the pale yellow banana coins from browning.
Step 8: Whip the remaining 1 cup (240ml) of heavy cream with a little powdered sugar. Use a large star tip to pipe large, stiff peaks around the perimeter of the cheesecake.
Step 9: Tuck whole golden Nilla Wafers vertically into the cream peaks. Place three moist, fresh banana slices in the center or on each slice.
Step 10: Finish with a light snowfall of fine golden cookie dust. This final detail catches the light and adds a professional touch.
Expert Tips for Success
- Room Temperature Ingredients: Ensure your cream cheese is truly soft, or you will have lumps in your ivory-toned mousse.
- Deep Chill: Do not rush the setting time. A no-bake banana pudding cheesecake needs time for the pudding stabilizers to work.
- Clean Slices: Dip a sharp knife in hot water and wipe it dry between every single cut. This is how you get the clean-cut vertical slice look.
- Prevent Browning: Toss your banana slices in a little lemon juice or pineapple juice to keep them pale yellow for hours.
Storage and Freezing Instructions
To Store: Keep the cheesecake in the refrigerator, covered loosely, for up to 3 days. Note that the fresh yellow banana slices will eventually soften.
To Freeze: You can freeze the cheesecake (without the fresh banana and whipped cream garnishes) for up to 1 month. Thaw in the fridge overnight before decorating.
What to Serve With Your Cheesecake
This dessert is rich and creamy, so it pairs beautifully with a refreshing beverage. Try serving it alongside a passion fruit margarita punch or a light coconut lavender margarita for a tropical flair.
Frequently Asked Questions
We use instant banana pudding for stability and flavor, but you can fold in finely mashed bananas. Be aware this may slightly soften the ‘clean-cut’ vertical texture of the mousse.
Toss the fresh banana slices in a little lemon juice or pineapple juice before garnishing. The acid prevents oxidation, keeping them pale yellow and fresh-looking for longer.
Use a food processor for a fine, uniform crumb. This allows for a more ‘compressed’ foundation that won’t crumble when sliced.
This usually happens if the cream cheese wasn’t full-fat or if the whipped cream wasn’t beaten to stiff peaks before folding. Ensure you use instant pudding mix as a stabilizer and chill for at least 6-8 hours.
The Ultimate no-bake banana pudding cheesecake Recipe
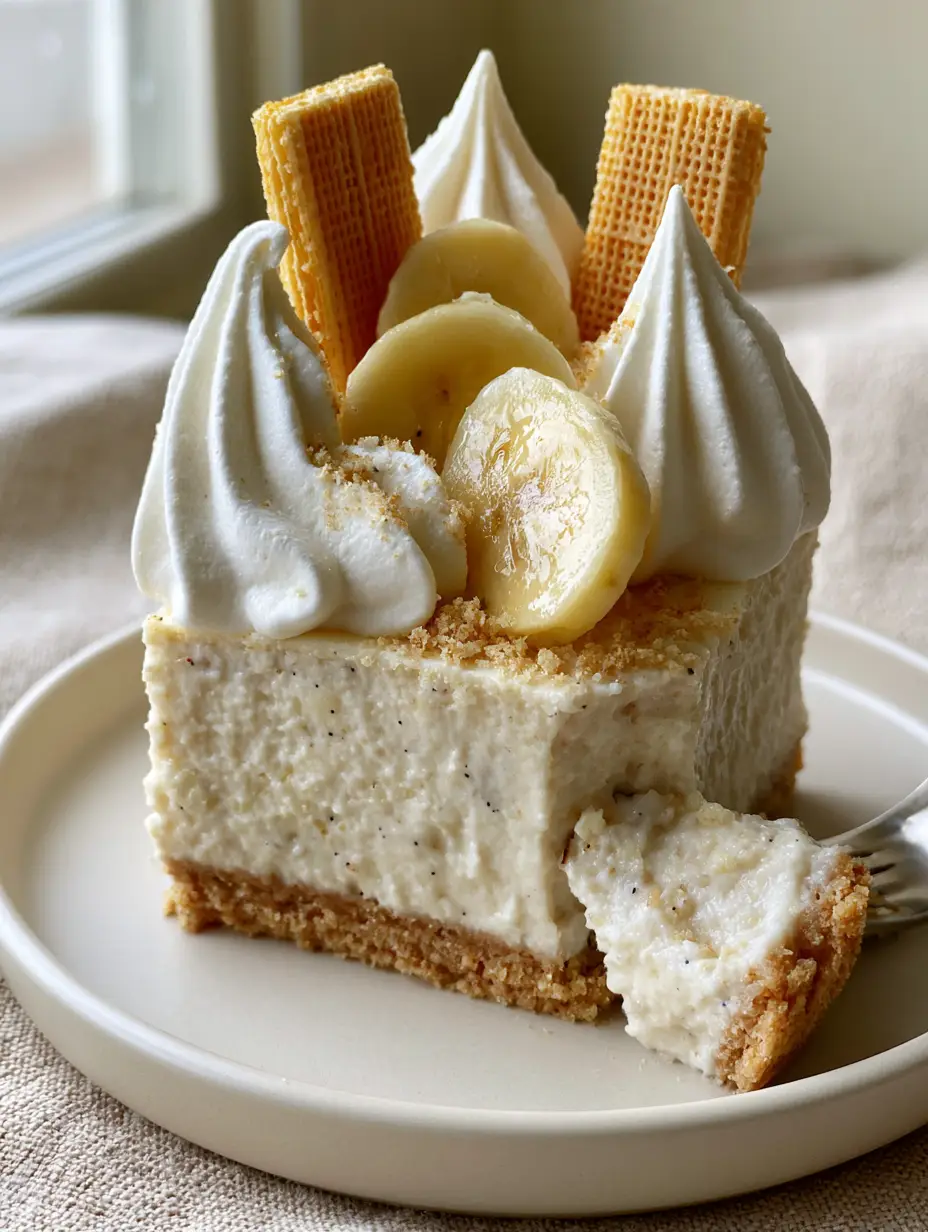
no-bake banana pudding cheesecake with Nilla Wafer Crust
Ingredients
Equipment
Method
- Combine Nilla Wafer crumbs, melted butter, and sugar until it resembles wet sand.
- Press firmly into a 9-inch springform pan using a flat cup. Chill in the freezer for 20 minutes.
- Beat softened cream cheese and vanilla bean paste until smooth with visible specks.
- Whisk pudding mix with milk until thick, then combine with cream cheese mixture.
- Gently fold in 1.5 cups of whipped heavy cream until a dense mousse forms.
- Pour filling over crust and refrigerate for 8 hours or overnight.
- Top with stiff whipped cream peaks, fresh banana slices, whole cookies, and cookie dust before serving.
Notes
Ensure the cream cheese is fully softened to avoid lumps in the dense mousse.
Join the Community!
Did you make this no-bake banana pudding cheesecake? We want to see your stiff whipped cream peaks and clean slices! Save this recipe to your Pinterest Dessert Board by clicking the Pin button. Leave a comment below with a photo of your creation and don’t forget to give us a 5-star rating if you loved it! For more decadent treats, follow @karen_cooks_official.