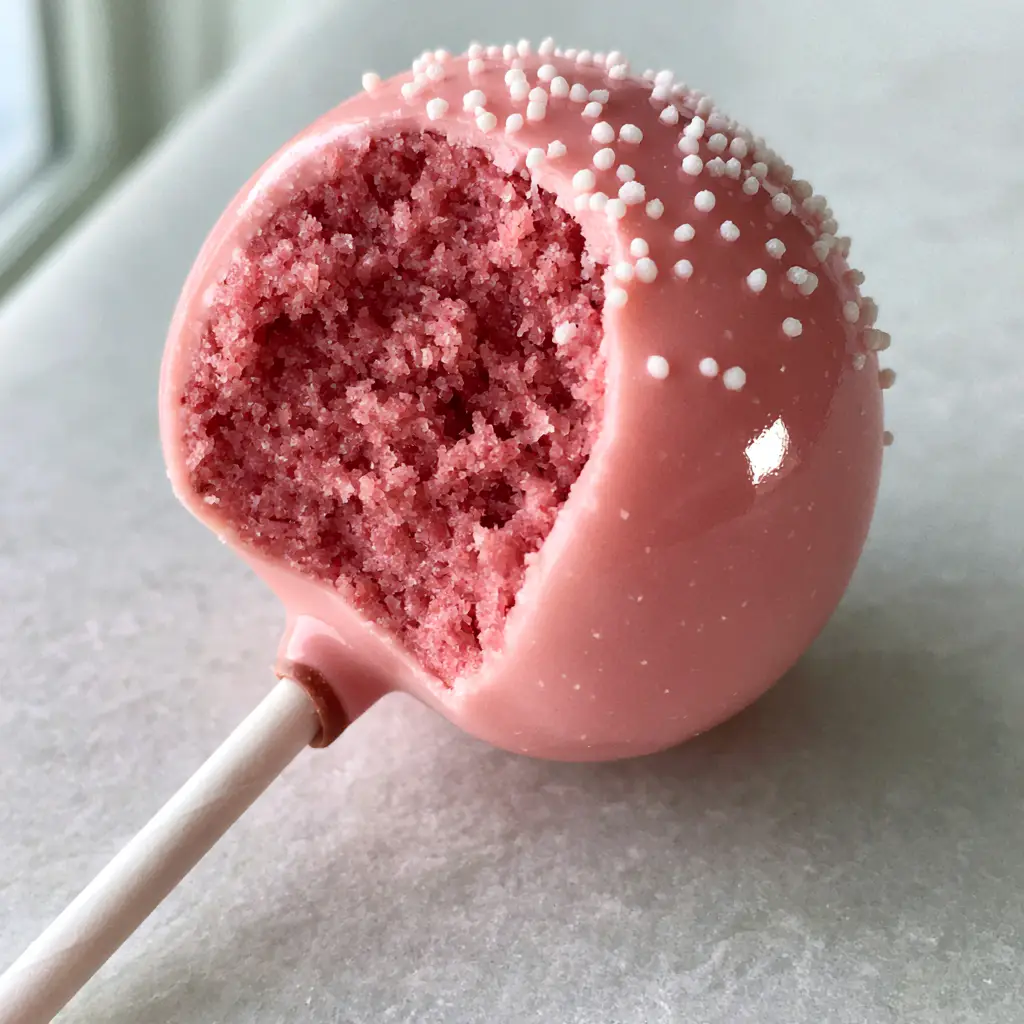
There is a specific kind of magic found in a perfectly executed Cake Pop Recipe. We have all seen them behind the glass at high-end cafes: that flawless, pastel pink orb that promises a decadent, moist interior. Many home bakers struggle with cake pops that are too dry, too mushy, or have coatings that crack and lose their luster within an hour.
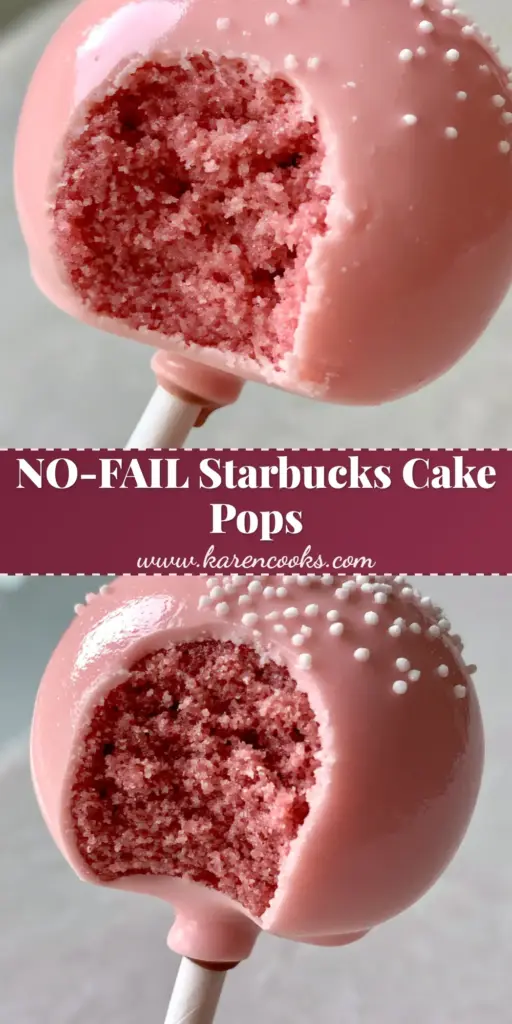
Today, we are bridging the gap between professional confectionery and your home kitchen. Using a meticulous culinary forensic approach, we have reverse-engineered the exact texture and visual profile of a “Starbucks-style” treat. This isn’t just a snack; it is an architectural masterpiece of moist pink vanilla crumbs and a thick, glossy candy shell.
By following this Cake Pop Recipe, you will achieve that iconic dense, fudgy center and a smooth finish that rivals any professional bakery. Whether you are prepping for a birthday party or looking for the perfect addition to your homemade Valentine’s treats, these pops are the gold standard of handheld desserts.
Why This Specific Cake Pop Recipe Wins Every Single Time
- The “Fudgy” Foundation: Unlike dry, crumbly versions, our ratio of pink vanilla cake to buttercream creates a texture that feels more like a truffle than a cake.
- High-Gloss Shell: We use specific melting techniques for pink candy wafers to ensure a smooth, reflective surface that stays vibrant.
- Structural Integrity: Using 6-inch (15cm) white paper lollipop sticks and a strategic chocolate seal, your pops will never slide off or wobble.
- Visual Precision: We replicate the macro-photography look with tiny white sugar nonpareils scattered for that classic, elegant contrast.
The Essential Components for a Bakery-Style Pink Treat
To achieve the visual and textural benchmarks of a professional Cake Pop Recipe, every ingredient must serve a specific culinary purpose. We are not just making a cake; we are creating a binder-ready crumb.
Cake Flour (2 ½ cups / 300g): This provides a fine, tight crumb structure that is essential for a “no air pocket” interior. Using all-purpose flour can result in a texture that is too coarse for the fudgy finish we desire.
Unsalted Butter (1 cup / 225g): High-quality fat at room temperature ensures the cake stays moist after being crumbled. It acts as the primary flavor carrier for the vanilla notes.
Pink Gel Food Coloring (2-3 drops): Gel is superior to liquid coloring because it provides intense pigment without altering the moisture content of the batter. We are aiming for a soft, pastel pink that matches the outer shell.
Vanilla Buttercream Binder (½ cup / 120g): This is the “glue” of our Cake Pop Recipe. It must be creamy and whipped to a high aeration to integrate smoothly with the crumbs without making them oily.
Pink Candy Wafers (16 oz / 450g): These are formulated to melt into a thick, glossy coating that sets hard. They provide that characteristic “snap” when you take a bite.
White Sugar Nonpareils (2 tbsp / 30g): These tiny, perfectly round sprinkles add a tactile crunch and a sophisticated visual detail that differentiates a professional pop from an amateur one.
Professional Tools for Confectionery Success
Achieving a perfectly round shape requires more than just your hands. You will need a standard 9×13 inch (23x33cm) baking pan to create the cake base. A stand mixer is highly recommended for the buttercream to ensure a smooth, lump-free consistency.
For the assembly, 6-inch (15cm) white paper lollipop sticks are the industry standard for stability. You will also need a styrofoam block or a dedicated cake pop stand to allow the glossy pink coating to set without flat spots.
Step 1: Baking the Vibrant Pink Vanilla Base
The first phase of this Cake Pop Recipe is creating a moist, pink-tinted vanilla cake. Preheat your oven to 350°F (175°C) and grease your baking pan thoroughly.
Cream your softened butter and sugar until the mixture is pale and fluffy, which usually takes about 3-4 minutes. This aeration is the secret to a cake that crumbles into fine, even pieces later on.
Slowly add your eggs and vanilla, then incorporate the pink gel coloring. Sift in your dry ingredients (flour, baking powder, and salt) alternating with whole milk. Bake for 25-30 minutes until a toothpick comes out with a few moist crumbs—do not overbake, or the center will lose its fudgy potential.
Step 2: Mastering the Crumble and Bind Technique
Once the cake has cooled completely, remove any browned edges with a serrated knife. This ensures the interior of your pop is a uniform, vibrant pink without any dark streaks.
Crumble the pink cake into a large bowl until it resembles fine sand. Add your vanilla buttercream one tablespoon at a time. Using a low speed on a mixer or your hands, work the frosting into the crumbs.
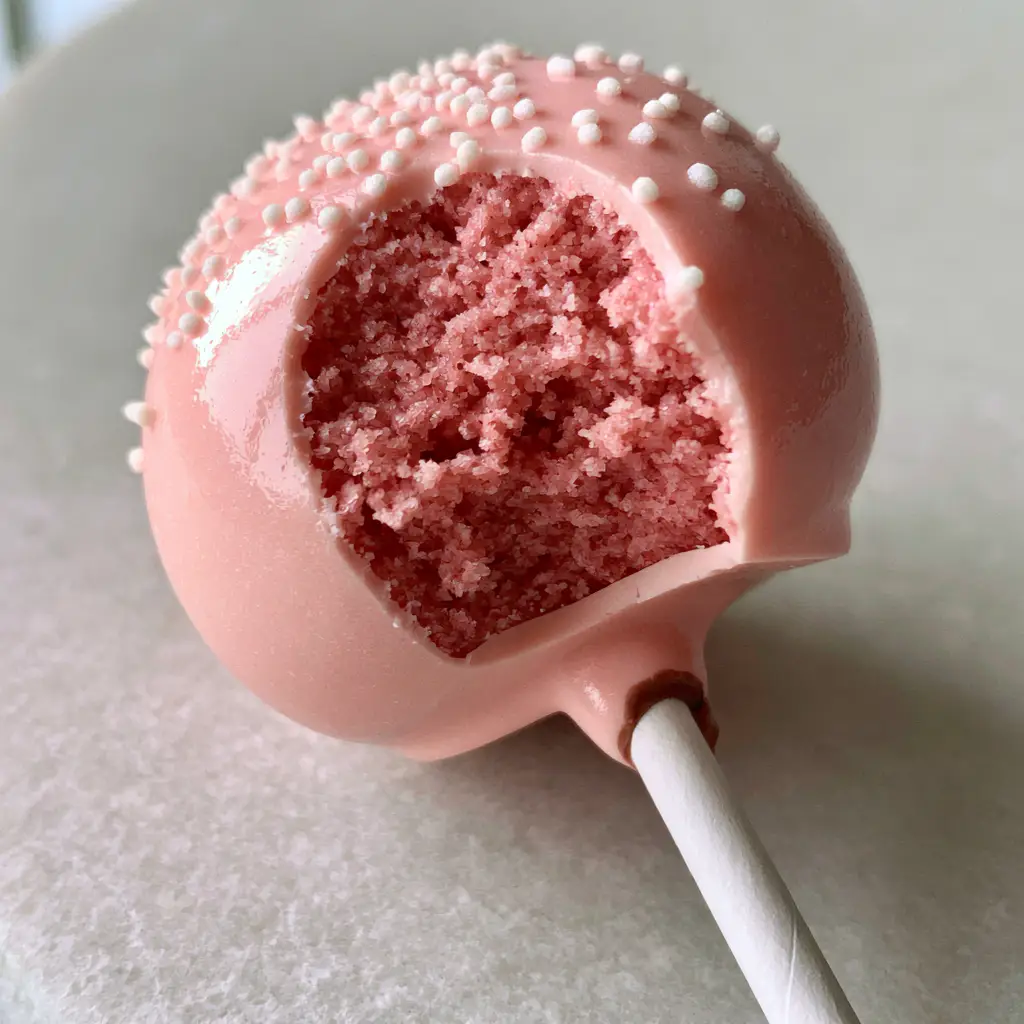
You are looking for a sensory cue: the mixture should feel like moist playdough. When you roll a small ball in your palms, it should be “perfectly round” and have no visible cracks or air pockets. This is the “dense and fudgy” interior promised by our Cake Pop Recipe.
Step 3: Creating the Architectural Chocolate Seal
Scoop 1.5 tablespoon (approx. 30g) portions of the mixture and roll them into spheres. Place these on a parchment-lined tray and chill in the freezer for exactly 15 minutes.
While the balls chill, melt a small handful of pink candy wafers in the microwave in 30-second bursts. Dip the tip of each 6-inch white paper stick into the melted chocolate (about ½ inch deep).
Insert the stick into the center of the chilled cake ball. This creates a “chocolate seal” at the base, ensuring the weight of the cake pop doesn’t cause it to fall off the stick during the final dipping process.
Step 4: The Art of the Glossy Dip and Garnish
Melt the remaining pink candy wafers in a deep, narrow microwave-safe glass. This depth allows for a single, clean plunge, which is the secret to a smooth, glossy finish.
Dip the cake pop straight down until the cake is completely submerged and the coating meets the chocolate seal on the stick. Lift it straight up—do not stir. Gently tap your wrist (not the stick) to let the excess coating drip off.
While the shell is still wet, scatter the white sugar nonpareils over the top. The side window lighting in your kitchen will catch the bright highlights on the glossy shell as it sets. Place the pops upright in your stand to dry.
Expert Troubleshooting for the Perfect Cake Pop
- Preventing Cracks: Cracks happen when there is a temperature extreme. Ensure your cake balls are not “frozen” when you dip them into warm chocolate; they should be slightly chilled but not ice-cold.
- Fixing Thick Coating: If your melted wafers are too thick, add a teaspoon of vegetable shortening or coconut oil. This thins the chocolate, helping it flow for that “Starbucks-style” look.
- Avoiding Oily Centers: If your cake pops feel greasy, you added too much frosting. Balance it by adding more dry cake crumbs if you have them, or chill the mixture longer before rolling.
- Eliminating “Feet”: If chocolate pools at the bottom of the pop, you didn’t tap off enough excess. Keep the pop rotating horizontally for a few seconds after dipping.
Preserving the Gloss: Storage and Freshness
This Cake Pop Recipe is excellent for advanced prep. Once set, store the pops in an airtight container in the refrigerator for up to 5 days. The chocolate shell acts as a vacuum seal, keeping the “moist, dense, and fudgy” interior fresh.
For longer storage, you can freeze the cake pops for up to 3 months. To prevent condensation (which ruins the glossy finish), let them thaw slowly in the refrigerator while still in their container before bringing them to room temperature.
What to Serve with Your Pink Cake Pops
These treats are quite rich, so they pair beautifully with contrasting textures and flavors. If you are hosting a dessert bar, consider serving them alongside a creamy mini cheesecake or a refreshing strawberry cheesecake trifle.
For a themed party, these pink pops look stunning next to no-bake Oreo cheesecake bars or even a tray of classic rice krispy treats. If you’re leaning into the pink aesthetic for a summer gathering, a glass of pineapple mango rum punch offers a tropical acidity that cuts through the sweetness of the vanilla buttercream.
Frequently Asked Questions about Cake Pops
Yes! The candy shell acts as a preservative. They stay fresh and moist in the refrigerator for up to 5 days or can be frozen for up to 3 months.
The secret is the ratio of buttercream to cake crumbs. You want a ‘playdough’ consistency. Also, removing the browned edges of the cake ensures a uniform, moist pink interior.
Use a deep, narrow glass for dipping to allow a single vertical plunge. Tap your wrist gently to remove excess chocolate without creating air bubbles or streaks.
Cracking is caused by temperature shock. If your cake balls are too cold (frozen) when dipped into warm candy coating, the expansion and contraction will cause the shell to fracture.
This usually happens due to a lack of a ‘chocolate seal.’ By dipping the stick in melted chocolate before inserting it into the cake ball, you create a structural anchor that prevents sliding.
The Ultimate Starbucks-Style Pink Cake Pop Recipe
The Ultimate Fudgy Starbucks-Style Cake Pop Recipe
Ingredients
Equipment
Method
- Cream butter and sugar, add eggs and pink gel. Mix in dry ingredients and milk. Bake at 350°F (175°C) for 25-30 mins.
- Once cooled, remove browned edges and crumble cake into a fine pink sand.
- Mix vanilla buttercream into crumbs until a moist, fudgy, playdough-like consistency is reached.
- Roll into 20 perfectly round spheres and chill in the freezer for 15 minutes.
- Dip sticks in melted pink chocolate and insert into cake balls to create a seal.
- Plunge each pop into a deep glass of melted pink wafers. Tap off excess to maintain a glossy finish.
- Scatter white nonpareils over the wet shell and let set upright.
Notes
If the candy coating is too thick, add 1 tsp of vegetable shortening.
[PinImage_2]
Bring the Bakery Home Today
Mastering this Cake Pop Recipe is a rite of passage for any enthusiastic home cook. The combination of the fine pink crumb, the fudgy binder, and that thick, glossy pastel shell creates a sensory experience that is both nostalgic and sophisticated. We would love to see your results!
Did you achieve that “perfectly round” shape? Did the “chocolate seal” work for you? Leave a comment below and share your baking journey with us. Don’t forget to save this recipe to your dessert boards on Pinterest so you can find it whenever a craving for pink perfection strikes!
[PinImage_3]