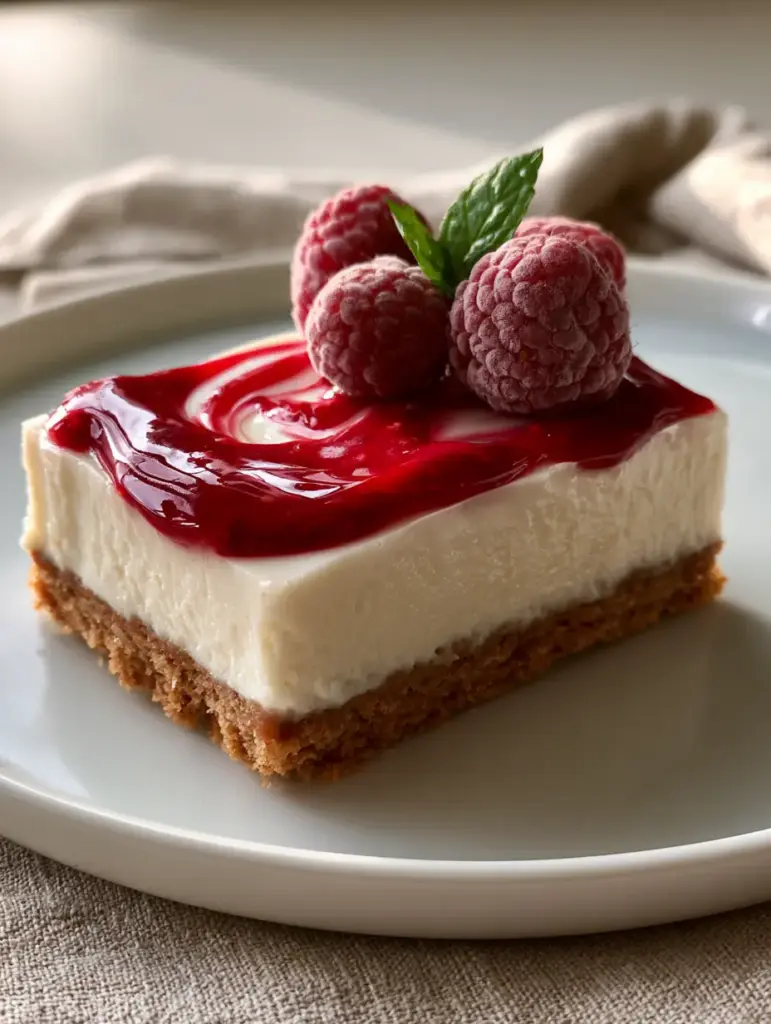
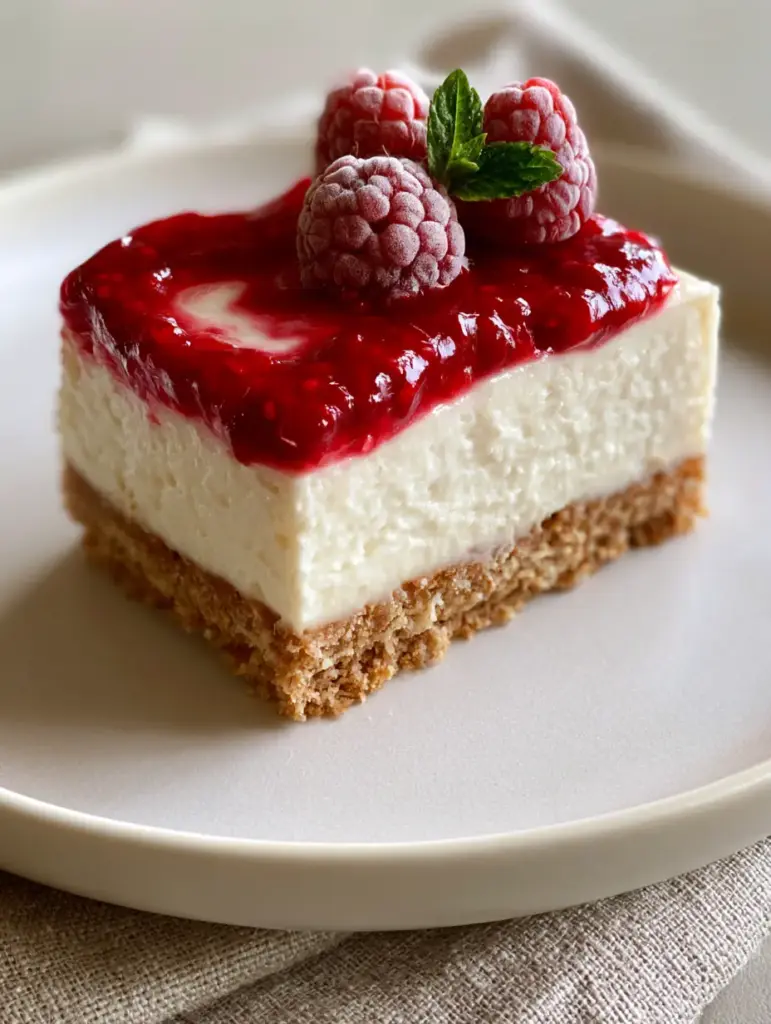
There is a specific kind of culinary magic found in the perfect No Bake Cheesecake Bars. Imagine a handheld slice that looks as if it were plucked directly from a high-end editorial shoot: a thick, buttery golden-brown graham cracker crust providing a sturdy anchor for a velvety, pale cream-colored filling. The crowning glory is a glossy, ruby-red raspberry coulis, swirled with intentional precision to create a vibrant contrast that catches the light. This isn’t just a dessert; it is a masterclass in texture and visual balance, designed to be served on a minimalist off-white ceramic plate with the soft glow of side daylight highlighting every creamy curve.
When you prepare these No Bake Cheesecake Bars, you are engaging in a process that prioritizes “forensic” visual accuracy. We are looking for those immaculate layers—the distinct separation between the crunch of the crust and the silkiness of the cream cheese. By following this guide, you will achieve that authentic food blog aesthetic, complete with the finishing touches of three plump, dusty-red raspberries and a tiny sprig of fresh green mint. Whether you are a seasoned baker or an enthusiastic home cook, this recipe delivers a professional-grade result without ever preheating the oven.
Why This No-Bake Masterpiece Is the Ultimate Showstopper
- The Immaculate Layering: Achieve a thick, compact, and structurally sound golden-brown base that won’t crumble when sliced.
- Velvety Texture: A filling that is ultra-smooth and pale cream in color, providing a luxurious mouthfeel that rivals a classic New York style cheesecake.
- Glossy Visual Contrast: A homemade ruby-red raspberry coulis that stays vibrant and glossy, adding both tartness and a high-end “swirl” aesthetic.
- Forensic Garnishing: Learn the exact placement of fresh raspberries and mint to replicate that professional handheld smartphone photo look.
- Efficiency and Ease: A sophisticated result that requires zero baking time, making it perfect for warm-weather entertaining or busy schedules.
The Anatomy of Ingredients: Choosing Quality for the Best Result
Graham Cracker Crumbs (2 cups / 200g): These provide the essential golden-brown foundation. Ensure they are finely ground to create a compact, “biscuit-like” texture that holds up under the weight of the filling.
Unsalted Butter (1/2 cup / 115g): When melted and combined with the crumbs, this acts as the “culinary glue.” It provides that rich, buttery aroma and ensures the crust sets firmly in the refrigerator.
Full-Fat Cream Cheese (24 oz / 680g): It is critical to use brick-style cream cheese at room temperature. This is the secret to achieving that velvety, ultra-smooth filling without any lumps.
Powdered Sugar (1 1/2 cups / 180g): Also known as confectioners’ sugar, this dissolves instantly into the cream cheese. It provides sweetness while maintaining the structural integrity of the bars.
Heavy Whipping Cream (1 1/2 cups / 360ml): Cold heavy cream is whipped to stiff peaks and folded into the mixture. This is what gives the bars their airy yet stable “velvety” texture.
Fresh Raspberries (2 cups / 250g for coulis + extra for garnish): Use ripe, dusty-red raspberries to create the glossy coulis and the final garnish. The acidity of the fruit balances the richness of the cheese.
Lemon Juice (1 tbsp / 15ml): A foundational “invisible” ingredient. The acid helps the proteins in the cream cheese set more firmly, ensuring your slices have immaculate edges.
Vanilla Bean Paste (1 tsp / 5ml): While vanilla extract works, the paste adds tiny black specks that elevate the visual appeal of the pale cream Filling.
Granulated Sugar (1/4 cup / 50g) and Cornstarch (1 tsp / 3g): Used for the coulis to ensure it reduces into a glossy, thick syrup that won’t bleed into the filling.
Essential Culinary Tools for Professional Slicing
To achieve the “immaculate layers” described in our visual blueprint, you will need a 9×9 inch (23x23cm) square baking pan. Lining this pan with parchment paper, leaving an overhang on the sides, is non-negotiable for lifting the bars out cleanly. You will also need a high-speed electric hand mixer or stand mixer to aerate the cream cheese and whip the heavy cream to the correct volume. A fine-mesh sieve is vital for the raspberry coulis; it removes the seeds to ensure the swirl is “glossy and vibrant” rather than textured and gritty.
Building the Foundation: The Buttery Golden-Brown Crust
Prepping the Pan and Crumbs
Line your square pan with parchment paper. In a medium bowl, combine the 2 cups (200g) of graham cracker crumbs with 2 tablespoons (25g) of granulated sugar. The sugar helps slightly caramelize the crust even without heat, enhancing that golden-brown hue.
The “Compact” Compression Technique
Pour in the 1/2 cup (115g) of melted butter and stir until the mixture resembles wet sand. Pour this into your prepared pan. Use the bottom of a flat measuring cup to press the crumbs down firmly. You want a “thick, compact” base that won’t shift when you pour the filling on top. Chill this in the freezer for 15 minutes while you prepare the next layer.
Creating the Velvety Pale Cream Filling
Achieving the Ultra-Smooth Texture
In a large bowl, beat the 24 oz (680g) of room-temperature cream cheese until it is completely smooth and aerated. This usually takes about 3 minutes. Slowly add the 1 1/2 cups (180g) of powdered sugar, vanilla bean paste, and lemon juice. Continue to beat until the mixture is glossy and there are no visible lumps.
The Art of the Fold
In a separate chilled bowl, whip the 1 1/2 cups (360ml) of heavy cream until stiff peaks form. The cream should be able to hold its shape when the whisk is lifted. Gently fold the whipped cream into the cream cheese mixture using a silicone spatula. Use a “cut and fold” motion to maintain the airiness, resulting in that velvety cream-colored filling we see in the visual prompt.
Developing the Glossy Ruby-Red Raspberry Swirl
Reducing the Coulis
In a small saucepan over medium heat, combine 2 cups (250g) of raspberries with 1/4 cup (50g) of sugar and 1 tsp (5ml) of lemon juice. Use a spoon to mash the berries as they cook. Once the mixture starts to bubble, whisk in a slurry of 1 tsp (3g) cornstarch and a splash of water. This ensures the coulis is “glossy” and thick enough to hold a swirl.
The Forensic Sieve Step
Pour the hot mixture through a fine-mesh sieve into a small bowl, using the back of a spoon to press out every bit of liquid. Discard the seeds. You should be left with a vibrant, ruby-red liquid. Let this cool completely to room temperature before using, or it will melt the cheesecake filling.
The Final Assembly: Swirling and Setting
Achieving the Visual Swirl
Remove the crust from the freezer. Pour the cheesecake filling over the crust and use an offset spatula to smooth the top into an even, immaculate layer. Drop small spoonfuls of the cooled raspberry coulis across the surface. Use a toothpick or a skewer to gently drag through the dots, creating a “vibrant ruby-red raspberry coulis swirl.”
The Critical Chill Time
For these bars to be “perfectly sliced,” they must set. Refrigerate for at least 6 hours, though overnight is preferred. This allows the invisible structural ingredients—the butter in the crust and the fats in the cream—to solidify into a stable dessert that can be held by hand.
Expert Tips for Success
- Temperature Control: Ensure your cream cheese is truly at room temperature. If it’s even slightly cold, you will end up with tiny white lumps that ruin the “ultra-smooth” aesthetic.
- The “Hot Knife” Trick: For immaculate, professional slices, dip a sharp chef’s knife in hot water and wipe it dry between every single cut. This prevents the filling from dragging and preserves the distinct layers.
- Coulis Consistency: If your coulis is too thin, it will sink. If it’s too thick, it won’t swirl. It should be the consistency of a thick maple syrup.
- Stabilization: If you live in a very humid climate, you can add 1 tsp (3g) of gelatin dissolved in water to the filling for extra insurance, though the whipped cream method is usually sufficient for bars.
The Professional Presentation: Plating and Garnishing
To replicate the Midjourney visual exactly, place a single, perfectly sliced bar onto a minimalist off-white ceramic plate. The plate should ideally be set upon a neutral beige linen napkin. The garnish is the final touch: place three fresh, plump, dusty-red raspberries on one corner of the bar. Lean a tiny sprig of fresh green mint against the berries. This provides a pop of color that complements the ruby-red swirl. Serve in natural side daylight to highlight the creamy texture of the filling and the golden-brown depth of the crust.
What to Serve With This
These No Bake Cheesecake Bars are a standalone star, but they also pair beautifully with other decadent treats. If you are hosting a dessert bar, consider offering these alongside fruit-topped cheesecake bars or a rich salted caramel cheesecake for variety. For those who enjoy a bit of crunch, a side of pistachio raspberry crunch elements can add a lovely textural contrast. If you’re looking for something lighter, a scoop of strawberry banana cheesecake salad makes for a refreshing accompaniment.
Storage, Reheating & Freezing
Store any leftover bars in an airtight container in the refrigerator for up to 5 days. Because these are no-bake, they are sensitive to heat and should not be left at room temperature for more than 30-45 minutes. To freeze, place the sliced bars on a baking sheet to flash-freeze for one hour, then wrap each bar tightly in plastic wrap and store in a freezer-safe bag for up to 3 months. Thaw in the refrigerator for 2 hours before serving to maintain that velvety texture.
Frequently Asked Questions
Yes, frozen raspberries work perfectly for the coulis as they will be cooked down. However, use fresh raspberries for the final garnish to maintain the ‘dusty-red’ visual appeal.
The ‘hot knife’ technique is essential. Dip a sharp knife into hot water, wipe it dry, and make one clean cut. Repeat the process for every single slice to maintain immaculate edges.
Make sure your raspberry coulis is completely cooled to room temperature and has been thickened with a cornstarch slurry. If it’s too warm or thin, it will sink and bleed.
Yes, you can use digestive biscuits, vanilla wafers, or Biscoff cookies. Maintain the same 2:1 ratio of crumbs to melted butter for a compact foundation.
This usually happens if the heavy cream wasn’t whipped to stiff peaks before folding, or if the cream cheese was too liquidy. Ensure you use full-fat, brick-style cream cheese and chill for at least 6 hours.
The Ultimate No Bake Cheesecake Bars Recipe
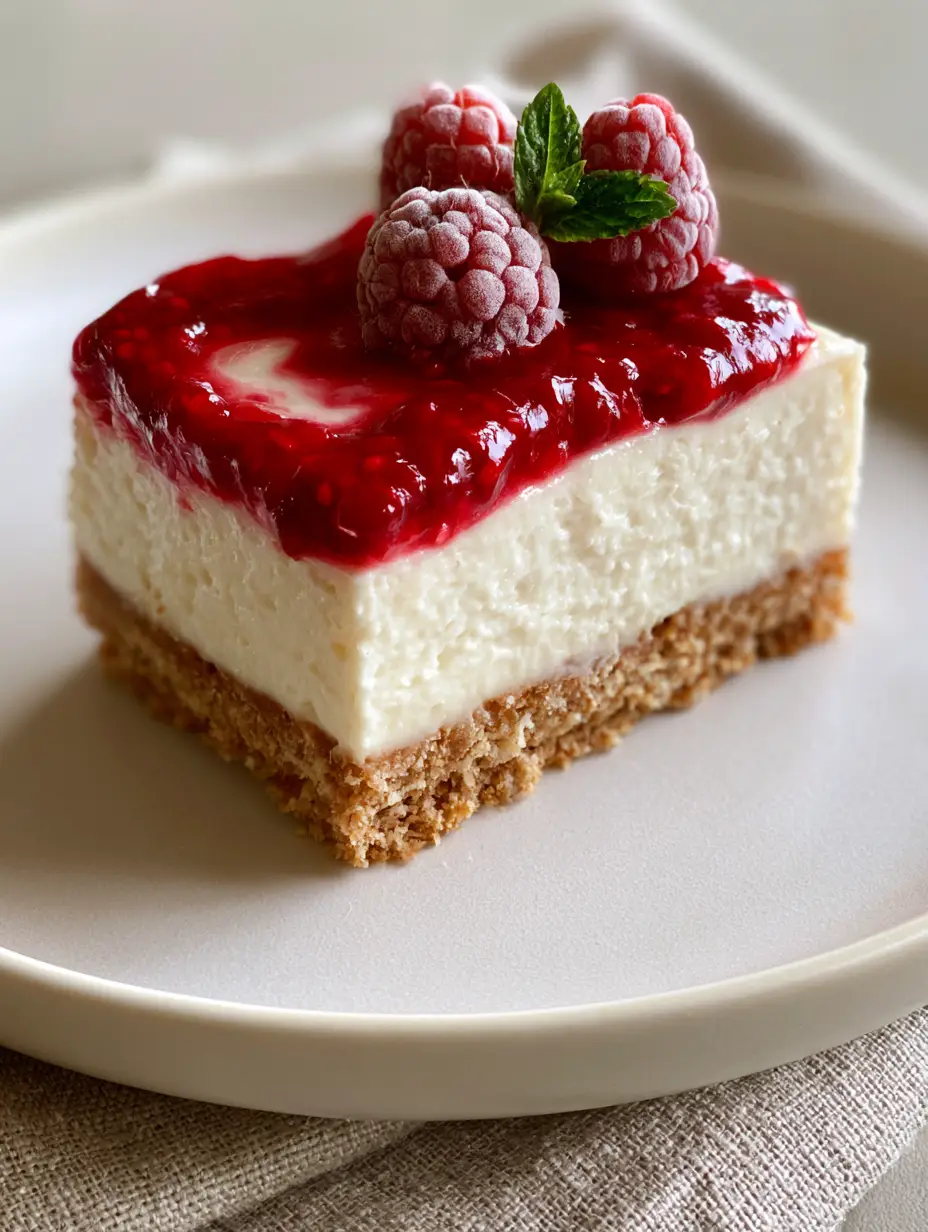
No Bake Cheesecake Bars with a Glossy Raspberry Swirl
Ingredients
Equipment
Method
- In a medium bowl, stir together graham cracker crumbs, melted butter, and 2 tbsp sugar until the texture resembles wet sand.
- Press the mixture firmly into the bottom of a parchment-lined 9x9 inch pan. Freeze for 15 minutes.
- Combine raspberries, sugar, and lemon juice in a saucepan. Simmer for 5-8 minutes until the fruit breaks down.
- Whisk in the cornstarch slurry, simmer for 1 minute until glossy, then strain through a fine-mesh sieve. Let cool completely.
- Beat room-temperature cream cheese, powdered sugar, vanilla, and lemon juice until ultra-smooth and pale cream-colored.
- In a separate bowl, whip heavy cream to stiff peaks. Gently fold the whipped cream into the cream cheese mixture using a spatula.
- Spread the filling over the crust. Drop spoonfuls of coulis on top and swirl with a toothpick. Refrigerate for at least 6 hours.
- Lift from pan and slice with a hot knife. Garnish each bar with three fresh raspberries and a tiny mint sprig.
Notes
Dip your knife in hot water and wipe clean between each slice for immaculate edges.
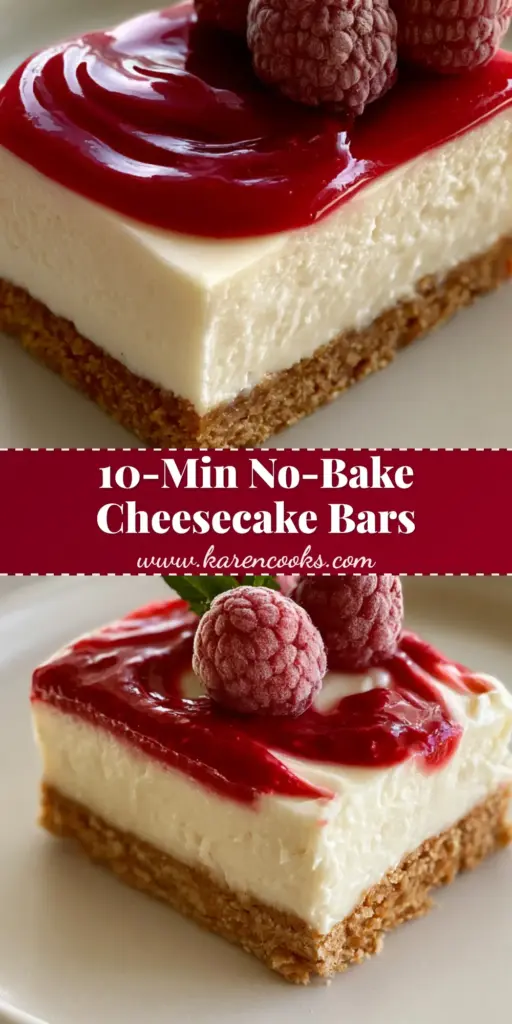
Master the Art of the No-Bake Dessert
The beauty of the No Bake Cheesecake Bars lies in their simplicity and their stunning visual impact. By focusing on the “forensic” details—the thickness of the crust, the smoothness of the filling, and the vibrancy of the swirl—you create a dessert that is as delicious as it is beautiful. Don’t forget to share your creations! If you enjoyed this recipe, please leave a comment below and follow us on Pinterest for more culinary inspiration.