There is a specific kind of magic that happens when the sharp, crystalline bite of sea salt meets the deep, toasted notes of burnt sugar. This salted caramel cheesecake isn’t just a dessert; it is a structural masterpiece designed to satisfy the most demanding dessert connoisseur. From the ivory-toned, velvet-smooth filling to the heavy, amber-colored caramel drips, every element has been calibrated for peak sensory impact.
If you have ever struggled with cheesecake surfaces that look like a roadmap of cracks or caramel that is either too runny or too hard, you are in the right place. We are moving beyond basic baking into the realm of culinary precision. This recipe delivers a tall, professional-grade slice that mirrors the aesthetic of a high-end patisserie while maintaining the soul of home-style comfort.
Inspired by the classic New York-style cheesecake, this version elevates the experience with a significantly thicker, buttery crust. This foundation provides the necessary crunch to offset the dense, creamy interior. Prepare your silver dessert fork; you are about to create the last cheesecake recipe you will ever need.
Why This Salted Caramel Cheesecake Stands Above the Rest
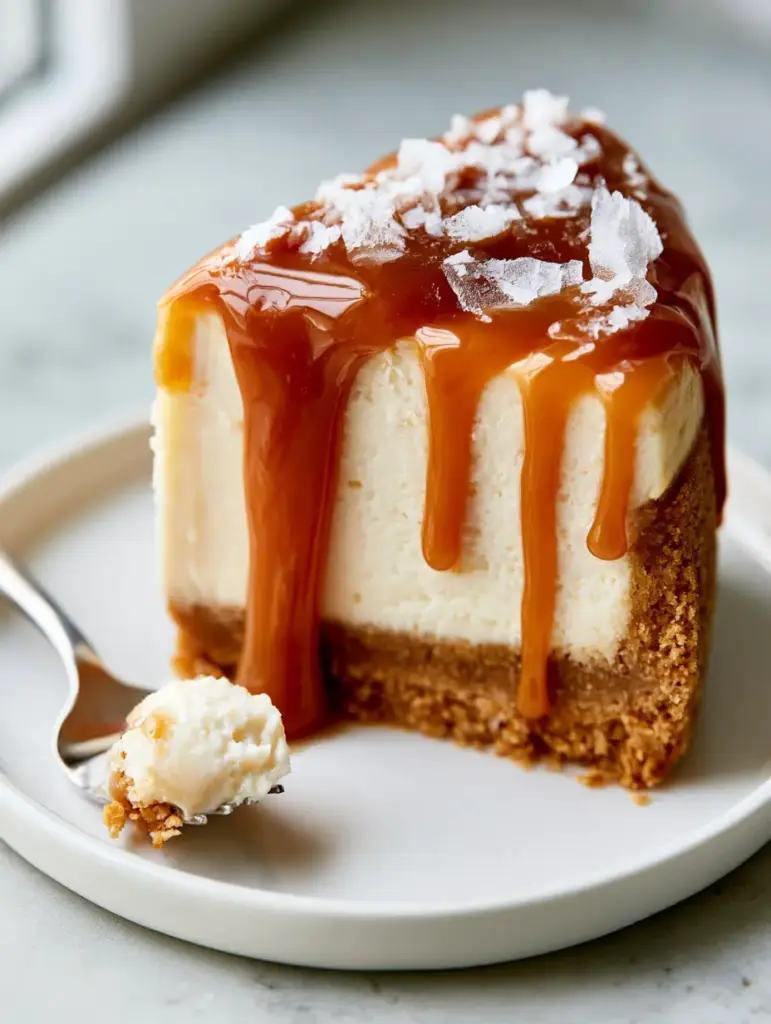
- The Iconic Amber Drip: We utilize a specific temperature-controlled caramelization process to ensure the sauce is viscous enough to create heavy, glistening drips that stay put on the vertical sides of the slice.
- Structural Integrity: A thick, compressed graham cracker base ensures that every bite has a visible, golden-brown crumb that doesn’t crumble away under the weight of the filling.
- Pristine Ivory Aesthetics: By utilizing a low-and-slow baking method and a controlled water bath, we achieve a flat, ivory surface with zero cracks or browning.
- Sensory Contrast: The addition of large, crystalline Maldon sea salt flakes provides a sharp texture that cuts through the richness of the dense cream cheese body.
- Velvety Internal Texture: The interior remains ultra-smooth and dense, providing that signature “clean cut” when you slide your fork through the slice.
The Foundation: Essential Ingredients for Architectural Success
To achieve the specific visual results of an ivory filling and heavy amber caramel, the quality and temperature of your ingredients are non-negotiable. Using sub-par fats or cold dairy will result in a grainy texture and a lackluster finish.
Full-Fat Brick Cream Cheese: You need 32 ounces (900g) of high-quality, full-fat cream cheese. Avoid the “spreadable” tubs at all costs; they contain extra air and moisture that will ruin the dense, professional crumb we are after.
Granulated Sugar: 1 1/4 cups (250g) of sugar provides the sweetness, but it also acts as a tenderizer for the proteins in the cheese. It helps achieve that ivory-toned, ultra-smooth body described in our visual blueprint.
Heavy Cream (36% Fat): 1/2 cup (120ml) of heavy cream is folded into the batter. This is the “invisible” ingredient that ensures the interior looks velvety and creamy when a bite is removed with a silver fork.
Large Room-Temperature Eggs: You will need 4 large eggs (approximately 200g). Eggs are the structural binder; ensuring they are at room temperature prevents over-beating, which is the primary cause of surface cracks.
Graham Cracker Crumbs: 2 1/2 cups (300g) of finely ground crumbs create that thick, compressed base. This is a higher ratio than most recipes to ensure the “foundation” is prominent and visible.
Unsalted European-Style Butter: 3/4 cup (170g) of melted butter binds the crust. The higher fat content in European-style butter ensures the crust remains crisp rather than becoming soggy under the moisture of the filling.
Maldon Sea Salt Flakes: These are the large, crystalline flakes that garnish the top. They provide the “glistening” visual and the essential flavor bridge between the sugar and the cream.
The Pro-Kit: Equipment for a Professional Finish
You cannot achieve a tall, professional slice without the right tools. The visual prompt specifies a tall slice, which requires a deep pan and specific heat management.
9-inch (23cm) Springform Pan: This is essential for removing the cheesecake without damaging the vertical sides. Ensure it has at least 3-inch (7.5cm) high walls to accommodate the thick crust and filling.
Extra-Wide Heavy Duty Aluminum Foil: You will wrap the base of your pan in multiple layers. This prevents the water bath from seeping into your thick graham cracker crust, keeping it golden-brown and compressed.
Large Roasting Pan: This serves as the vessel for your bain-marie (water bath). A water bath regulates the temperature of the cheesecake, ensuring the “ivory-toned” finish rather than a toasted, brown top.
Silicone Spatula: Use this to scrape the bottom of the bowl frequently. This prevents “cream cheese lumps” from appearing in your otherwise ultra-smooth, dense filling.
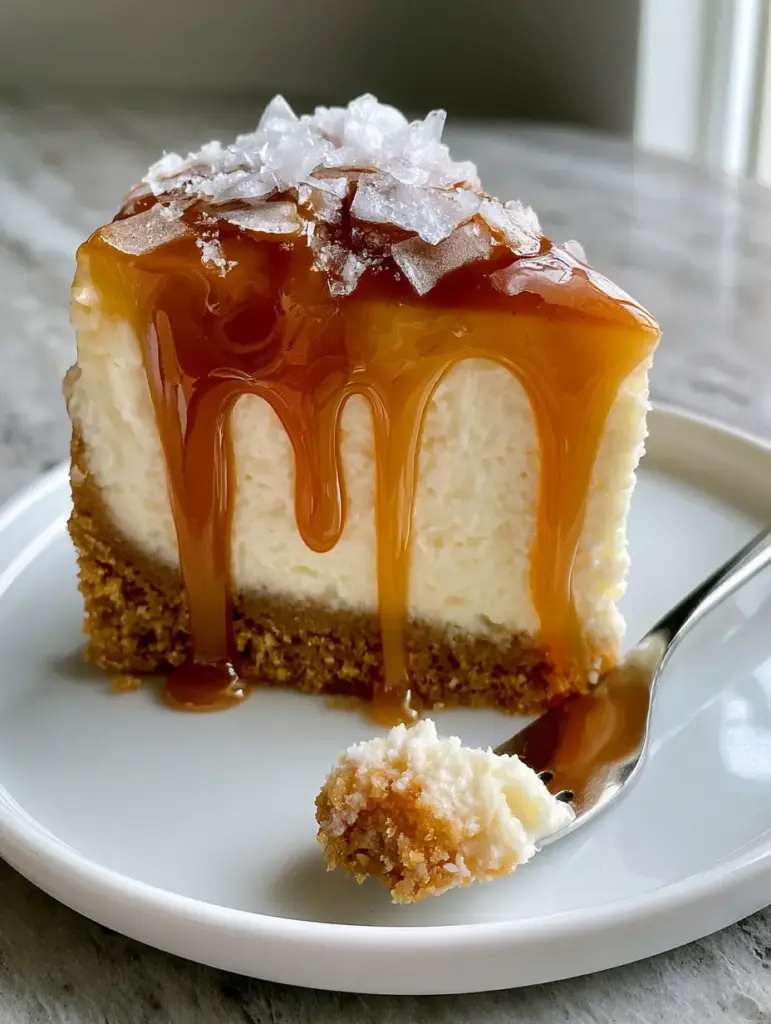
Architecting the Perfect Thick Graham Cracker Crust
The first step in our visual blueprint is creating that “thick, compressed golden-brown buttery graham cracker crust.” This is not just a container for the cheese; it is a primary flavor and texture component.
Step 1: Preparing the Crumb Foundation
In a medium bowl, combine 2 1/2 cups (300g) of graham cracker crumbs with 1/4 cup (50g) of granulated sugar and 1/2 tsp (3g) of fine sea salt. Pour in 3/4 cup (170g) of melted unsalted butter. Stir until the mixture looks like wet sand and the butter is evenly distributed.
Step 2: The Compression Technique
Dump the crumbs into your 9-inch (23cm) springform pan. Use the bottom of a flat measuring cup to press the crumbs firmly into the bottom. To achieve the “compressed” look from the Midjourney prompt, apply significant pressure. Bake at 350°F (175°C) for 10 minutes until you smell a nutty, toasted aroma. Set aside to cool completely.
Crafting the Ultra-Smooth Ivory Filling
To match the prompt’s “ivory-toned, ultra-smooth, dense cream cheese layer with zero surface cracks,” we must minimize air incorporation and maximize emulsification.
Step 3: The Low-Speed Creaming Method
In a stand mixer fitted with the paddle attachment, beat the 32 oz (900g) of cream cheese on the lowest speed for 2-3 minutes. We are not looking to “whip” it; we are looking to smooth it. Add the 1 1/4 cups (250g) of sugar and beat until no lumps remain. You should see a glistening, heavy paste.
Step 4: Incorporating the Structure
Add 1 cup (240ml) of full-fat sour cream and 1 tbsp (15ml) of vanilla extract. The sour cream provides the “ivory” hue and a slight tang that cuts the sugar. Add your 4 eggs one at a time, mixing on low just until the yellow yolk disappears. Over-mixing at this stage will incorporate air, leading to the “imperfections” we want to avoid.
Step 5: The Water Bath Bake
Pour the batter over your cooled crust. Place the foil-wrapped springform pan into the roasting pan. Fill the roasting pan with boiling water until it reaches halfway up the sides of the cheesecake pan. Bake at 300°F (150°C) for 75-90 minutes. The low temperature is the secret to that ivory color.
The Science of the Heavy Amber Salted Caramel Drip
While the cheesecake chills for at least 6 hours (essential for that “creamy interior texture”), we prepare the amber crown. This is the visual highlight of the dish.
Step 6: Developing the Amber Color
In a heavy-bottomed saucepan, melt 1 cup (200g) of granulated sugar over medium heat. Do not stir; simply swirl the pan. Watch for the color transition from clear to pale gold to a deep, viscous amber. Once it reaches the color of a polished penny, immediately remove it from the heat.
Step 7: Creating the Viscous Drip
Slowly whisk in 6 tbsp (85g) of unsalted butter followed by 1/2 cup (120ml) of heavy cream. Be careful; it will steam and bubble violently. Whisk until smooth. Stir in 1 tsp (6g) of Maldon sea salt. Let the caramel cool at room temperature until it reaches a thick, pourable consistency that holds its shape when dripped from a spoon.
Expert Tips for Visual and Textural Success
- The “Jiggle” Test: The cheesecake is done when the outer 2 inches are set, but the center still has a slight, uniform jiggle like Jell-O. It will firm up into a “velvety internal texture” as it cools.
- Avoid the Draft: When the bake time is up, turn off the oven and crack the door slightly. Let it sit for one hour. Rapid temperature changes cause the surface cracks we are avoiding.
- The Clean Slice: To get that “professional slice” look, dip your knife in hot water and wipe it clean between every single cut. This ensures the ivory filling doesn’t smudge into the amber caramel.
- Caramel Temperature: If your caramel is too cold, it won’t create those “glistening drips.” If it’s too hot, it will melt the top of the cheesecake. Aim for roughly 80°F (26°C) before pouring.
Storage, Reheating & Freezing
Cheesecake is a living dairy product and requires careful handling to maintain its “zero imperfection” status. Store your salted caramel cheesecake in an airtight container in the refrigerator for up to 5 days.
If you wish to freeze the cheesecake, do so before adding the caramel drip. Wrap the chilled cheesecake tightly in plastic wrap and then aluminum foil. It will stay fresh for up to 3 months. Thaw overnight in the refrigerator before adding the fresh caramel and Maldon salt garnish.
What to Serve With This Decadent Slice
While this cheesecake is a titan on its own, it pairs beautifully with other textures. Consider serving it alongside chewy chocolate chip cookies for a dessert platter. If you are hosting a themed event, it fits perfectly next to a pecan-topped turtle cheesecake or even a spiced caramel apple cupcake.
For a drink pairing, a bitter espresso or a dark roast coffee provides the perfect acidic counterpoint to the heavy, sweet amber caramel and the dense cream cheese layer.
Frequently Asked Questions
You can, but most store-bought sauces are designed to be ice cream toppings and are too thin. To achieve the visual ‘glistening drip’ from our blueprint, a homemade caramel with a higher butter-to-cream ratio is recommended.
Bake the cheesecake at a lower temperature (300°F/150°C) and use a water bath. This prevents the Maillard reaction (browning) on the surface of the cream cheese, keeping it a pristine ivory tone.
The key is a water bath (bain-marie) and room-temperature ingredients. The water bath regulates the heat so the edges don’t overcook before the center sets, while room-temp ingredients ensure you don’t over-mix air into the batter.
Maldon sea salt flakes are the gold standard. They provide a specific crystalline look and a clean salty crunch that doesn’t dissolve immediately into the caramel like table salt would.
If your caramel is too thin, it likely hasn’t cooled enough or wasn’t cooked to a high enough temperature. For a ‘heavy drip,’ let the caramel cool to around 80°F (26°C) so it reaches a viscous, honey-like consistency before pouring.
The Ultimate Salted Caramel Cheesecake Recipe
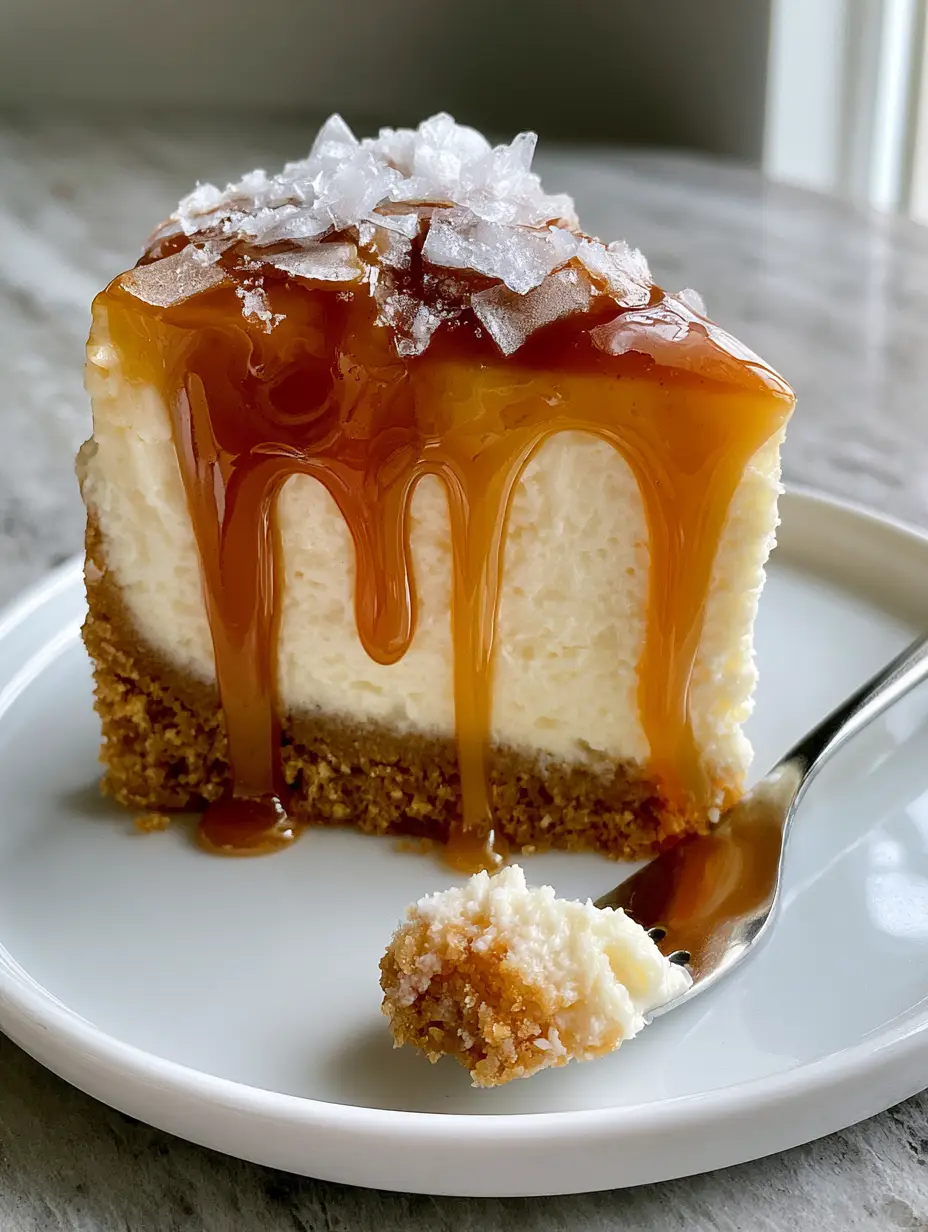
Salted Caramel Cheesecake with a Thick Graham Cracker Crust
Ingredients
Equipment
Method
- Combine crumbs, melted butter, and sugar. Press firmly into a 9-inch springform pan using a measuring cup.
- Bake at 350°F (175°C) for 10 minutes. Cool completely.
- Beat cream cheese and sugar on low speed until smooth. Add sour cream, heavy cream, and vanilla.
- Mix in eggs one at a time on low speed just until combined.
- Pour into pan. Place in a water bath and bake at 300°F (150°C) for 75-90 minutes. Cool in oven with door cracked for 1 hour.
- Melt sugar until deep amber. Whisk in butter and cream. Stir in salt.
- Cool caramel until viscous, then pour over chilled cheesecake allowing it to drip down the sides.
Notes
Use a water bath to prevent surface cracks and maintain the ivory color.
Closing & Call to Action
Mastering the salted caramel cheesecake is a rite of passage for any serious home baker. By focusing on the “invisible” culinary science—the water bath, the room-temp ingredients, and the sugar’s caramelization point—you have created a dish that is as visually stunning as it is delicious. The thick graham cracker crust and the heavy amber drip make this a centerpiece worth sharing.
Did your caramel achieve that perfect glistening drip? Tag me in your photos or leave a comment below with your results! If you loved this recipe, please share it to Pinterest so others can enjoy this ivory-toned masterpiece.