There is a specific, undeniable magic that happens when the crisp autumn air hits and the scent of warm spices begins to waft through the kitchen. These Pumpkin Cake Pops are the physical embodiment of that cozy feeling, designed to be as visually stunning as they are delicious. Unlike standard cake pops that can sometimes feel dry or overly sweet, this recipe focuses on a deep, complex flavor profile and a texture that is remarkably moist.
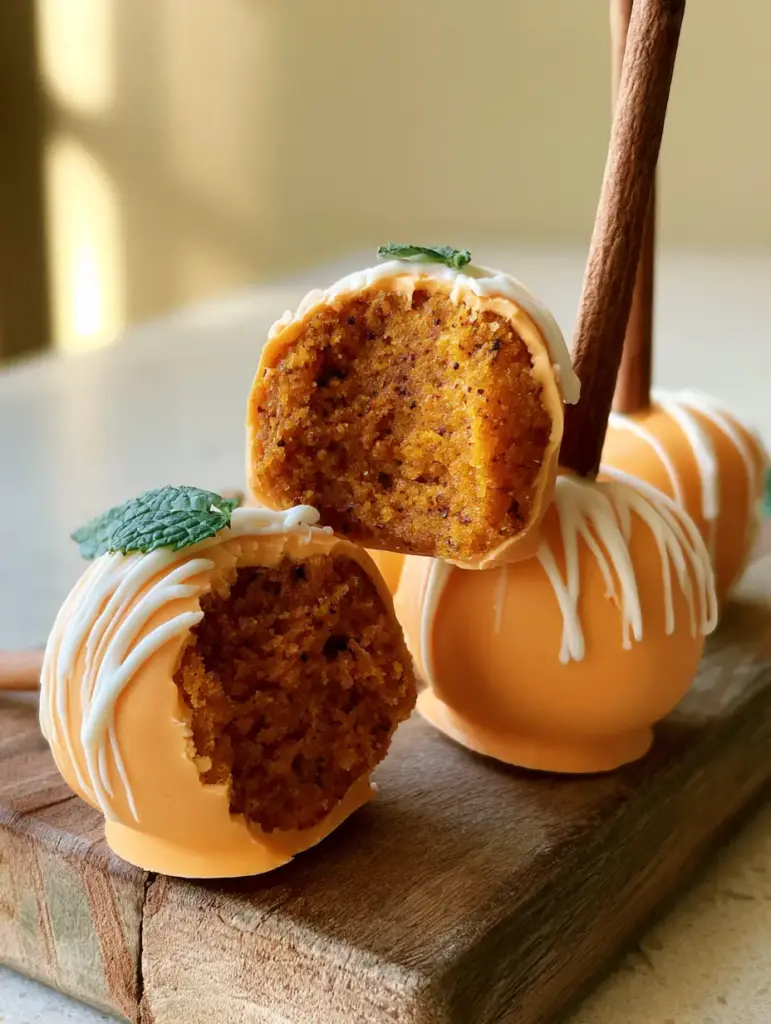
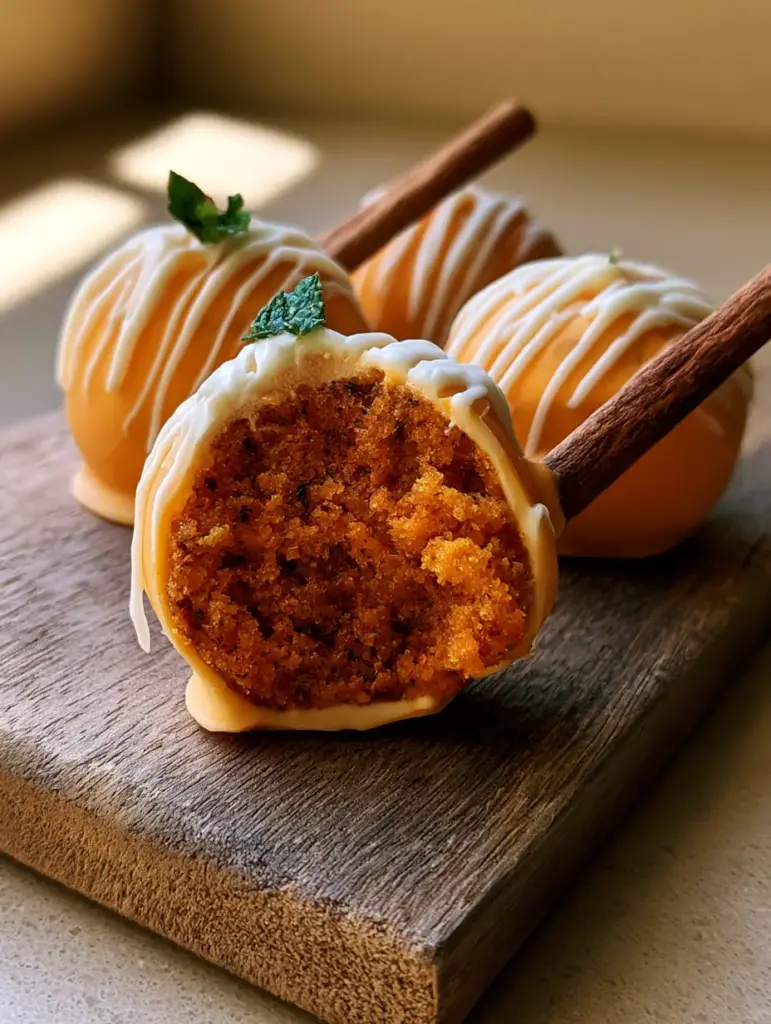
Every bite of these Pumpkin Cake Pops reveals a dense, vibrant orange interior that contrasts beautifully with the smooth, matte orange white chocolate shell. We aren’t just making a snack; we are crafting a handheld masterpiece that uses real cinnamon sticks as the “pop” sticks for an aromatic experience. Whether you are prepping for a harvest party or just want to master the art of the perfect fall confection, this guide will walk you through every scientific detail to ensure success.
Why These Fall-Inspired Treats Are the Ultimate Autumn Confection
- Unmatched Texture: The interior features moist pumpkin cake crumbs bound by tangy cream cheese frosting, creating a fudge-like consistency.
- Visual Sophistication: A zig-zag white chocolate drizzle and a fine pumpkin spice dusting provide a professional, bakery-style finish.
- Aromatic Garnish: Using real cinnamon sticks as the handles infuses the cake with a subtle woody scent every time you take a bite.
- Deep Color Contrast: The “deep orange” center is achieved through a high ratio of pure pumpkin purée and specific spice specks.
- Garden Fresh Finish: A tiny green mint leaf garnish adds a pop of color and a refreshing counterpoint to the warm spices.
Essential Components for the Perfect Pumpkin Cake Pops
To achieve the specific visual and textural results seen in professional culinary photography, we must select our ingredients with forensic precision. We aren’t just looking for sweetness; we are looking for structural integrity and “matte” finishes that photograph beautifully under natural light.
Pure Pumpkin Purée (Not Pie Filling): 1 cup (245g). This is the soul of the recipe, providing the moisture and the “deep orange” color described in the visual blueprint. Ensure you use 100% pumpkin without added sugars or spices so you can control the flavor profile.
Warm Pumpkin Spice Blend: 2 tsp (10g). A combination of cinnamon, ginger, nutmeg, and cloves provides those “visible specks of spice” that signal a high-quality, homemade cake. This spice blend will also be used for the final dusting over the white chocolate coating.
Full-Fat Cream Cheese: 4 oz (115g). Softened to room temperature, this acts as the “culinary glue” that binds the cake crumbs together without making them greasy. It adds a necessary tang to balance the sweet white chocolate.
High-Quality White Chocolate Couverture: 12 oz (340g). This forms the outer shell; we use a high-cocoa butter version to ensure a smooth, matte finish rather than a waxy one. You will also need oil-based orange food coloring to achieve that vibrant autumnal hue.
Real Cinnamon Sticks: 12-15 pieces. These act as the sticks for our Pumpkin Cake Pops. Look for sticks that are roughly 3 inches (7.5cm) long and sturdy enough to support the weight of the dense cake ball.
Refined Coconut Oil: 1 tbsp (15ml). This “invisible” foundational ingredient is added to the melted chocolate to thin it out. It helps create a smooth, even dip that dries with a professional matte appearance.
Fresh Mint Leaves: 15 tiny leaves. These are used as the final garnish to mimic a pumpkin stem or leaf, providing a vibrant green contrast to the orange palette.
Professional Tools for a Flawless Finish
Achieving a handheld smartphone photo-worthy result requires a few specific tools to manage temperature and texture. You will need a standard 9×13 inch (23x33cm) baking pan for the initial cake and a large mixing bowl for the crumbling process.
A digital kitchen scale is highly recommended for weighing the cake balls to ensure they are uniform in size. A small microwave-safe deep bowl or a double boiler is essential for melting the white chocolate coating without scorching it. Finally, a piece of styrofoam or a dedicated cake pop stand will hold the pops upright while the coating sets, preventing flat spots.
Step-by-Step: Crafting the Deep Orange Spice Center
Baking the Foundational Pumpkin Cake
Preheat your oven to 350°F (175°C). In a large bowl, whisk together 1.5 cups (190g) of all-purpose flour, 1 tsp (5g) baking soda, and your 2 tsp (10g) of pumpkin spice. In a separate bowl, cream together 0.5 cups (115g) of oil and 1 cup (200g) of granulated sugar before folding in the pumpkin purée and 2 large eggs.
Combine the wet and dry ingredients, stirring until just mixed to avoid over-developing the gluten. Pour into a greased pan and bake for 25-30 minutes. You are looking for a visual cue of “golden brown edges” and a toothpick that comes out with a few moist crumbs clinging to it.
Creating the “Moist Crumb” Binder
Once the cake has cooled completely, use your hands to crumble it into a large bowl. You want fine, uniform crumbs with no large chunks. Add the 4 oz (115g) of softened cream cheese and 0.5 cups (60g) of powdered sugar.
Mix with a spatula or your hands until the mixture reaches a “playdough” consistency. If you take a bite, it should reveal that “dense, moist pumpkin cake center” we are aiming for. If the mixture is too dry, add an extra tablespoon of cream cheese.
Portioning and Shaping the Pops
Scoop about 2 tablespoons of the mixture and roll it between your palms to form a smooth ball, approximately 1.5 inches (4cm) in diameter. Place the balls on a parchment-lined tray. Before inserting the cinnamon sticks, dip the tip of each stick into a small amount of melted chocolate to act as a “seal,” then push it halfway into the cake ball.
Chill the pops in the freezer for 20 minutes. This is a critical culinary step; if the cake is too warm, it will fall off the stick during dipping. However, if it’s too cold, the white chocolate coating may crack as it expands.
The Art of the Matte Orange Coating and Garnish
Mastering the White Chocolate Dip
Melt your white chocolate and coconut oil in 30-second intervals in the microwave, stirring until perfectly smooth. Add a few drops of oil-based orange food coloring until you reach a vibrant “matte orange” shade. Ensure the chocolate is in a deep, narrow container to allow for a single, clean dip.
Submerge the chilled cake ball entirely, then gently tap your wrist to remove the excess chocolate. You want a “smooth, matte orange white-chocolate coating” that isn’t too thick. Place the pop upright in your stand to begin the setting process.
Drizzling and Final Flourishes
While the orange base is still slightly tacky but mostly set, melt a small amount of plain white chocolate and place it in a piping bag with a tiny tip. Create a “fine, zig-zag white chocolate drizzle” across the top of each pop. This adds a geometric visual interest that contrasts with the organic shape of the pumpkin.
Immediately after drizzling, lightly shake a pinch of pumpkin spice over the top for that “fine pumpkin spice dusting.” Finally, use a tiny dot of melted chocolate to adhere a “tiny green mint leaf garnish” near the base of the cinnamon stick. This completes the visual blueprint perfectly.
Expert Tips for Bakery-Quality Results
- Avoid Water: Ensure all your tools are completely dry; even a drop of water will cause white chocolate to seize and ruin the smooth finish.
- The “Tap” Technique: When removing excess chocolate, tap your wrist, not the stick itself, to prevent the cake ball from vibrating off the cinnamon stick.
- Room Temp Frosting: Always use room temperature cream cheese to ensure it incorporates fully into the crumbs without leaving white lumps in the orange center.
- Spice Freshness: Grinding your own nutmeg or cloves fresh will significantly enhance the “visible specks of spice” and the overall aroma.
Storage and Make-Ahead Instructions
These Pumpkin Cake Pops are incredibly stable thanks to the chocolate shell. They can be stored in an airtight container in the refrigerator for up to 5 days. For the best flavor, allow them to sit at room temperature for 15 minutes before serving to soften the interior “dense, moist center.”
If you wish to freeze them, do so before the final dipping stage. The cake balls with the cinnamon sticks can be frozen for up to 3 months. When ready to finish, thaw them in the fridge overnight before proceeding with the orange chocolate coating and garnishes.
What to Serve With These Festive Treats
These pops are a standout dessert on their own, but they also pair beautifully with other seasonal favorites. If you are hosting a larger gathering, consider serving them alongside some chewy pumpkin snickerdoodles for a variety of textures.
For a complete pumpkin-themed dessert board, these pops look stunning next to moist pumpkin spice cupcakes or even small portions of velvety carrot cake cheesecake. If you prefer a bite-sized variety, try adding some sugared pumpkin donut holes to the mix. For those who want a classic cake experience, a perfect chocolate cupcake provides a great flavor contrast to the warm spices.
Frequently Asked Questions
No, pumpkin pie filling contains added sugars and spices that will throw off the recipe’s balance. Use 100% pure pumpkin purée for the best texture and color.
Yes, because the cake is bound with cream cheese frosting, they should be stored in the refrigerator to keep them fresh and food-safe.
Adding a small amount of refined coconut oil to high-quality white chocolate helps it set with a smooth, matte finish rather than a shiny, waxy one.
This usually happens if the cake balls aren’t chilled enough before dipping or if the balls are too heavy. Dip the cinnamon stick in chocolate before inserting it to act as a glue.
Cinnamon sticks provide a rustic, aesthetic appeal and a wonderful woody aroma that complements the pumpkin spice flavor of the cake.
The Ultimate Pumpkin Cake Pop Recipe Card
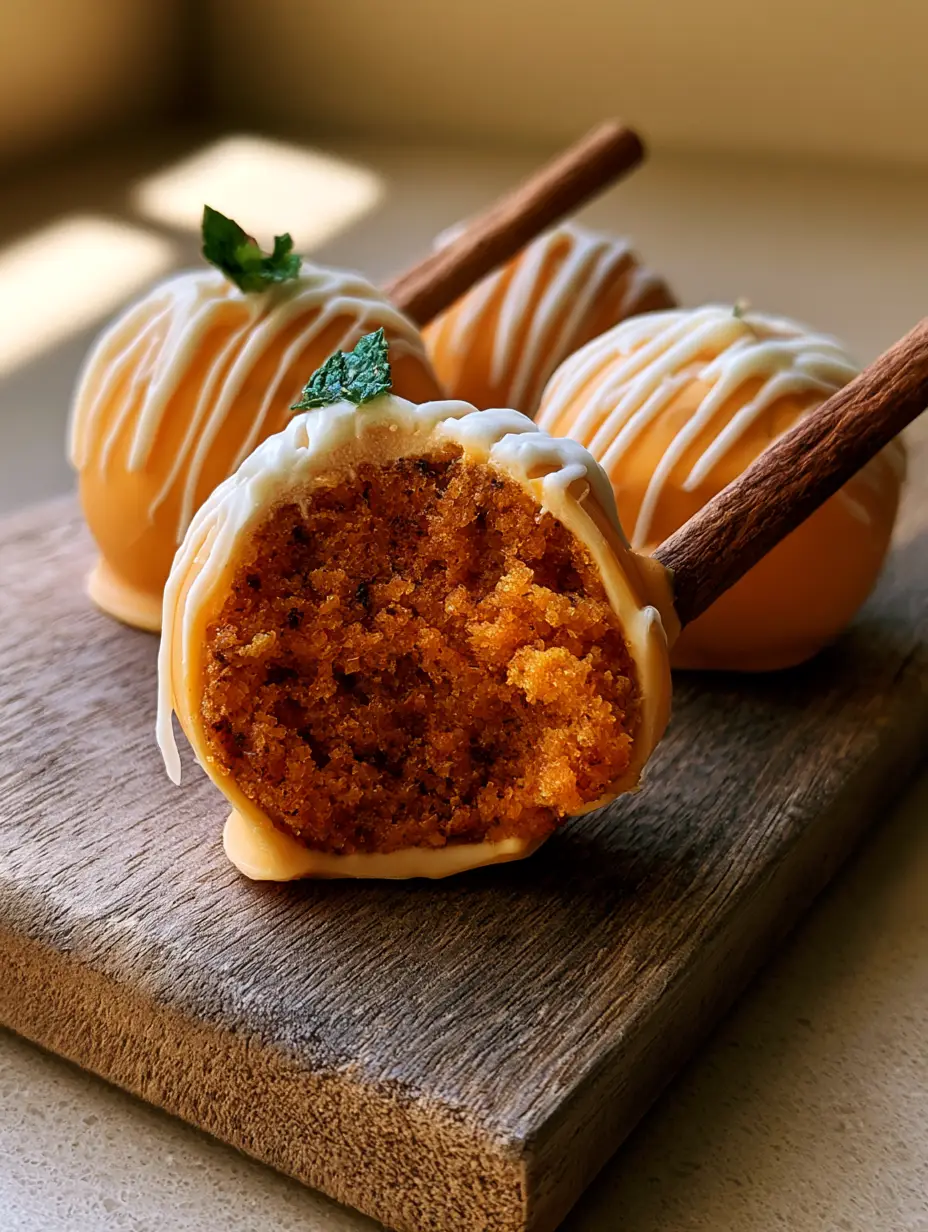
Pumpkin Cake Pops: The Ultimate Moist Spice Treat with Real Cinnamon Sticks
Ingredients
Equipment
Method
- Mix pumpkin, flour, spices, eggs, and oil; bake at 350°F (175°C) for 30 minutes until golden.
- Crumble cooled cake and mix with cream cheese until a dense, moist, deep orange dough forms.
- Roll into 1.5-inch balls and insert cinnamon sticks using melted chocolate as a seal. Chill for 20 minutes.
- Dip balls into orange-tinted white chocolate mixed with coconut oil for a smooth, matte finish.
- Drizzle with white chocolate, dust with pumpkin spice, and add a tiny mint leaf garnish.
Notes
Use oil-based food coloring to prevent the chocolate from seizing.

Bring the Flavors of Autumn to Your Kitchen
Creating these Pumpkin Cake Pops is a rewarding culinary project that combines baking science with artistic flair. The combination of the “deep orange” spicy interior and the aromatic cinnamon stick creates a sensory experience that far exceeds a standard dessert. I encourage you to take a photo of your finished work—especially that “large bite taken out” shot to show off the moisture!
If you enjoyed this recipe, please leave a comment below and let me know how your cinnamon stick handles turned out! Don’t forget to follow me on Pinterest for more seasonal inspiration and shared “kitchen wins.” Happy baking!