There is nothing quite like the aroma of fluffy cinnamon rolls wafting through the house on a slow Sunday morning. This isn’t just a recipe; it’s a sensory journey designed to replicate that professional, bakery-level experience right in your own kitchen.
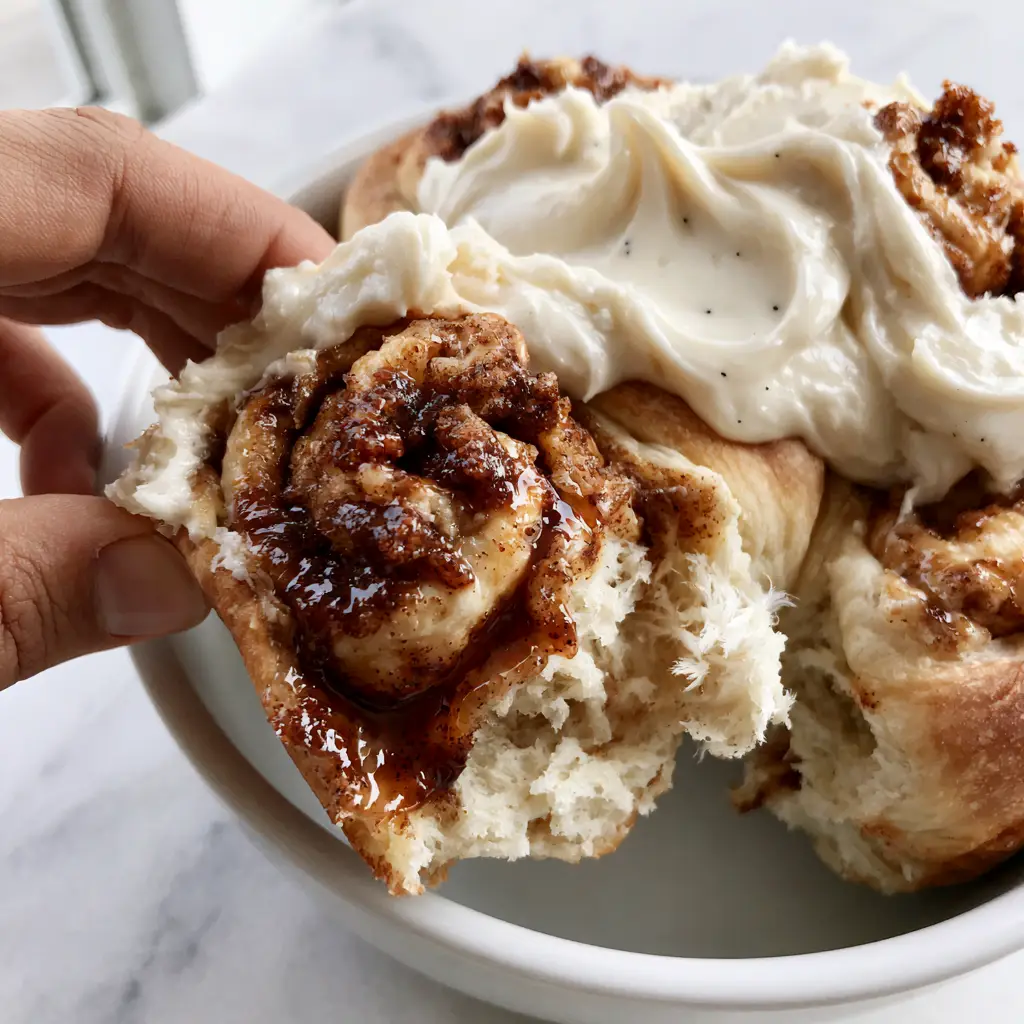
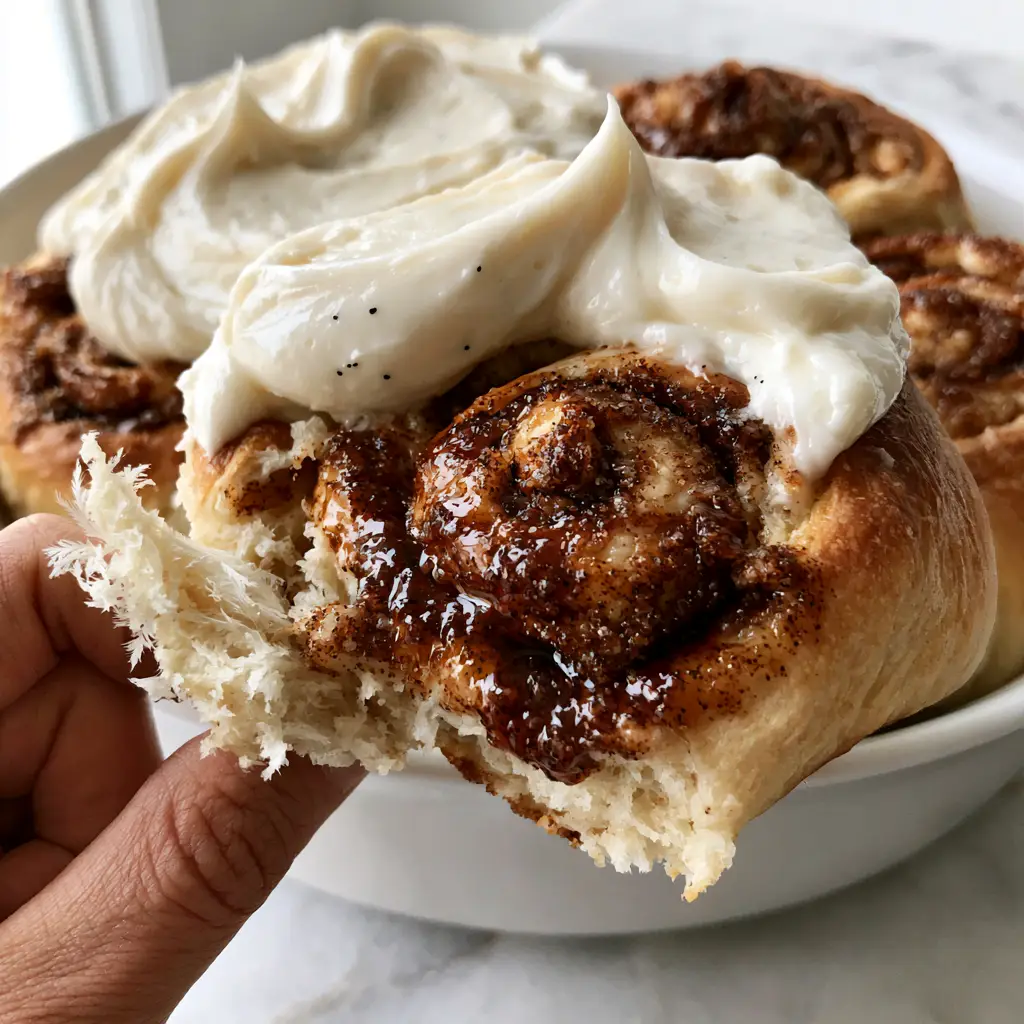
We are aiming for a specific, high-end result: a golden-brown yeast dough that yields a feathery shred when pulled apart, revealing a pillowy, airy interior texture. Each spiral is packed with a dark mahogany cinnamon-sugar glaze that remains gooey long after the pan leaves the oven.
The Secret to That Signature Feathery Crumb
To achieve the visual and textural perfection seen in high-end pastry shops, we focus on three specific pillars of baking science. These ensure your rolls aren’t just bread, but a delicate, melt-in-your-mouth confection.
- High-Hydration Brioche Base: Using whole milk and room-temperature butter creates a rich, supple dough that stretches into paper-thin, feathery layers.
- Dark Mahogany Glaze: We use dark brown sugar and premium cinnamon to create a glistening, gooey interior that contrasts beautifully with the pale crumb.
- Velvety Vanilla Bean Frosting: The thick, opaque white cream cheese frosting is studded with visible vanilla bean specks, signaling gourmet quality to every guest.
Essential Pantry Staples for Exceptional Rolls
Every ingredient in this list serves a forensic purpose to match our visual blueprint. We aren’t just mixing flour and sugar; we are building a structural masterpiece.
Bread Flour (500g / approx. 4 cups): The higher protein content is non-negotiable for creating the gluten structure required for that “hand-pulled” feathery shred.
Whole Milk (240ml / 1 cup): The fats in whole milk tenderize the crumb, ensuring the rolls stay soft and pillowy even the next day.
Active Dry Yeast (7g / 1 packet): This is our engine, providing the biological lift needed for a high-angle, airy rise in the ceramic dish.
Unsalted Butter (115g / 1/2 cup for dough, plus more for filling): We use high-fat European-style butter to achieve the rich, golden-brown hue on the exterior.
Dark Brown Sugar (200g / 1 cup): The molasses content is critical for achieving that glistening, dark mahogany glaze within the spirals.
Vanilla Bean Paste (1 tbsp / 15ml): This provides the iconic black specks in the thick frosting that signify a professional-grade dessert, much like a gourmet white chocolate mocha cake.
Full-Fat Cream Cheese (225g / 8oz): This provides the opaque, velvety base for the frosting, allowing for those soft, decorative peaks.
Must-Have Tools for the Perfect Swirl
To achieve the professional aesthetic described in our visual blueprint, you will need a few specific items. A warm ceramic baking dish is essential as it retains heat evenly, preventing the edges from over-browning while the center stays gooey.
A sharp serrated knife or unscented dental floss is required to cut the dough without squishing the feathery layers. Finally, a stand mixer with a dough hook will help you reach that “windowpane” stage of gluten development without tiring your arms.
Mastering the Art of the Perfect Rise
Activating the Yeast
Warm your milk to exactly 110°F (43°C). Combine with a teaspoon of sugar and your yeast, letting it sit for 5-10 minutes until a thick foam forms on the surface, indicating the yeast is alive and ready to lift your dough.
Developing the Feathery Texture
Mix your flour, eggs, and activated yeast. Once a shaggy dough forms, add your room-temperature butter one tablespoon at a time. Knead for 8-10 minutes until the dough is smooth, elastic, and pulls away from the sides of the bowl.
The First Proof
Place the dough in a lightly oiled bowl and cover with a damp cloth. Let it rise in a warm, draft-free spot for 60-90 minutes, or until it has doubled in size and feels incredibly light and airy to the touch.
Rolling and Filling for Maximum Gooeyness
Roll the dough into a large rectangle. Slather with softened butter and a generous layer of the dark brown sugar and cinnamon mixture. Roll tightly to ensure the dark mahogany glaze is trapped in every single layer.
The Final Rise and Bake
Cut into 12 even rolls and place into your warm ceramic dish. Let them rise again for 45 minutes—this “second proof” is what creates the extreme close-up worthy volume. Bake at 350°F (175°C) for 20-25 minutes until the tops are a perfect golden-brown.
Pro Secrets for Unbeatable Cinnamon Buns
- The Dental Floss Trick: Use unscented floss to “strangle” the dough log into rolls. This prevents compressing the delicate interior air pockets.
- Temperature Control: Ensure your cream cheese is truly room temperature before whipping to avoid lumps in your velvety white frosting.
- Don’t Overbake: The rolls should sound slightly hollow when tapped but still feel soft. A thermometer should read 190°F (88°C) in the center.
- The Frosting Window: Apply half the frosting while the rolls are still warm so it melts into the cracks, and the rest once they have cooled slightly to maintain those thick, opaque peaks.
Preserving That Fresh-Baked Magic
These fluffy cinnamon rolls are best enjoyed warm, straight from the ceramic dish. However, you can store leftovers in an airtight container for up to 3 days. To reheat, microwave for 15-20 seconds to revive the melted butter and dark mahogany glaze.
If you want to prepare these in advance, you can perform the second rise in the refrigerator overnight. This slow ferment actually develops more flavor, making them taste like something from a high-end Starbucks reserve bakery.
The Best Pairings for a Cozy Morning
For a complete brunch spread, pair these rolls with something savory to balance the sweetness. They go beautifully alongside a fresh fruit salad or a batch of strawberry white chocolate chip cookies for a dessert-themed party.
If you are looking for more decadent inspirations, consider how these flavors translate into a cinnamon roll cheesecake or even a rich classic cheesecake for your next gathering.
Common Cinnamon Roll Curiosities
You can, but the rolls will be less ‘feathery.’ Bread flour has more protein, which creates the strong gluten network needed for a professional dough shred.
The key to fluffiness is high-protein bread flour and two proper proofing sessions. The second rise in the pan is crucial for achieving that airy, feathery texture.
Store them in an airtight container as soon as they cool. The fat content from the whole milk and butter in this recipe helps retain moisture for up to 3 days.
Those are vanilla bean specks from vanilla bean paste or a fresh vanilla bean pod, which provide a more intense, gourmet flavor than standard extract.
This happens if the butter is too melted when applied. Use soft, spreadable butter rather than liquid butter to keep the dark mahogany glaze inside the spirals.
Fluffy Cinnamon Rolls Recipe
Fluffy Cinnamon Rolls: The Ultimate Guide to Bakery-Style Perfection
Ingredients
Equipment
Method
- Combine warm milk, yeast, and 1 tsp of sugar. Let sit until foamy (about 10 minutes).
- In a stand mixer, combine yeast mixture with eggs, remaining sugar, and salt. Gradually add flour. Once dough forms, add softened butter one tbsp at a time. Knead for 8-10 minutes until smooth and elastic.
- Place dough in an oiled bowl, cover, and let rise in a warm spot for 90 minutes until doubled.
- Roll dough into a 12x18 inch rectangle. Spread softened butter over the surface, then sprinkle generously with the cinnamon-dark brown sugar mix. Roll tightly into a log.
- Cut into 12 rolls using dental floss. Place in a ceramic dish, cover, and let rise for another 45-60 minutes.
- Bake at 350°F (175°C) for 20-25 minutes until golden-brown and airy.
- Whip cream cheese, butter, powdered sugar, and vanilla bean paste until velvety. Spread half over warm rolls and the rest once cooled.
Notes
Ensure the vanilla bean paste is fresh for the best visual black specks.
Share the Love of Homemade Baking
Making fluffy cinnamon rolls is an act of love that rewards you with the most incredible textures and flavors imaginable. If you enjoyed this recipe, please leave a comment below and share your results! You can also follow my latest culinary adventures and find more inspiration on my Pinterest page.


