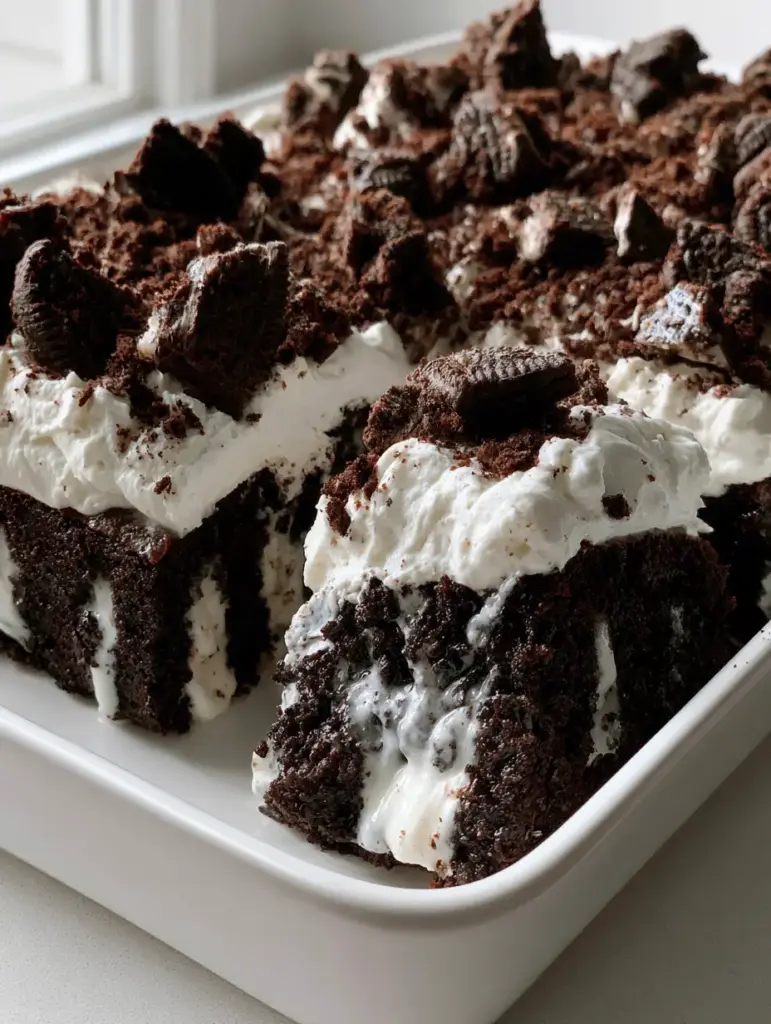
There is something undeniably nostalgic about an Oreo Poke Cake, a dessert that manages to be both humble in its preparation and high-end in its final presentation. Imagine a deep, dark chocolate sponge so moist it practically melts, punctuated by vertical tunnels of glossy white sweetness that saturate every single crumb.
This isn’t just another sheet cake; it is a masterclass in textural contrast, featuring an airy cloud of whipped topping and the satisfying crunch of jagged cookie chunks. Whether you are hosting a summer potluck or simply craving a midnight chocolate fix, this recipe delivers the “wow” factor with every velvety bite.
Our Oreo Poke Cake is designed to mirror the handheld, unedited aesthetic of modern food photography—natural, messy-perfect, and absolutely irresistible. From the matte white ceramic dish to the fine cookie dust scattered like dark sand, every element is curated for maximum culinary impact.
The Irresistible Allure of High-Contrast Chocolate Desserts
- Visual Masterpiece: The striking contrast between the pitch-black cocoa sponge and the snowy white cream filling creates a stunning “zebra” effect when sliced.
- Unmatched Moisture: By utilizing a sweetened condensed milk soak, we ensure the cake remains incredibly hydrated and flavorful for days.
- Textural Harmony: You get the softness of the sponge, the silkiness of the cream, and the jagged, crunchy snap of real Oreo cookies in every mouthful.
- Effortless Elegance: Despite its complex appearance, this recipe uses simple techniques that any home cook can master to achieve professional-grade results.
Essential Components for a Perfect Dark Chocolate Sponge
To achieve that deep, dark hue seen in our visual blueprint, we rely on high-quality Dutch-processed cocoa powder. This ingredient provides the neutral pH and intense color necessary for a “midnight” aesthetic while delivering a smoother chocolate flavor.
1 ½ cups (190g) All-purpose flour: This provides the structural foundation for our cake, ensuring it can hold the weight of the soak without collapsing. A mid-range protein content is ideal for a tender yet sturdy crumb.
¾ cup (65g) Dutch-processed cocoa powder: This is the secret to the “dark” in our dark chocolate sponge. It creates a rich, earthy base that makes the white cream filling pop visually.
1 ½ tsp (7g) Baking powder & 1 tsp (6g) Baking soda: These chemical leaveners work in tandem to create the airy “vertical tunnels” we need for the soak to penetrate deeply. The reaction with the acidity in the batter is what gives us that lift.
1 cup (200g) Granulated sugar: Beyond sweetness, sugar tenderizes the gluten and locks in moisture. It helps create the “velvety texture” described in our forensic visual analysis.
2 large (100g) Eggs, room temperature: Eggs provide emulsification and structure. Using them at room temperature ensures they incorporate smoothly without seizing the fats in the batter.
½ cup (120ml) Neutral vegetable oil: Unlike butter, oil remains liquid at room temperature. This is crucial for a cake that will be chilled, as it prevents the sponge from becoming hard or dry.
1 cup (240ml) Full-fat buttermilk: The acidity in buttermilk reacts with the baking soda to create a massive rise. It also adds a subtle tang that balances the sweetness of the condensed milk.
1 tsp (5ml) Pure vanilla extract & ½ tsp (3g) Fine sea salt: These are the “invisible” flavor enhancers. Salt heightens the perception of chocolate, while vanilla adds a floral aromatic layer.
The Glossy Soak and Fluffy Cloud Topping
1 can (14 oz / 397g) Sweetened condensed milk: This is our primary soak. Its thick, glossy consistency allows it to coat the interior of the holes without making the cake unpleasantly soggy.
2 cups (480ml) Heavy whipping cream, cold: For the topping, we want a thick, airy cloud. Using cream with at least 36% milk fat is non-negotiable for achieving that “velvety” whipped texture.
¼ cup (30g) Powdered sugar: This stabilizes the whipped cream and adds just enough sweetness to complement the cookies. It disappears instantly into the cream for a smooth finish.
24-30 (approx. 300g) Oreo Cookies: You will need these for three distinct roles. Large jagged chunks for texture, fine cookie dust for the “matte” finish, and whole cookies for the final garnish.
Must-Have Equipment for Culinary Success
To replicate the visual prompt exactly, you will need a 9×13 inch matte white ceramic baking dish. Ceramic retains heat evenly, ensuring the edges of your Oreo Poke Cake don’t overcook before the center is set.
A wooden spoon with a rounded handle is the best tool for “poking.” The diameter of a standard wooden spoon handle (about ½ inch) creates the perfect “vertical tunnels” to house that glossy white cream soak.
An offset spatula is essential for spreading the whipped cream into a thick, airy cloud. It allows you to create those soft swoops and peaks that catch the morning light in your kitchen.
The Science of the Perfect Chocolate Sponge
Preparing the Dry Foundations
Begin by whisking together your flour, Dutch-processed cocoa, sugar, baking powder, baking soda, and salt. Sifting the cocoa powder is a critical step; cocoa tends to clump, and you don’t want “flour pockets” ruining your dark aesthetic.
In a separate bowl, emulsify the oil, eggs, buttermilk, and vanilla. Slowly stream the wet ingredients into the dry, whisking until just combined. For an extra boost of chocolate intensity, you can stir in ½ cup of hot coffee at the very end to “bloom” the cocoa.
Baking and Achieving the Dark Crumb
Pour the batter into your greased ceramic dish. Bake at 350°F (175°C) for 30-35 minutes. You are looking for a visual cue: the edges should just begin to pull away from the sides of the dish, and a toothpick should come out with a few moist crumbs clinging to it.
Mastering the Poke and Saturating the Interior
Creating the Vertical Tunnels
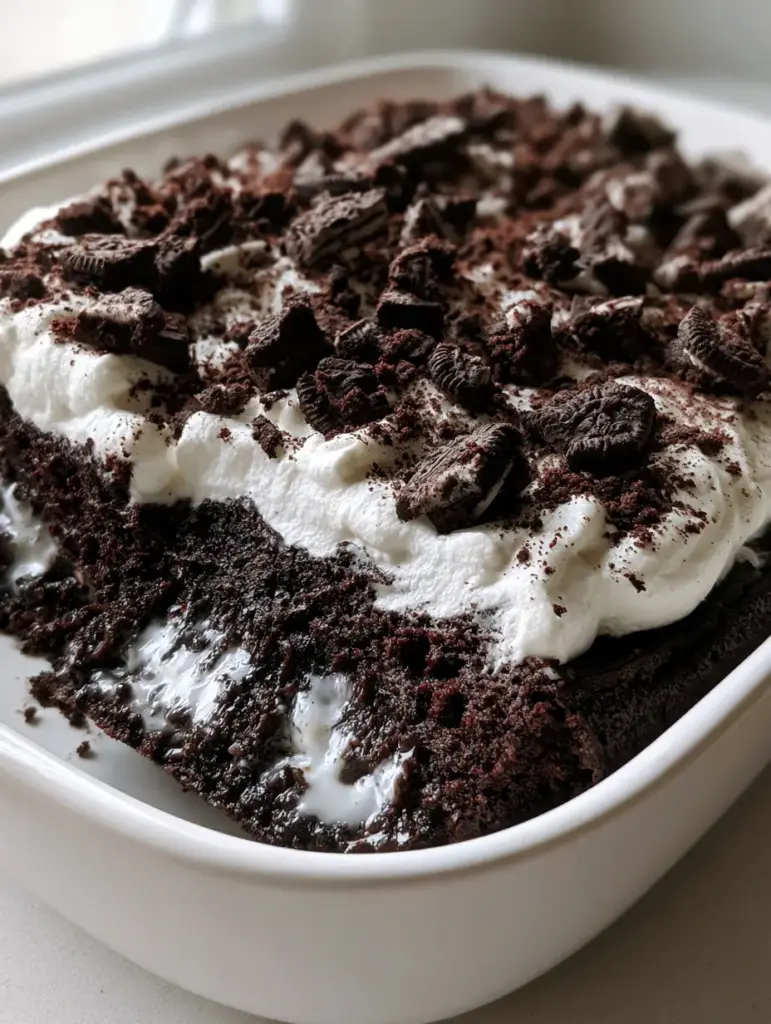
While the cake is still warm (but not piping hot), take your wooden spoon handle. Poke holes across the entire surface of the cake, spaced about 1 inch apart. You want to go about ¾ of the way down—don’t hit the bottom of the dish, or the soak will pool under the cake rather than saturating the crumbs.
If you’ve loved making this, you might also enjoy the textural complexity of a Strawberry Earthquake Cake, which also features a “swirled” interior logic. Both recipes rely on deep saturation for their legendary moisture.
The Glossy White Cream Soak
Pour the sweetened condensed milk slowly over the warm cake. Target the holes specifically, watching as the glossy white liquid vanishes into the dark sponge. This is the “soak” phase that creates those visible vertical tunnels seen in the final slice.
Let the cake cool completely at room temperature, then transfer it to the refrigerator for at least 2 hours. This “setting” time is what allows the condensed milk to thicken and bond with the chocolate crumbs.
Building the Airy Cloud Topping and Cookie Garnish
Whipping to Velvety Perfection
In a chilled bowl, beat your heavy cream and powdered sugar until stiff peaks form. You are looking for a texture that is firm enough to hold its shape but still feels like an “airy cloud.” Do not overbeat, or the cream will become grainy and lose its luster.
Spread the whipped cream over the chilled cake using your offset spatula. Aim for a thick layer—roughly 1 inch—to provide a clean white backdrop for the dark cookie crumbs.
The Forensic Cookie Application
Now, for the “jagged chunks.” Crush about 15 Oreos by hand or in a plastic bag with a rolling pin. You want large, irregular pieces that provide a tactile crunch. Sprinkle these generously over the whipped cream.
Next, take 5 more Oreos and pulse them in a food blender until they reach a “fine cookie dust” consistency. Dust this over the top to fill in the white gaps. Finally, place whole Oreos at even intervals for a professional garnish. If you are a fan of cookie-based crusts, check out our Oreo Peanut Butter Pie for another way to use these iconic sandwiches.
Expert Tips for a Professional-Grade Poke Cake
- The Temperature Rule: Never add the whipped cream to a warm cake. The heat will melt the fat bubbles in the cream, turning your airy topping into a runny mess.
- Clean Slices: For those perfect “vertical tunnel” photos, wipe your knife with a warm, damp cloth between every single cut. This prevents the white cream from smearing over the dark sponge.
- Cookie Timing: If you prefer your cookies to be very crunchy, add the jagged chunks and whole Oreo garnish just before serving. If you like them slightly softened (resembling a “cake-like” texture), add them 4 hours before serving.
- Dutch is Best: If you use regular cocoa powder instead of Dutch-processed, the cake will be lighter in color and more acidic. The visual “dark” impact will be diminished.
Storage, Reheating & Freezing Your Oreo Poke Cake
Because of the dairy content in the soak and the whipped topping, this cake must be kept refrigerated. Cover the ceramic dish tightly with plastic wrap or a lid. It will stay fresh and moist for up to 4 days.
We do not recommend freezing the fully assembled cake, as the whipped cream can weep and lose its airy texture upon thawing. However, you can bake and “poke” the chocolate sponge, add the soak, and freeze that layer for up to 3 months. Simply add the fresh whipped cream and cookies when you are ready to serve.
Creative Pairings: What to Serve With This Dessert
This Oreo Poke Cake is a heavy hitter, so it pairs best with beverages that can cut through the richness. A cold glass of milk is the classic choice, but a White Chocolate Mocha or a strong cup of black coffee provides a sophisticated bitter contrast.
If you are serving this at a party, consider offering a fruit-based dessert alongside it to cleanse the palate. Our Classic Strawberry Shortcake or a refreshing Beach Peach Lemonade Cocktail would provide a bright, acidic balance to the deep chocolate notes.
Frequently Asked Questions
Absolutely! In fact, this cake often tastes better the next day once the flavors have melded. Just wait to add the crunchy cookie garnish until a few hours before serving to maintain their snap.
Yes, a standard dark chocolate or devil’s food box mix works well. Just ensure you bake it in a 9×13 dish and follow the poking and soaking steps exactly as described for the best results.
The key is to let the cake cool slightly before poking and to only go 3/4 of the way down. Using thickened sweetened condensed milk rather than a thin liquid helps the soak stay within the vertical tunnels.
The cake must be completely cold, ideally chilled for 2 hours after adding the soak. If the cake is warm, the whipped cream will melt and lose its airy cloud-like texture.
Dutch-processed cocoa is treated with an alkalizing agent, giving it a darker color and a smoother, less acidic flavor that perfectly mimics the taste of an Oreo cookie wafer.
The Complete Oreo Poke Cake Recipe
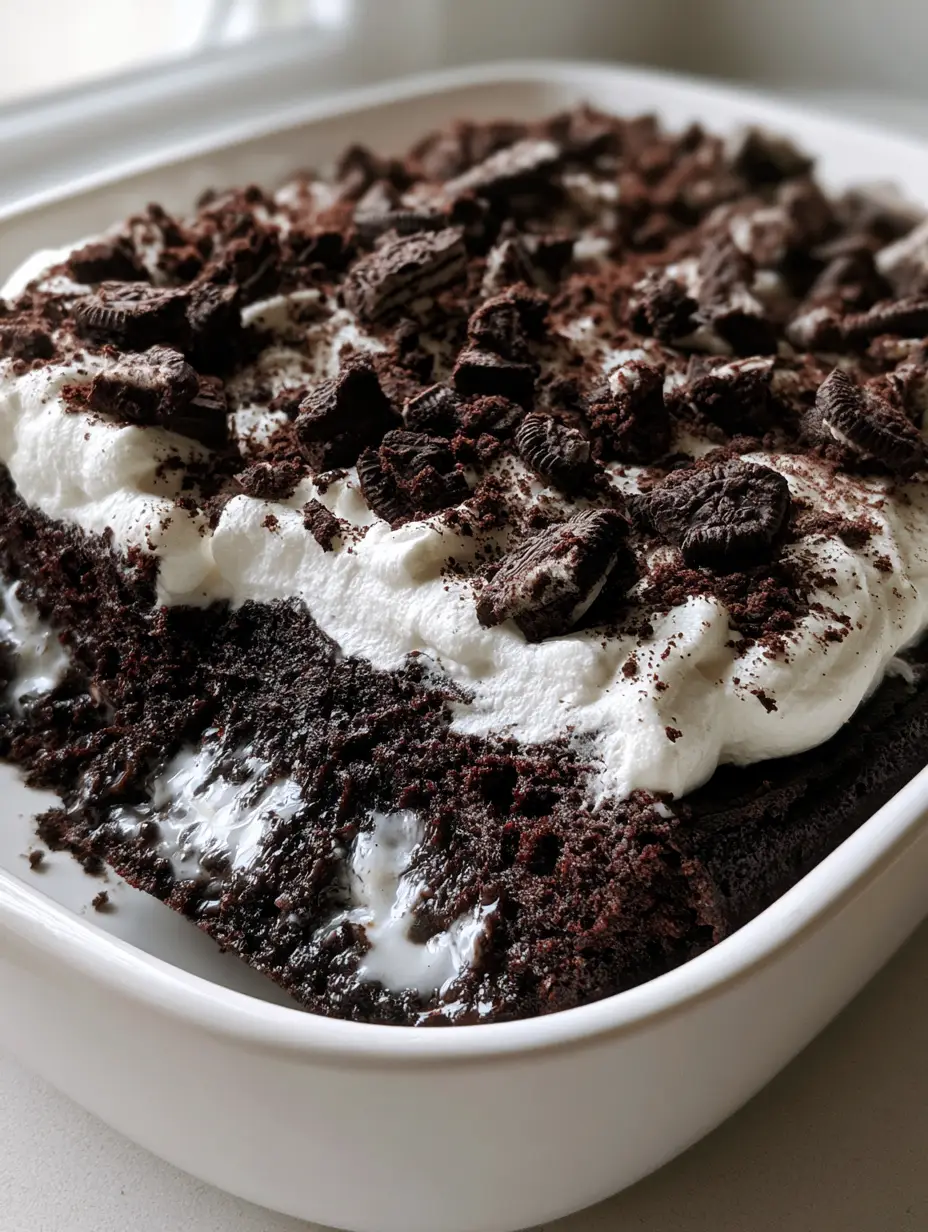
Oreo Poke Cake: The Ultimate Decadent Cookies and Cream Dessert
Ingredients
Equipment
Method
- Whisk dry ingredients, then incorporate wet ingredients until a smooth, dark batter forms. Pour into a 9x13 dish.
- Bake at 350°F (175°C) for 30-35 minutes until the cake edges pull away from the dish slightly.
- Using a wooden spoon handle, poke holes 1 inch apart across the warm cake, creating vertical tunnels.
- Pour the sweetened condensed milk over the cake, ensuring it fills the holes for a glossy interior.
- Let the cake cool, then refrigerate for at least 2 hours to allow the soak to set.
- Beat cold heavy cream and powdered sugar until stiff, airy peaks form.
- Spread cream over the cake. Top with jagged Oreo chunks, fine cookie dust, and whole Oreos for the final visual finish.
Notes
Wipe your knife between slices for the cleanest vertical tunnel presentation.
Closing & Call to Action
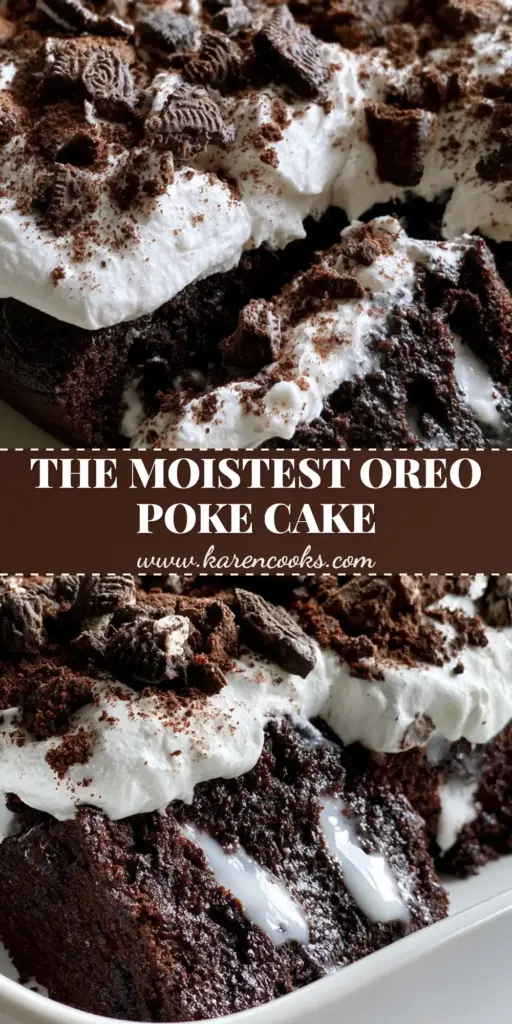
This Oreo Poke Cake is more than just a dessert; it’s a celebration of chocolate and cream in their most decadent forms. With its saturated dark sponge and cloud-like topping, it’s guaranteed to be the star of your next gathering. The visual contrast of the “vertical tunnels” filled with glossy milk is a culinary detail your guests won’t soon forget.
Did you make this recipe? We would love to see your results! Leave a comment below and tell us how yours turned out. Don’t forget to sign up for our newsletter for more elite recipe blueprints, and be sure to share this post to your favorite dessert boards on Pinterest!


