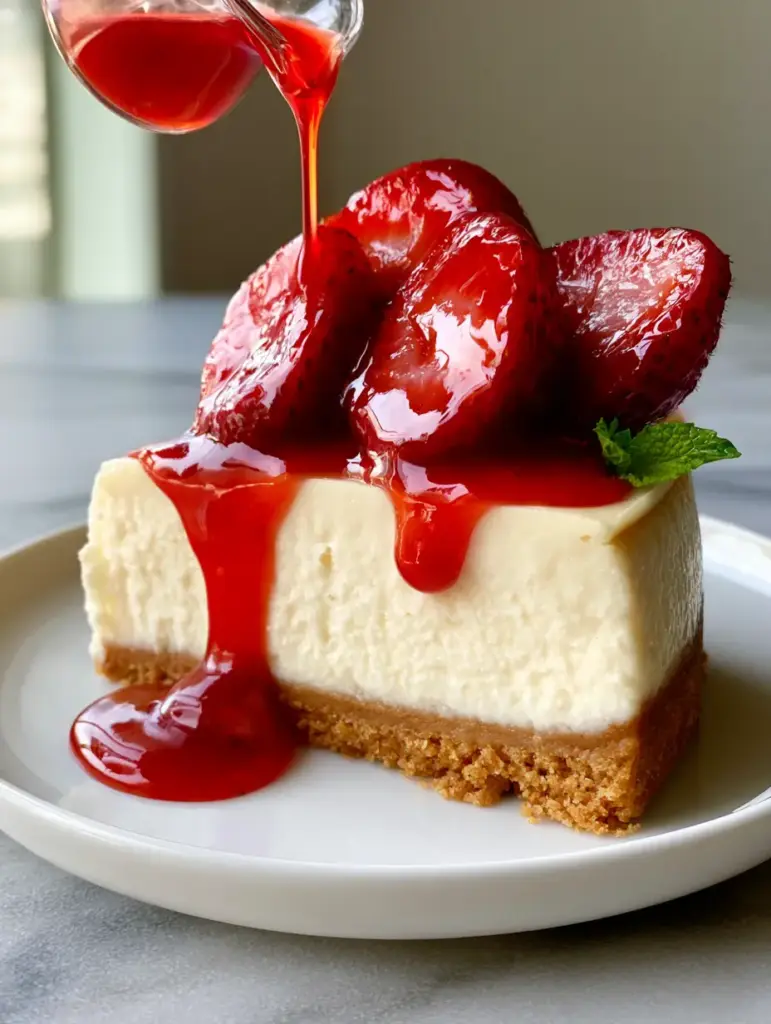
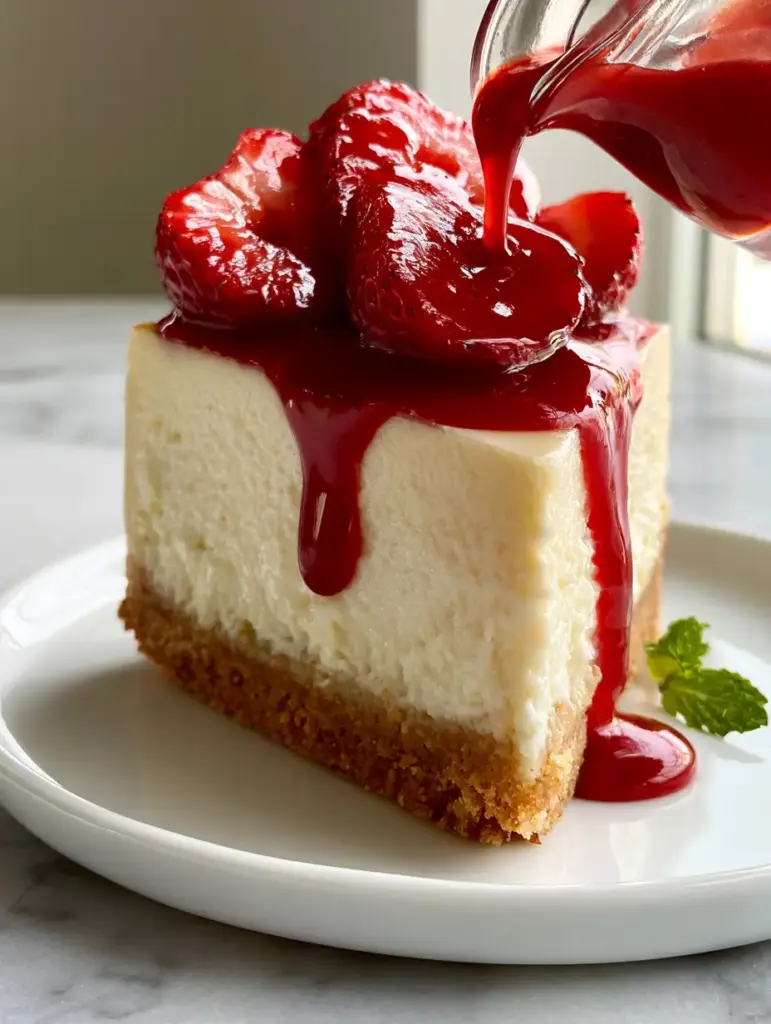
There is nothing quite as iconic in the world of desserts as a towering, tall slice of New York style cheesecake. This isn’t your average airy cake; it is a dense, velvety masterpiece characterized by its rich ivory center and a substantial, buttery foundation.
Achieving that picture-perfect side profile—with a thick, 1/2 inch crust and a completely crack-free surface—requires a blend of culinary precision and patience. In this guide, we will walk through the forensic details of creating a cheesecake that looks like it stepped out of a high-end Manhattan bakery.
Every bite offers a contrast between the compressed, salty-sweet graham cracker base and the bright, ruby-red acidity of a glossy strawberry reduction. Whether you are a seasoned baker or a newcomer, this recipe ensures a professional, high-resolution result every single time.
Why This Is the Ultimate New York Style Cheesecake
- Structural Integrity: A dedicated 1/2 inch (1.25cm) thick graham cracker crust provides a sturdy, crunchy base for the heavy filling.
- Velvety Texture: By utilizing specific mixing techniques and a controlled water bath, the filling remains ivory-colored and perfectly smooth.
- Glossy Visuals: The strawberry reduction is cooked to a specific Brix level to ensure it coats the cake with a mirror-like finish.
- Scientific Precision: We use cornstarch and heavy cream to achieve the signature “New York” density that distinguishes it from lighter Italian versions.
Essential Pantry Staples for a Velvety Filling
Full-Fat Brick Cream Cheese: You must use the brick variety, not the spreadable kind from a tub. This provides the necessary fat content for that signature dense, creamy mouthfeel.
Granulated Sugar: Beyond sweetness, sugar aerates the cheese during the initial creaming phase and helps stabilize the protein structure during the long bake.
Cornstarch: This is a secret weapon in New York style recipes. It binds with the moisture in the cheese and eggs, preventing the proteins from over-coagulating and causing cracks.
Heavy Whipping Cream (36% Fat): This adds a luxurious silkiness to the batter. If you enjoy variations in texture, you might also love my creamy no-bake cheesecake bars.
Large Eggs: Added one at a time, eggs provide the structure. Ensure they are at room temperature to prevent the batter from breaking or curdling.
Pure Vanilla Extract and Lemon Juice: These are the “invisible” ingredients that brighten the heavy fats and provide a complex, aromatic finish to the ivory filling.
Engineering the Perfect 1/2 Inch Graham Cracker Crust
Graham Cracker Crumbs: 2 cups (200g) of finely pulsed crumbs are required to reach that 1/2 inch (1.25cm) thickness. For a twist, you could use similar techniques from my Biscoff crust recipe.
Unsalted Melted Butter: 6 tbsp (85g) acts as the mortar. It must thoroughly coat every crumb to ensure the crust is “compressed” and doesn’t crumble when sliced.
Granulated Sugar and Sea Salt: A touch of sugar (2 tbsp/25g) helps the crust caramelize, while a pinch of salt balances the rich filling.
The Glossy Strawberry Reduction and Maceration
Fresh Strawberries: You will need 2 cups (300g) for the reduction and an additional handful of halved berries for the “macerated” topping. If you have extra fruit, try this strawberry banana cheesecake salad.
Lemon Zest and Juice: The acid helps set the pectin in the strawberries naturally, resulting in a vibrant, glossy ruby-red coulis without artificial thickeners.
Fresh Mint Leaves: A single tiny mint leaf provides the professional garnish seen in high-end food photography, offering a pop of green against the red glaze.
Professional Equipment for a Flawless Result
To achieve the “zero cracks” look described in our visual blueprint, you will need a 9-inch (23cm) springform pan with high walls. A heavy-duty roasting pan is also essential for the water bath (bain-marie), which insulates the cake from harsh, direct heat.
An electric stand mixer or hand mixer is necessary, but it must be used on low speeds. High speeds incorporate too much air, which leads to the cake rising and سپس falling, creating those dreaded surface imperfections.
Step-by-Step Instructions for the Perfect Slice
Phase 1: Compressing the Foundation
Preheat your oven to 350°F (175°C). Combine the graham crumbs, melted butter, sugar, and salt in a bowl until it resembles wet sand. Pour the mixture into the springform pan.
Use the flat bottom of a measuring cup to press the crumbs down firmly. You are looking for a uniform, 1/2 inch thick layer across the bottom. Bake for 10 minutes until it smells nutty and looks golden-brown, then let it cool completely.
Phase 2: Crafting the Ivory Filling
Lower the oven to 325°F (160°C). In a large bowl, beat the room-temperature cream cheese and sugar on low speed for 2 minutes. You want it smooth but not aerated. Scrape the sides of the bowl frequently.
Add the cornstarch, vanilla, and lemon juice. Add the eggs one at a time, mixing just until the yellow disappears. Finally, stir in the heavy cream by hand. The batter should look like thick, pale ivory velvet.
Phase 3: The Controlled Bake
Wrap the outside of your cooled springform pan in three layers of heavy-duty aluminum foil to prevent water seepage. Pour the filling over the crust. Place the pan inside a larger roasting pan and fill the roasting pan with 1 inch (2.5cm) of boiling water.
Bake for 75-90 minutes. Start checking at 75 minutes. The edges should be set and slightly puffed, but the center should still “jiggle” like firm gelatin when nudged. Turn off the oven, crack the door slightly, and let it sit inside for one hour. This slow cooling is the secret to a crack-free finish.
Phase 4: Creating the Glossy Drizzle
While the cake chills, simmer 1 cup of chopped strawberries with 1/4 cup sugar and 1 tbsp lemon juice over medium heat. Once the berries break down, strain them through a fine-mesh sieve to create a smooth coulis. Reduce the liquid further until it is thick and glossy.
Macerate the remaining halved strawberries by tossing them with a teaspoon of sugar. Let them sit for 20 minutes until they are glistening and juicy.
Expert Tips for Success
- The Room Temp Rule: Every single ingredient, especially the cream cheese and eggs, must be at room temperature to ensure a smooth emulsion.
- Don’t Over-mix: Once the eggs are added, the structure becomes fragile. Over-mixing leads to air bubbles that pop and cause cracks.
- Slicing for the Camera: To get that “extreme close-up” side profile, dip a sharp knife in hot water and wipe it clean between every single cut.
- Avoid the Peek: Do not open the oven door during the first hour of baking. The sudden temperature drop will cause the cake to collapse.
Storage and Make-Ahead Advice
This New York style cheesecake actually improves with age. It needs at least 8 hours (preferably 24) in the refrigerator to fully set its dense texture. Store it in the springform pan, covered tightly with plastic wrap.
You can freeze the plain cheesecake (without the strawberry topping) for up to 3 months. Thaw it overnight in the fridge before adding the fresh macerated berries and glossy glaze. If you prefer smaller portions, consider my cheesecake-inspired cupcakes.
What to Serve With This Decadent Dessert
While the strawberry reduction is the classic choice, this base recipe is incredibly versatile. You could swap the fruit for a rich chocolate ganache similar to the one found in my chocolate brownie recipe.
If you want to lean into the autumnal flavors, a side of spiced apples from this apple crumble cheesecake would be divine. For a truly over-the-top experience, serve it alongside a warm Milky Way brownie.
Frequently Asked Questions
While a springform pan is recommended for easy removal and that iconic tall side profile, you can use a deep cake pan lined with parchment paper, though removal will be much more difficult.
Yes. Room temperature cream cheese and eggs emulsify properly, creating a smooth batter. Cold ingredients result in a lumpy texture that is impossible to smooth out without over-mixing.
The cheesecake is done when the edges are set and slightly puffed, but the center 2-3 inches still has a ‘jiggle’ similar to firm Jell-O when the pan is gently shaken.
New York style cheesecake is characterized by its heavy use of cream cheese and the addition of heavy cream or sour cream (and often cornstarch), resulting in a much denser, richer, and smoother texture than other regional varieties.
Cracks are usually caused by over-mixing, which introduces air, or by sudden temperature changes. Using a water bath and letting the cake cool slowly in the oven with the door cracked are the best ways to prevent them.
The Ultimate New York Style Cheesecake Recipe
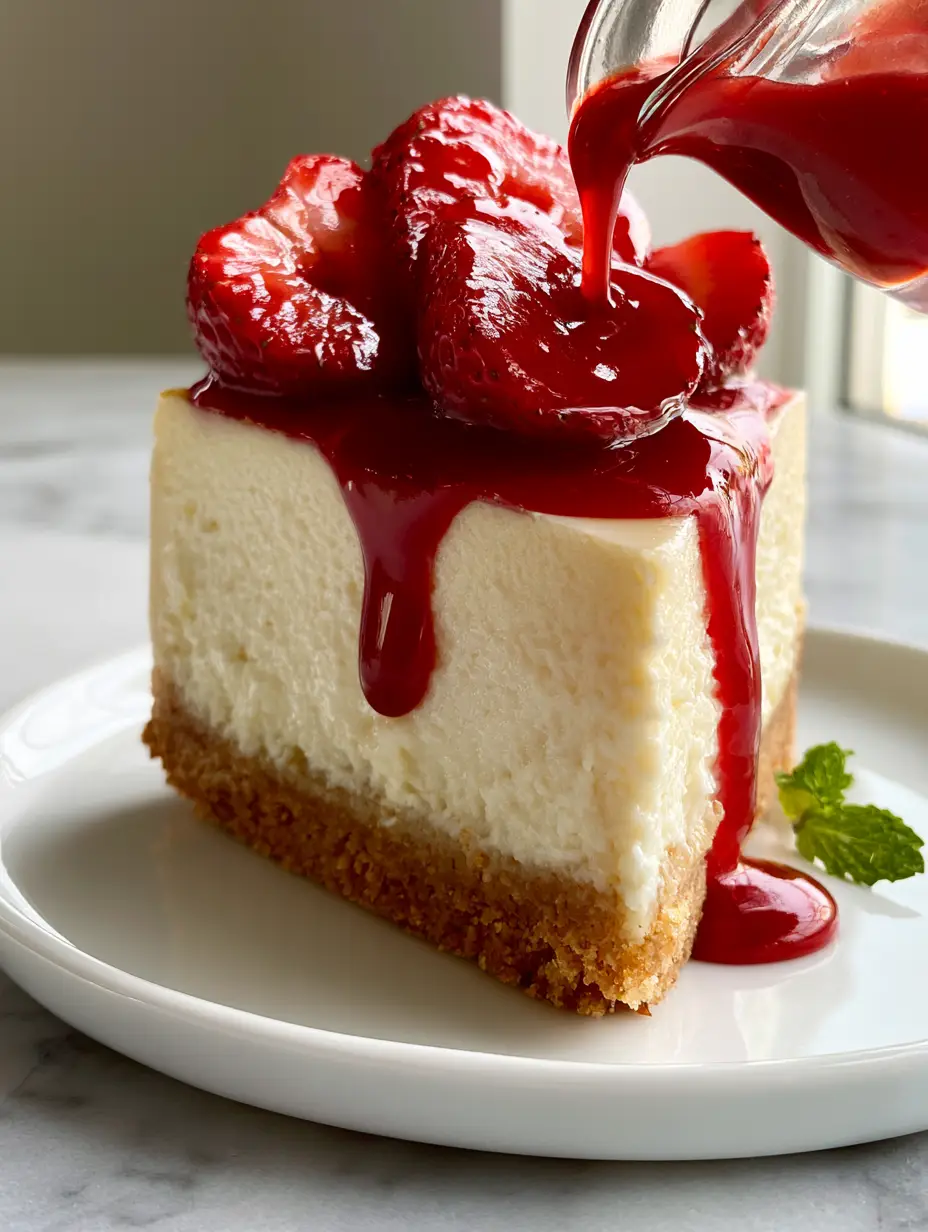
New York style cheesecake with Glossy Strawberry Reduction and Macerated Berries
Ingredients
Equipment
Method
- Combine crumbs, butter, sugar, and salt. Press firmly into a 9-inch springform pan to create a 1/2 inch thick base.
- Bake at 350°F (175°C) for 10 minutes. Remove and cool completely.
- Beat cream cheese and sugar on low speed until smooth. Mix in cornstarch, vanilla, and lemon juice.
- Add eggs one at a time, followed by the heavy cream, stirring just until incorporated.
- Wrap pan in foil. Place in roasting pan with 1 inch of boiling water.
- Bake at 325°F (160°C) for 75-90 minutes until the edges are set and center jiggles slightly.
Notes
Chill for at least 8 hours before slicing with a hot, clean knife.
Join the Karen Cooks Community!
Did your cheesecake turn out with that perfect, crack-free ivory finish? I want to see your results! Post a photo of your tall, thick slice and tag me. This New York style cheesecake is a labor of love, but the “wow” factor is worth every minute of prep.
For more professional baking tips and visual recipe blueprints, follow me on Pinterest and subscribe to our weekly newsletter. Don’t forget to share this recipe with your fellow dessert enthusiasts!