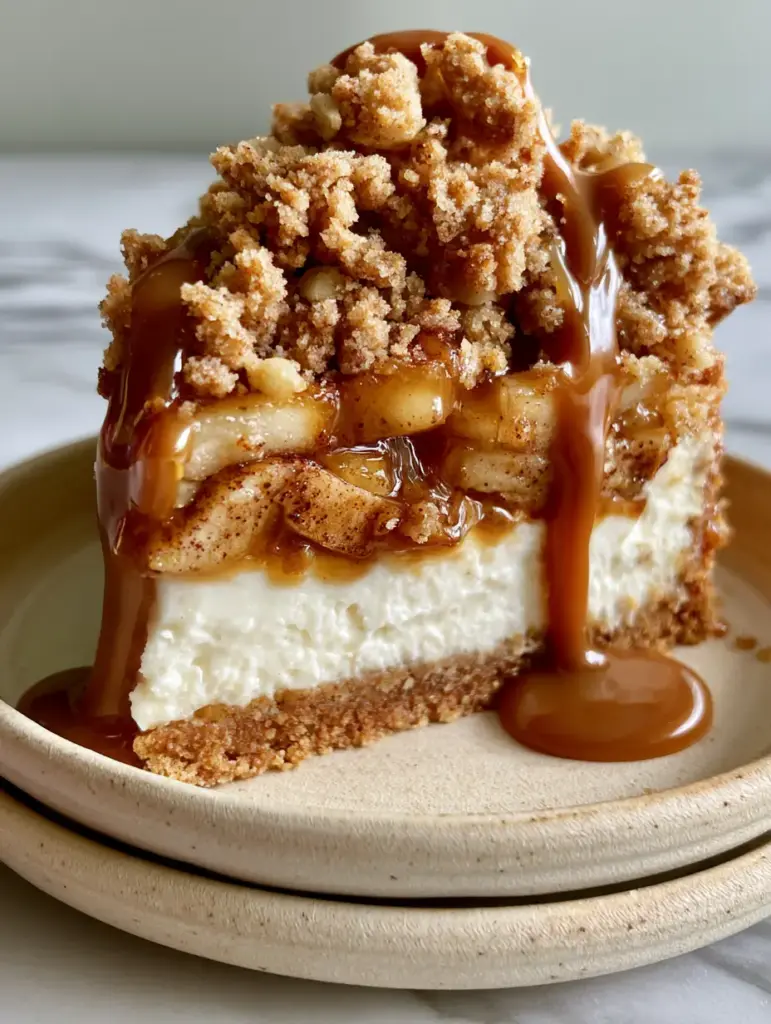
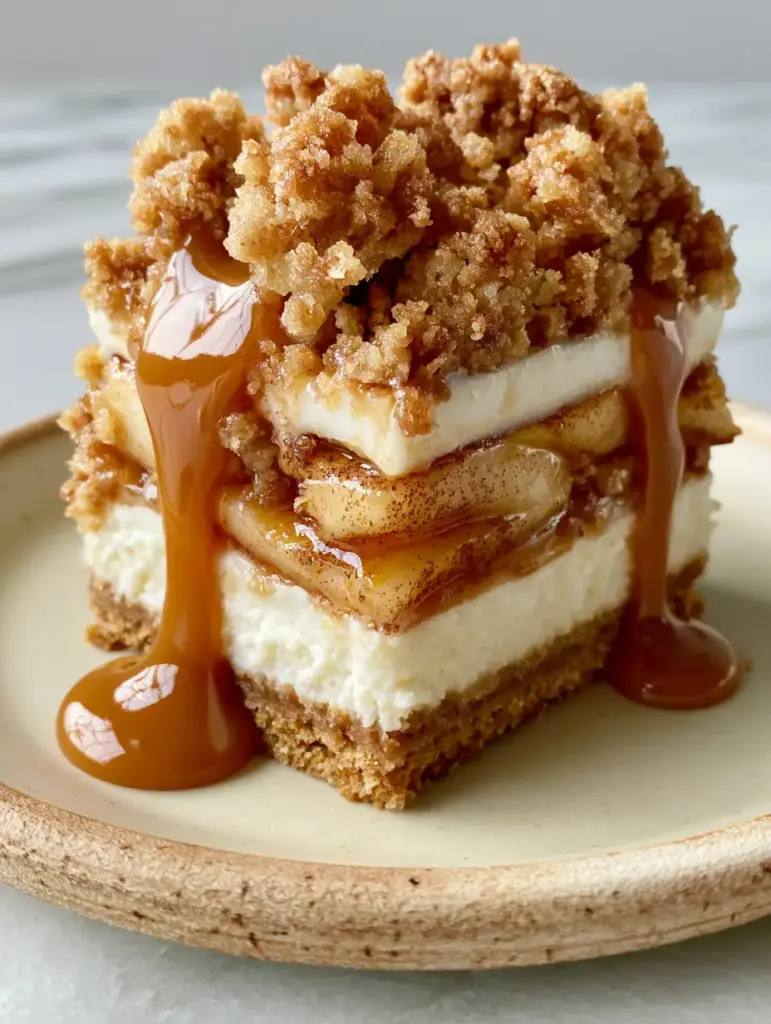
Imagine the soft, warm natural afternoon sunlight from a side window catching the glistening edges of a thick, decadent slice of apple crumble cheesecake. This isn’t just a dessert; it is a multi-sensory experience that combines the architectural integrity of a New York-style bake with the cozy, rustic charm of a deep-dish apple pie.
Every forkful reveals immaculate physical layers that tell a story of culinary precision and comfort. From the crisp, golden-brown graham cracker crust to the heavy, crunchy brown sugar crumble topping, this recipe is designed to be the crown jewel of your dessert repertoire.
Whether you are hosting a sophisticated dinner party or simply craving a bakery-style treat at home, this apple crumble cheesecake delivers a professional result. The secret lies in the contrast between the velvety white cream cheese and the tender, spiced cinnamon apple slices glistening in their own amber juice.
Why This Apple Crumble Cheesecake Is a Total Showstopper
- Structural Perfection: Unlike messy crisps, this cheesecake maintains distinct, immaculate layers that look stunning on a rustic cream-colored ceramic plate.
- Texture Contrast: You get the crunch of the graham cracker, the silkiness of the cream, the snap of the tender apples, and the sandy grit of the brown sugar crumble.
- The Amber Glow: By pre-sautéing the apples, we create a natural amber juice that prevents the cheesecake from becoming watery while adding a glossy visual appeal.
- The Professional Finish: A generous, thick drizzle of warm, glossy caramel sauce cascades down the sides, pooling slightly on the plate for that “food stylist” look.
The Anatomy of the Ultimate Layered Cheesecake
To achieve the result seen in high-end food photography, we must understand the role of every ingredient. This apple crumble cheesecake relies on foundational science to ensure the layers stay separated and the textures remain distinct.
For the Golden-Brown Graham Cracker Crust:
You will need 2 cups (200g) of finely crushed graham cracker crumbs. This provides the structural base that supports the heavy layers above. Mixing this with 6 tbsp (85g) of melted unsalted butter ensures the crust is crisp and doesn’t crumble prematurely when sliced.
For the Velvety White Cream Cheese Layer:
We use 32 oz (900g) of full-fat brick cream cheese, softened to room temperature. This is the “canvas” of the dish, providing a rich, tangy counterpoint to the sweet fruit. Adding 1 cup (240ml) of heavy cream or sour cream ensures the texture remains velvety and smooth rather than dense.
For the Spiced Cinnamon Apple Middle Layer:
Three large (approx. 500g) Granny Smith apples provide the necessary tartness. We toss them in 1 tsp (5g) of ground cinnamon and a pinch of nutmeg to create that iconic spiced aroma that fills the kitchen as it bakes.
For the Heavy Brown Sugar Crumble Topping:
A mix of 1 cup (125g) all-purpose flour and 1/2 cup (100g) packed brown sugar creates a rugged, textured landscape on top. This layer must be “heavy” to provide the satisfying crunch that distinguishes this from a standard New York-style cheesecake.
For the Warm Glossy Caramel Drizzle:
While you can use store-bought, a homemade salted caramel adds a professional touch. Much like the finish on a turtle cheesecake, the caramel should be thick enough to cascade slowly rather than run off the slice.
Essential Tools for Bakery-Quality Results
Achieving the “handheld smartphone photo” aesthetic requires more than just good ingredients; you need the right gear. A 9-inch (23cm) springform pan is non-negotiable for releasing the cheesecake without damaging the crust.
An electric hand mixer or stand mixer is required to aerate the cream cheese, ensuring there are no lumps in your velvety white layer. Finally, a sharp chef’s knife dipped in hot water is the secret to getting those perfectly clean, immaculate slices shown in the visual blueprint.
Mastering the Golden-Brown Graham Cracker Base
Pre-Baking for Maximum Crunch
To avoid a soggy bottom, combine your crumbs, sugar, and melted butter until the mixture feels like wet sand. Press it firmly into the bottom and 1 inch (2.5cm) up the sides of your pan.
Bake the crust at 350°F (175°C) for exactly 10 minutes. You are looking for a light toasted aroma and a visual change to a deeper golden-brown; this “sets” the crust so it stays crisp under the moist cheesecake filling.
Preparing the Glistening Spiced Apple Layer
The Secret to Tender, Non-Watery Fruit
One of the biggest mistakes in an apple crumble cheesecake is putting raw apples directly into the batter. This leads to a watery mess that ruins the velvety white layer.
Instead, peel and slice your apples into thin wedges. Sauté them in a pan with 1 tbsp (14g) of butter and your spices for 5-7 minutes until they are tender but still hold their shape. This releases the excess moisture and creates that glistening amber juice mentioned in the Midjourney prompt.
Creating the Velvety White Cheesecake Filling
Emulsifying for Smoothness
Beat the softened cream cheese and sugar on medium speed until completely smooth. Add your eggs one at a time, beating on low speed just until combined; over-mixing at this stage incorporates too much air, which causes cracking.
Fold in 1 tsp (5ml) of vanilla extract. The result should be a thick, pourable cream that looks like white satin. This layer acts as the pillow for our spiced apples.
Building the Heavy Brown Sugar Crumble
Achieving the Perfect Clump
For a truly “crunchy” topping, use cold, cubed butter. Work the butter into the flour and brown sugar using a pastry cutter or your fingers until large, pea-sized crumbs form.
Do not over-work the dough into a paste. You want distinct “nuggets” of crumble that will brown unevenly in the oven, creating beautiful highlights and shadows in the afternoon sunlight.
Assembly and the Visual Layering Process
Architecting the Slice
Pour half of the cream cheese batter over the pre-baked crust. Carefully arrange the sautéed cinnamon apple slices in an even layer, ensuring they are submerged slightly in the batter.
Top with the remaining cheesecake batter, then generously sprinkle the brown sugar crumble over the entire surface. This ensures the apples are “sandwiched” in the middle, creating that immaculate internal layer when the apple crumble cheesecake is sliced.
The Low and Slow Bake
Bake at 325°F (160°C) for 60-70 minutes. The edges should be set and slightly puffed, but the center should still have a slight “jiggle” when shaken gently.
Turn off the oven and prop the door open with a wooden spoon for one hour. This gradual cooling prevents the velvety white layer from pulling away from the golden-brown crust, maintaining the structural integrity of the slice.
Pro Tip: For the best flavor development, chill the cheesecake for at least 6 hours, or ideally overnight. This allows the spiced apple juices to meld with the cream cheese.
Expert Tips for Success
- Room Temperature Ingredients: Ensure your cream cheese and eggs are at room temperature to avoid a lumpy batter.
- Water Bath Optional: If you are worried about cracks, wrap the pan in foil and place it in a larger pan with 1 inch of hot water. However, the crumble topping is very forgiving and hides most surface imperfections!
- The Clean Cut: For the photo-ready look, wipe your knife clean after every single cut. This keeps the white cream cheese layer from smearing onto the amber apples.
- Caramel Temperature: Ensure your caramel sauce is warm, not hot. If it’s too hot, it will melt the cheesecake; if it’s too cold, it won’t “cascade” down the sides.
Serving Suggestions and Pairings
This dessert is a powerhouse on its own, but it pairs beautifully with other fall-inspired treats. If you love the combination of fruit and spice, try serving this alongside our apple pie cupcakes for a dessert spread.
For those who prefer a darker, saltier profile, a drizzle of the same caramel used here works wonders on a salted caramel cheesecake. If you have extra apples, you might even consider making a batch of caramel apple cupcakes for the kids!
Frequently Asked Questions
Yes, you can! Just ensure it is a high-quality, thick caramel. Warm it slightly before drizzling so it cascades beautifully down the sides of the slice.
Use a long, sharp knife and dip it in hot water before each cut. Wipe the blade clean between every slice to keep the layers looking immaculate and distinct.
The secret is to pre-sauté the sliced apples. This releases excess moisture and creates a thick amber juice, ensuring the cheesecake layer remains velvety and firm.
Granny Smith apples are highly recommended. Their tartness balances the sweetness of the cheesecake and they hold their shape perfectly during the baking process.
Cracking is usually caused by over-mixing eggs or sudden temperature changes. However, the heavy crumble topping is excellent for hiding any small surface cracks!
The Ultimate Apple Crumble Cheesecake Recipe
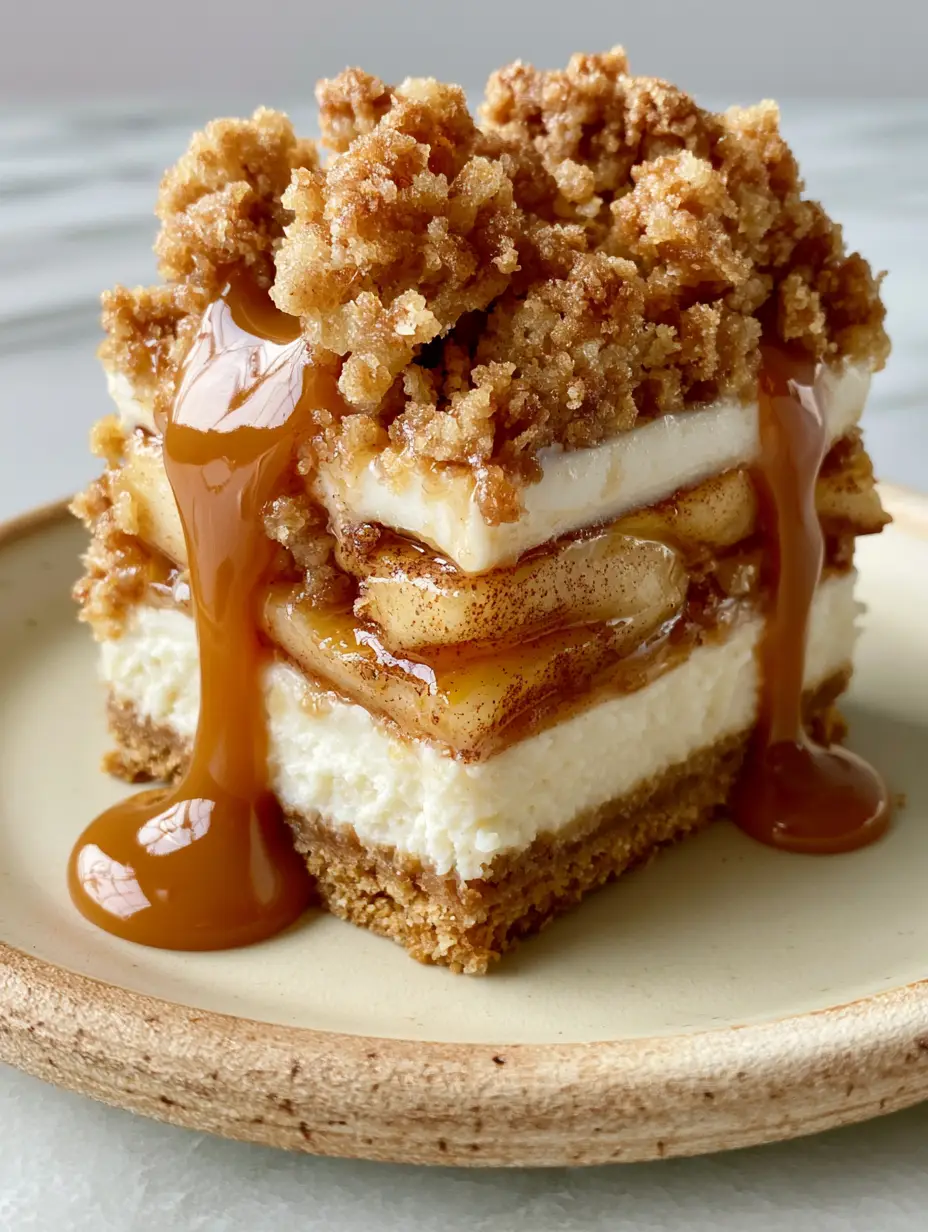
Apple Crumble Cheesecake with Warm Glossy Caramel Drizzle
Ingredients
Equipment
Method
- Combine graham cracker crumbs and melted butter. Press firmly into a 9-inch springform pan.
- Bake at 350°F (175°C) for 10 minutes until golden-brown and fragrant.
- Sauté sliced apples with cinnamon and butter for 5-7 minutes until tender and glistening in amber juice.
- Pour half the batter over crust, layer the apples, then cover with remaining batter and crumble topping.
- Bake at 325°F (160°C) for 70 minutes. Cool slowly to prevent cracking.
Notes
Wipe your knife with a hot damp cloth between slices for immaculate layers.
Closing & Call to Action
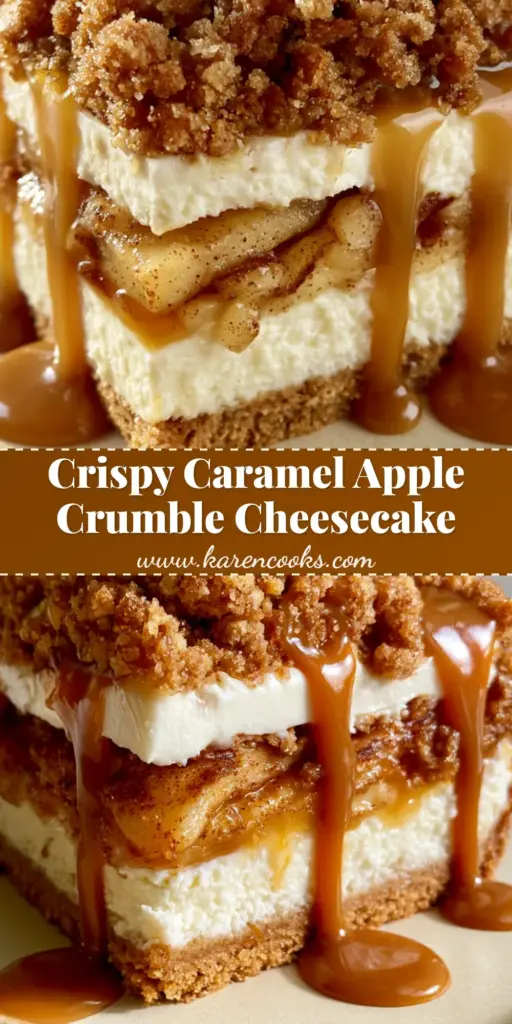
This apple crumble cheesecake is the ultimate marriage of texture and flavor. With its crisp crust, velvety filling, and crunchy topping, it is a recipe that looks just as good as it tastes. The warm glossy caramel sauce is the final touch that elevates it from a simple bake to a professional-grade masterpiece.
If you enjoyed this recipe, please leave a comment below and let us know how your layers turned out! Don’t forget to snap a photo and share it with us on Pinterest so we can see your beautiful creations.
For more decadent dessert inspiration, be sure to sign up for our newsletter and follow Karen Cooks Official for weekly updates from our kitchen to yours!