There is a specific, almost magical moment in baking when the scent of toasted hazelnuts begins to waft from a skillet of melting butter. That aroma signals the start of the ultimate baking journey: creating the perfect caramel chocolate chip cookies. These aren’t just your standard bakery fare; they are a masterclass in texture and flavor contrast, designed specifically for those who crave a professional-grade dessert at home.
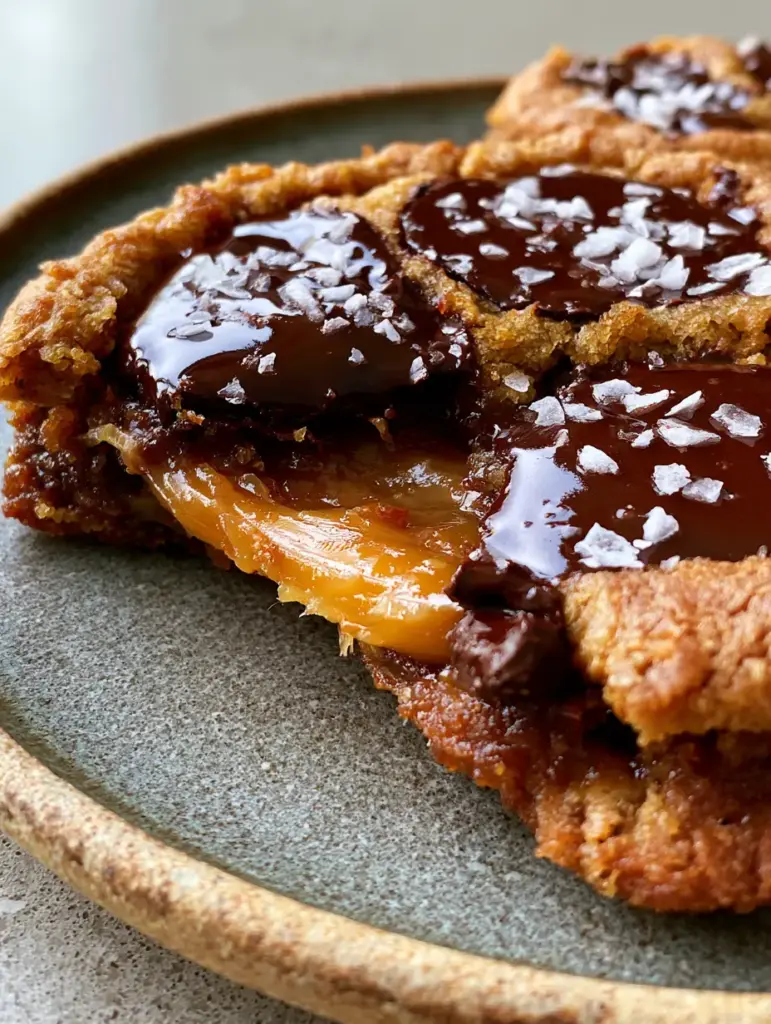
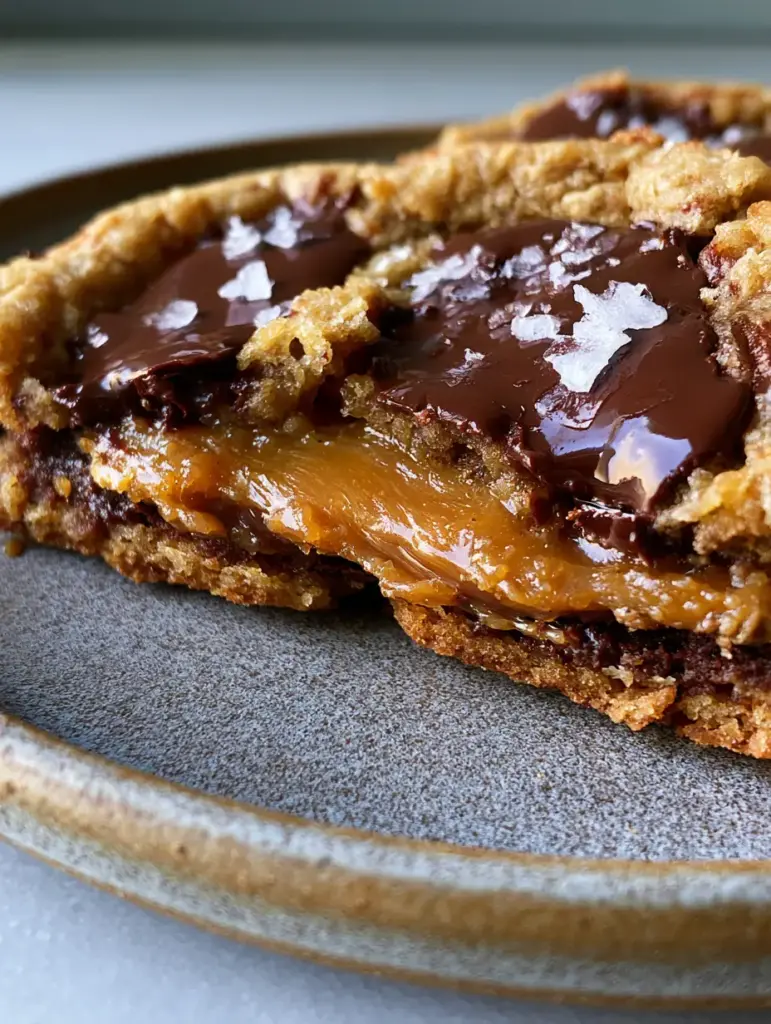
When you break one of these cookies in half, you are met with a thick, golden-amber caramel pull that stretches between the two halves like a glistening bridge. This visual is anchored by deep, dark chocolate pools and a crinkled, golden-brown surface that shimmers with flakes of Maldon sea salt. Every element of this recipe is calibrated to deliver that exact handheld smartphone photo-ready result you’ve seen on high-end culinary feeds.
The secret lies in the forensic details—the way the brown butter interacts with the sugars to create a toffee-like base, and the specific method of stuffing the dough to ensure the caramel remains molten. Whether you are looking for perfect chocolate chip cookies or a more decadent twist on a classic, this recipe provides the blueprint for success. Let’s dive into the science of the perfect “snap and stretch.”
Why These Are the Absolute Best Caramel Chocolate Chip Cookies You Will Ever Bake
- The Brown Butter Foundation: By browning the butter (beurre noisette), we introduce toasted, nutty notes that perfectly complement the golden-amber caramel center.
- Multi-Dimensional Chocolate: We move beyond standard chips, using chopped dark chocolate bars to create those signature glossy, wide pools of melted cocoa.
- The Signature Caramel Pull: Using a specific stuffing technique ensures a thick, stretchy, golden-amber center that remains soft even after the cookies have cooled slightly.
- Textural Perfection: A high-sided, thick cookie base with a slightly crinkled, textured surface provides the ideal vessel for the gooey interior.
- Salted Finish: Pristine white flakes of Maldon sea salt cut through the richness, elevating the dark chocolate and sweet caramel to a professional flavor profile.
The Anatomy of Ingredients: Every Component Explained
Unsalted Butter (2 sticks / 226g): We begin with high-quality unsalted butter to control the sodium levels. Browning this butter is non-negotiable, as it provides the moisture-less fat and toasted milk solids that define the cookie’s “golden-brown” visual appeal.
Granulated Sugar (3/4 cup / 150g) and Dark Brown Sugar (1 cup / 200g): The combination of these two is critical. The dark brown sugar, rich in molasses, provides the chew and the deep color, while the granulated sugar ensures those slightly crisp, crinkled edges.
All-Purpose Flour (2 ¼ cups / 280g): This provides the structural integrity needed to hold a heavy caramel center. Too little flour and the caramel will leak; too much and the cookie becomes cakey rather than chewy.
Large Eggs (2, at room temperature): Eggs act as the primary emulsifier. Using room-temperature eggs ensures they incorporate seamlessly into the brown butter and sugar mixture without curdling the fats.
Dark Chocolate Bars (8 oz / 225g, 70% cocoa): By hand-chopping your chocolate, you get varying sizes of “pools.” The high cocoa butter content in bar chocolate allows it to melt more fluidly than stabilized chips.
Soft Caramel Candies (12-15 pieces): Choose a high-quality, soft-set caramel. If the caramel is too hard, it won’t achieve that “stretchy golden-amber pull” described in our visual blueprint.
Maldon Sea Salt (for finishing): These large, pyramid-shaped flakes provide a clean saltiness and a beautiful “pristine white” visual contrast against the dark chocolate pools.
Baking Soda (1 tsp / 5g) and Cornstarch (1 tsp / 3g): Baking soda aids in browning and lift, while cornstarch is our “secret weapon” for keeping the cookies thick and tender rather than spreading too thin.
Essential Equipment for Professional Results
To achieve the “textured, slightly crinkled surface” and the “thick” profile seen in our Midjourney-inspired visual, you need the right tools. A heavy-bottomed stainless steel skillet is best for browning butter because it allows you to see the color change clearly. A large cookie scoop (approx. 3 tbsp capacity) ensures each cookie is identical in size, which is vital for even baking.
You will also need a rustic, matte grey ceramic plate for the ultimate serving presentation. To capture that “handheld smartphone photo” look, ensure you have a clean, neutral kitchen counter and access to soft, natural daylight. High-quality parchment paper or a silicone baking mat will prevent the caramel from sticking if any should happen to peek through the bottom.
Step-by-Step Instructions to Mastering the Caramel Pull
1. The Art of the Beurre Noisette (Brown Butter)
In a medium saucepan, melt the 2 sticks (226g) of butter over medium heat. Once melted, the butter will begin to foam and pop; this is the water evaporating. Stir constantly with a heat-proof spatula. Watch for the “visual cue”: when small brown specks (toasted milk solids) appear at the bottom and the butter smells like toasted nuts, immediately remove it from the heat and pour into a large, heat-safe bowl.
2. Building the Flavor Base
Add the granulated sugar (150g) and dark brown sugar (200g) to the warm brown butter. Whisk vigorously for 2 minutes. The residual heat from the butter will slightly melt the sugars, creating a shiny, toffee-like texture. Add the eggs and 1 tbsp (15ml) of vanilla extract, whisking until the batter lightens in color and becomes smooth and glossy.
3. Incorporating Dry Ingredients
Sift in the flour (280g), baking soda (5g), and cornstarch (3g). Use a spatula to fold the ingredients together until just a few streaks of flour remain. Fold in 3/4 of your chopped dark chocolate (170g). Do not overmix, as this develops gluten and will make your caramel chocolate chip cookies tough instead of tender.
4. The Stuffing Technique
Scoop a generous 3 tbsp (approx. 60g) of dough. Flatten it slightly in your palm. Place one soft caramel candy in the center. Carefully wrap the dough around the caramel, ensuring there are no gaps or thin spots. If the caramel is exposed, it will leak out and burn on the tray. Roll the ball between your palms until smooth.
5. Chilling for Texture
This is the most critical step for the “thick, golden-brown” look. Place the dough balls on a tray and refrigerate for at least 2 hours, or ideally overnight. Chilling solidifies the fats, ensuring the cookie doesn’t spread too fast, allowing the crinkled surface to form while the center stays gooey.
6. Baking and the Salted Finish
Preheat your oven to 350°F (175°C). Place the chilled dough balls on a parchment-lined sheet, spaced 3 inches apart. Press the remaining dark chocolate chunks into the tops of the balls. Bake for 11-13 minutes. Look for the “sensory cue”: the edges should be set and golden-brown, but the center should still look slightly underdone and soft. Immediately upon removing from the oven, sprinkle generously with Maldon sea salt.
Expert Tips for Bakery-Style Success
- The “Pan Bang” Method: If your cookies aren’t looking crinkled enough, gently bang the baking sheet on the oven rack halfway through baking. This collapses air pockets and creates those beautiful ripples.
- Size Matters: For the most dramatic caramel pull, make the cookies large. Smaller cookies don’t have enough dough “insulation” to keep the caramel in its liquid, stretchy state.
- Chocolate Placement: Always save some chocolate chunks to press into the top *after* rolling. This ensures the “glossy pools” are visible on the surface rather than hidden inside.
- Caramel Choice: Avoid “hard” caramels. Look for “soft” or “chewy” varieties. If you use homemade caramel, ensure it is cooked to the firm-ball stage so it doesn’t dissolve into the dough.
Maximizing Your Cookie Experience: Storage and Pairings
To maintain that “warm soft center,” these cookies are best enjoyed within 20 minutes of baking. However, they stay delicious for up to 4 days when stored in an airtight container at room temperature. To revive the caramel pull after the first day, microwave the cookie for 8-10 seconds.
If you love this flavor profile, you might also enjoy our salted caramel cheesecake or perhaps a batch of milky way brownies for more caramel-filled goodness. These cookies pair exceptionally well with a cold glass of whole milk or a bitter espresso to balance the sweetness of the caramel.
What to Serve with Caramel Chocolate Chip Cookies
While these cookies are a meal in themselves for any dessert lover, they are part of a broader world of indulgent treats. If you are hosting a dessert party, consider serving these alongside banana chocolate muffins for a brunch-to-dessert transition. For a truly decadent spread, pair them with a slice of chocolate pie recipe to offer various textures of cocoa.
If you’re looking for something fruitier to cut through the richness, our caramel apple cupcakes provide a tart contrast that complements the “golden-amber caramel” theme perfectly.
Frequently Asked Questions
Absolutely. You can freeze the stuffed dough balls for up to 3 months. Bake them directly from frozen, adding 2-3 minutes to the total baking time for the same gooey caramel center.
You can, but chopped dark chocolate bars are recommended for those ‘glossy pools’ seen in the photos. Chips contain stabilizers that prevent them from melting into the wide, fluid pools that characterize this recipe.
Yes! Browning the butter removes water and adds a toasted, nutty depth of flavor that complements the caramel. It is the key to the professional ‘golden-brown’ taste and appearance.
The secret is using high-quality soft caramels and ensuring the dough is chilled before baking. This prevents the caramel from overheating and absorbing into the flour, maintaining its stretchy, golden-amber texture.
This usually happens if the dough is too thin around the caramel or if there’s a small gap in the seal. Ensure you wrap the caramel piece fully in the dough ball and chill the cookies thoroughly before they hit the oven.
The Ultimate Caramel Chocolate Chip Cookies Recipe
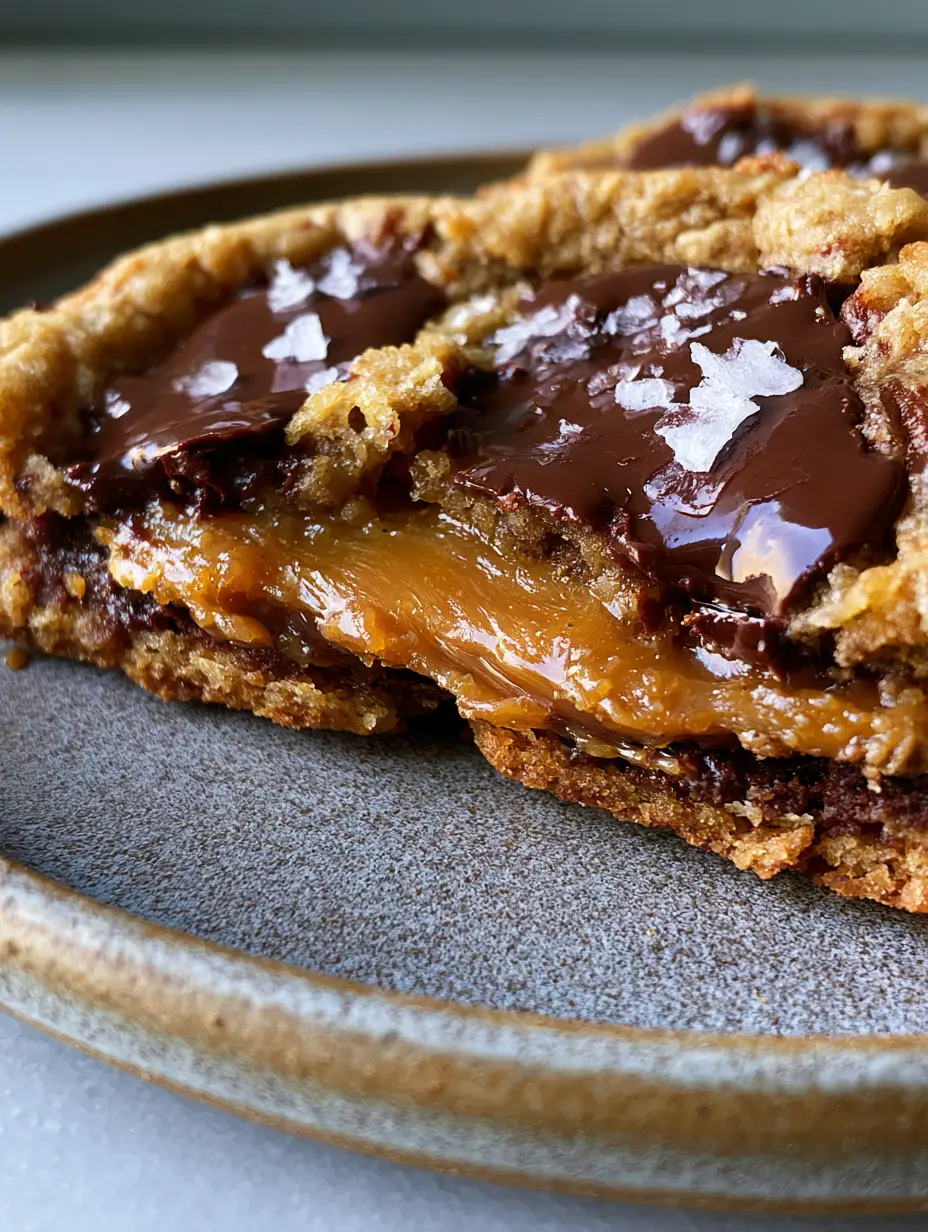
Caramel Chocolate Chip Cookies with Brown Butter and Sea Salt
Ingredients
Equipment
Method
- Melt butter in a skillet over medium heat. Stir until it foams, pops, and develops brown specks with a nutty aroma. Remove and pour into a bowl.
- Whisk brown butter with granulated and brown sugars for 2 minutes until glossy. Add eggs and vanilla, whisking until smooth.
- Fold in flour, baking soda, and cornstarch. Add 3/4 of the chopped dark chocolate, mixing until just combined.
- Scoop 3 tbsp of dough, flatten, place a caramel in the center, and seal tightly. Roll into a ball.
- Refrigerate dough balls for at least 2 hours (or overnight) to prevent spreading.
- Preheat oven to 350°F (175°C). Press remaining chocolate into tops. Bake for 11-13 minutes until edges are golden. Top with Maldon salt.
Notes
Use high-quality bar chocolate rather than chips for the best melting pools.
Closing & Call to Action
Mastering the caramel chocolate chip cookies is a rite of passage for any serious home baker. The combination of browned butter, molten dark chocolate, and that signature stretchy caramel center creates a sensory experience that is as beautiful as it is delicious. We hope this recipe helps you capture that perfect “smartphone photo” moment in your own kitchen.
Did you get that perfect caramel pull? We want to see it! Leave a comment below with your results or tag us in your photos. Don’t forget to follow karen_cooks_official on Pinterest for more visually stunning recipe inspiration and share this post with your fellow chocolate lovers!