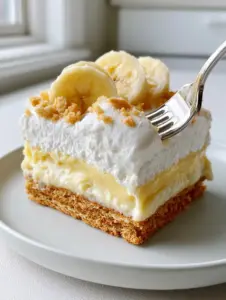
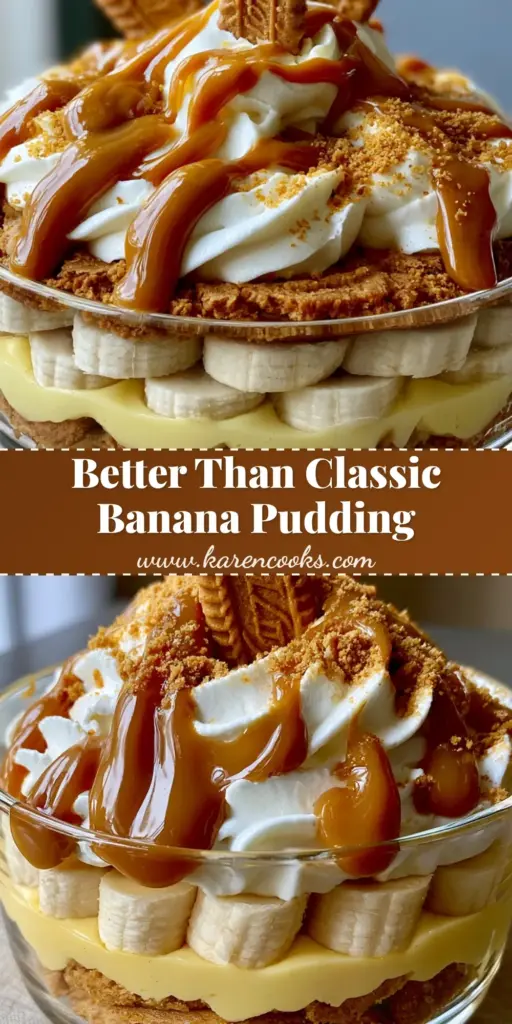
The biscoff banana pudding is the ultimate evolution of the classic Southern trifle, merging the deep, caramelized warmth of Belgian Speculoos with the nostalgic comfort of a creamy custard. This isn’t just another dessert; it is a multi-layered sensory experience featuring thick, pale-yellow vanilla bean custard and rows of perfectly sliced bananas.
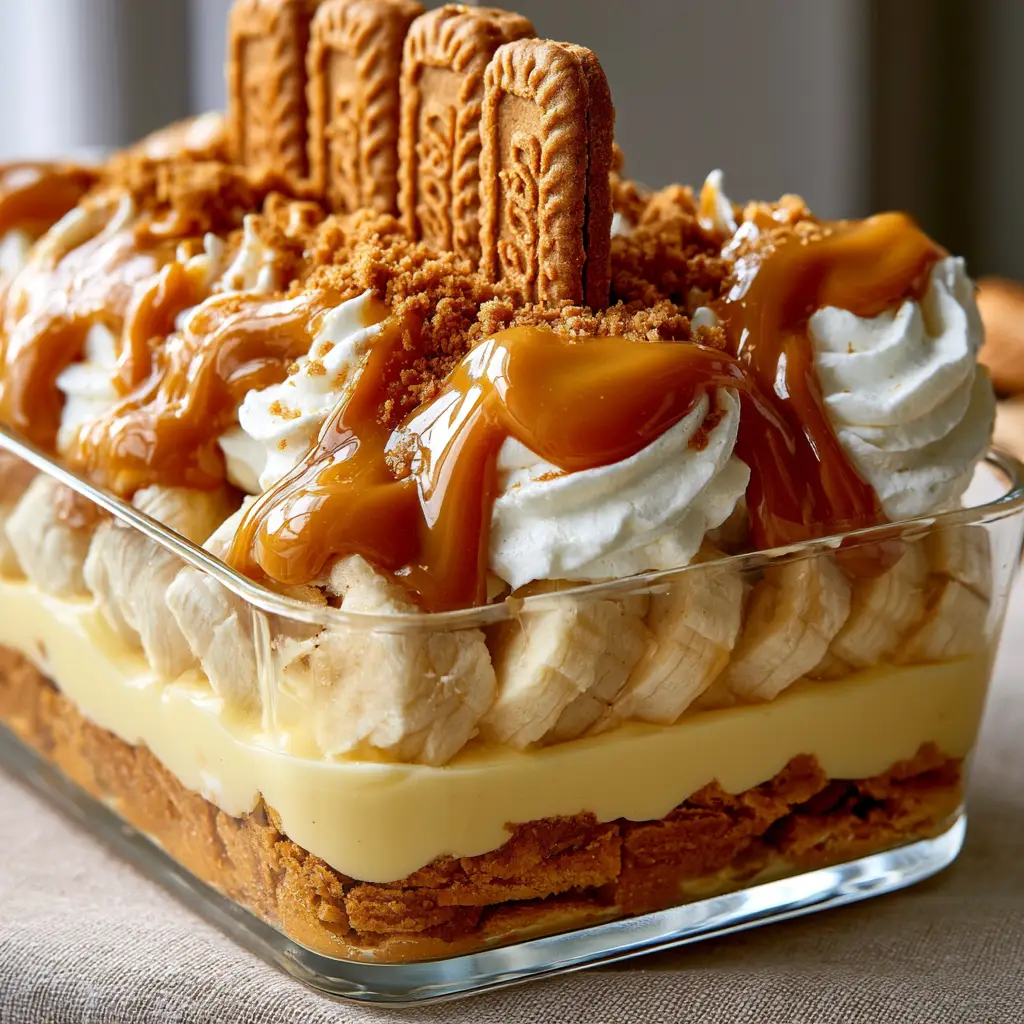
Imagine diving your spoon through a cloud of stabilized whipped cream, hitting a stream of glossy, amber-colored warm cookie butter, and finally reaching the crunchy, spiced foundation of crushed Lotus Biscoff cookies. Every bite offers a contrast of textures that makes this premium version stand out from any store-bought alternative.
Whether you are hosting a summer dinner party or looking for a show-stopping holiday treat, this biscoff banana pudding delivers a professional, “handheld smartphone photo” aesthetic that looks as good as it tastes. Let’s break down the culinary science behind achieving those perfect layers and that signature glossy finish.
Why This Biscoff-Infused Trifle Is the Ultimate Crowd-Pleaser
- Visual Masterpiece: Features distinct, neat rows of fresh sliced bananas and artisanal whipped cream swirls that mimic a high-end bakery display.
- Flavor Complexity: The inclusion of real vanilla bean flecks in the custard balances the intense cinnamon and ginger notes of the Biscoff cookies.
- Textural Harmony: Combines the “cookie dust” fine crunch with whole vertical cookies and a “glossy warm cookie butter drizzle” for a sophisticated mouthfeel.
- No-Bake Ease: While the custard requires stovetop attention, the rest of the assembly is a simple, meditative layering process.
The Speculoos Pantry: Essential Ingredients for Success
Lotus Biscoff Cookies: You will need both crushed cookies for the structural base and whole cookies for the vertical garnish. These provide the iconic caramelized “Speculoos” flavor profile that defines the dish.
Whole Milk and Heavy Cream: A 2:1 ratio of milk (480ml) to cream (240ml) creates a custard that is rich enough to hold the weight of the bananas without being cloying. This ensures the “thick pale-yellow” appearance described in the visual blueprint.
Vanilla Bean Paste or Whole Pod: Using real vanilla beans provides the tiny black specks that signal a premium, from-scratch recipe. If using a pod, ensure you scrape the seeds thoroughly into the warming milk.
Egg Yolks: These are the “invisible” emulsifiers that provide the custard with its signature golden hue and velvety structure. Use large, room-temperature yolks for the smoothest integration.
Cornstarch: This serves as our primary thickening agent, ensuring the pudding sets firmly enough to support the heavy drizzle of cookie butter. It provides a clean flavor that allows the vanilla to shine.
Ripe but Firm Bananas: Look for bananas with a few sugar spots on the skin but no bruising. They must be firm enough to create “neat rows” when sliced, providing a clean visual line in the glass dish.
Biscoff Spread (Cookie Butter): This is melted down to create the “glossy, amber-colored” drizzle. Use the “creamy” variety rather than “crunchy” for the smoothest pour.
Tools Required for Professional Layering
To achieve the “sleek glass dish” look, you will need a straight-sided glass trifle bowl or individual parfaits. A heavy-bottomed saucepan is non-negotiable for the custard to prevent scorching the milk solids.
A fine-mesh sieve is your best friend here; straining the custard after cooking removes any accidental bits of cooked egg, ensuring a perfectly smooth texture. Finally, a piping bag fitted with a large star tip is essential for those signature whipped cream swirls.
How to Make the Perfect Vanilla Bean Custard
Infusing the Dairy and Tempering Yolks
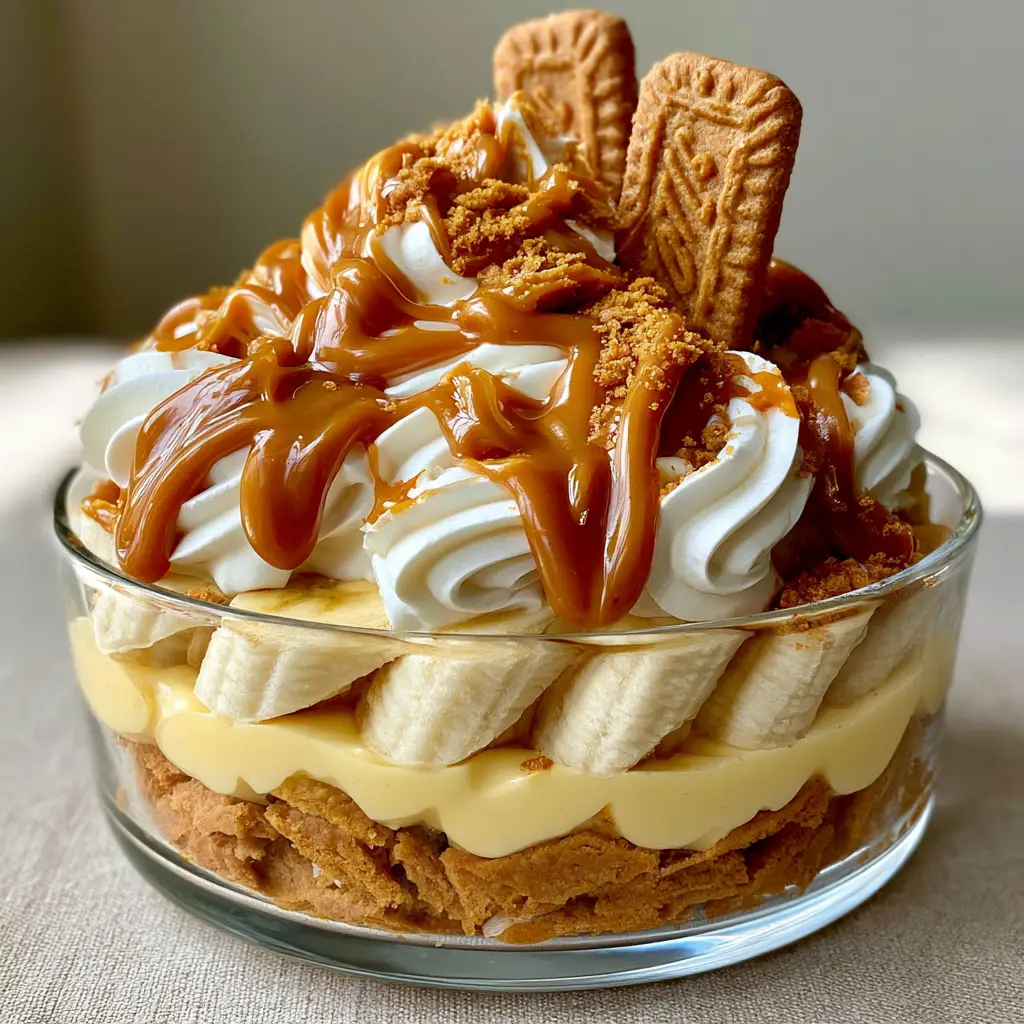
Start by combining 2 cups (480ml) of whole milk and 1 cup (240ml) of heavy cream in your saucepan. Whisk in the seeds of 1 vanilla bean (or 1 tbsp (15ml) vanilla bean paste) and heat over medium until small bubbles form around the edges.
In a separate bowl, whisk 4 large egg yolks with ¾ cup (150g) of granulated sugar and ¼ cup (30g) of cornstarch. Slowly ladle about ½ cup (120ml) of the hot milk into the egg mixture while whisking constantly; this “tempering” prevents the eggs from scrambling.
Thickening to a Glossy Finish
Pour the tempered egg mixture back into the saucepan with the remaining milk. Cook over medium-low heat, stirring continuously with a silicone spatula, until the mixture thickens into a “thick pale-yellow” custard that coats the back of a spoon.
Remove from heat and stir in 2 tbsp (30g) of unsalted butter and a pinch of fine sea salt. Pass the custard through a fine-mesh sieve into a clean bowl, then press plastic wrap directly onto the surface to prevent a skin from forming. Chill for at least 4 hours.
Assembling the Biscoff Banana Pudding Layers
Creating the Crunchy Foundation
Pulse 20 Lotus Biscoff cookies in a food processor until they reach a coarse crumb texture. Press about 1.5 cups (150g) of these crumbs into the bottom of your sleek glass dish to form a solid “bottom layer of crushed golden Lotus Biscoff cookies.”
Top the crumbs with a thin layer of the chilled vanilla bean custard. This acts as a “glue” for your first layer of bananas, preventing them from sliding toward the center of the dish.
The Art of the Banana Row
Peel and slice 4 large bananas into ¼ inch (6mm) rounds. Arrange them in “neat rows” against the glass, ensuring the flat side of the banana faces outward for maximum visual impact. Pour the remaining custard over the bananas, smoothing the top with an offset spatula.
For a deeper flavor profile, you might consider how this fruit-forward approach compares to a strawberry banana cheesecake salad, which uses similar fresh fruit techniques.
Finishing with Swirls and Drizzle
Whip 1 cup (240ml) of heavy cream with 2 tbsp (15g) of powdered sugar until stiff peaks form. Pipe “whipped cream swirls” across the top of the pudding. Warm ½ cup (125g) of Biscoff spread in the microwave for 20 seconds until it becomes a “glossy, amber-colored” liquid.
Generously apply the “heavy drizzle of warm cookie butter” over the cream. Finish the presentation by nestling “whole vertical Biscoff cookies” into the swirls and scattering “cookie dust” (very finely crushed cookies) over the entire surface.
Expert Tips for a Professional Result
- Prevent Browning: Toss your banana slices in a tablespoon of lemon juice before layering. The acid prevents oxidation, keeping your “neat rows” bright and fresh.
- Temperature Control: Ensure the cookie butter drizzle is warm but not hot. If it is too hot, it will melt your whipped cream swirls instantly.
- The “Set” Time: While you can eat this immediately, the biscoff banana pudding is best after 4-6 hours in the fridge. This allows the cookies to soften slightly into a cake-like texture.
- Consistency Check: If your custard is too thin, you likely didn’t cook the cornstarch long enough. It must reach a gentle boil for 1 minute to fully activate the starch.
Storage and Make-Ahead Instructions
This dessert is best enjoyed within 24 hours of assembly to maintain the contrast between the creamy custard and the crisp cookies. Store covered in the refrigerator. While the flavor remains excellent on day two, the cookies will lose their crunch and the bananas may begin to soften.
Do not freeze the biscoff banana pudding. The emulsion in the custard will break upon thawing, resulting in a watery mess that ruins the “premium” texture. For other make-ahead treats, you might enjoy these blueberry cream cheese bars which hold up beautifully in the fridge.
What to Serve with Biscoff Banana Pudding
Since this is a rich, spiced dessert, it pairs beautifully with a strong cup of dark roast coffee or a cold glass of milk. If you are building a dessert table, consider contrasting this creamy dish with the chewy texture of perfect chocolate chip cookies or the fudgy depth of brownie de chocolate.
For a fruit-themed party, this pudding complements the warm spices found in caramel apple cupcakes or even a light banana chocolate muffin for a brunch-style gathering.
Frequently Asked Questions
Yes, you can make the custard 2 days early. However, assemble the full pudding no more than 12-24 hours before serving to ensure the cookies maintain some structural crunch.
While you can, the ‘premium’ taste and thick pale-yellow texture come specifically from the homemade custard with real vanilla bean flecks. Instant mix won’t support the heavy cookie butter drizzle as well.
Toss the sliced bananas in a small amount of lemon juice before layering. This provides an acid barrier that keeps the neat rows of bananas looking fresh for up to 24 hours.
It needs at least 4 hours in the refrigerator to allow the custard to firm up and the cookie layers to soften slightly into a cake-like consistency.
For the bottom layer, use a food processor to get a uniform golden crumb. For the ‘cookie dust’ on top, crush them even finer to create a velvet-like finish.
The Ultimate Biscoff Banana Pudding Recipe
Biscoff Banana Pudding with Vanilla Bean Custard and Cookie Butter Drizzle
Ingredients
Equipment
Method
- In a saucepan, combine milk, 1 cup cream, and vanilla. Heat until steaming.
- Whisk yolks, sugar, and cornstarch. Slowly whisk in half of the hot milk to temper the eggs.
- Return mixture to the pan. Cook until thick and pale-yellow. Stir in butter and salt. Strain and chill.
- Layer crushed Biscoff cookies at the bottom of the glass dish.
- Add a layer of custard, then arrange neat rows of sliced bananas against the glass.
- Top with remaining custard. Pipe whipped cream swirls on top.
- Drizzle with warm, glossy cookie butter. Add whole cookies and cookie dust.
Notes
Use a star tip for the whipped cream to achieve the bakery-style 'swirl' look.
The Final Flourish: Share Your Creation
Mastering the biscoff banana pudding is a milestone for any home cook. The combination of the “vanilla bean custard” and that “glossy warm cookie butter drizzle” creates a dessert that tastes like it came from a professional pastry kitchen. The spiced notes of the Biscoff cookies provide a sophisticated edge that traditional wafers simply cannot match.
If you made this recipe, I would love to see your beautiful layers! Tag me in your photos and be sure to follow Karen Cooks on Pinterest for more visual recipe blueprints and culinary inspiration. Don’t forget to leave a comment below with your favorite way to use cookie butter!