There is a specific, transcendent joy found in the perfect Chocolate cake pops. It is the contrast between the audible “snap” of a tempered dark chocolate shell and the immediate, velvet-like give of a dense, fudgy interior. This isn’t just a leftover cake scrap rolled into a ball; this is a calculated piece of confectionery art designed to mimic the texture of a high-end truffle.
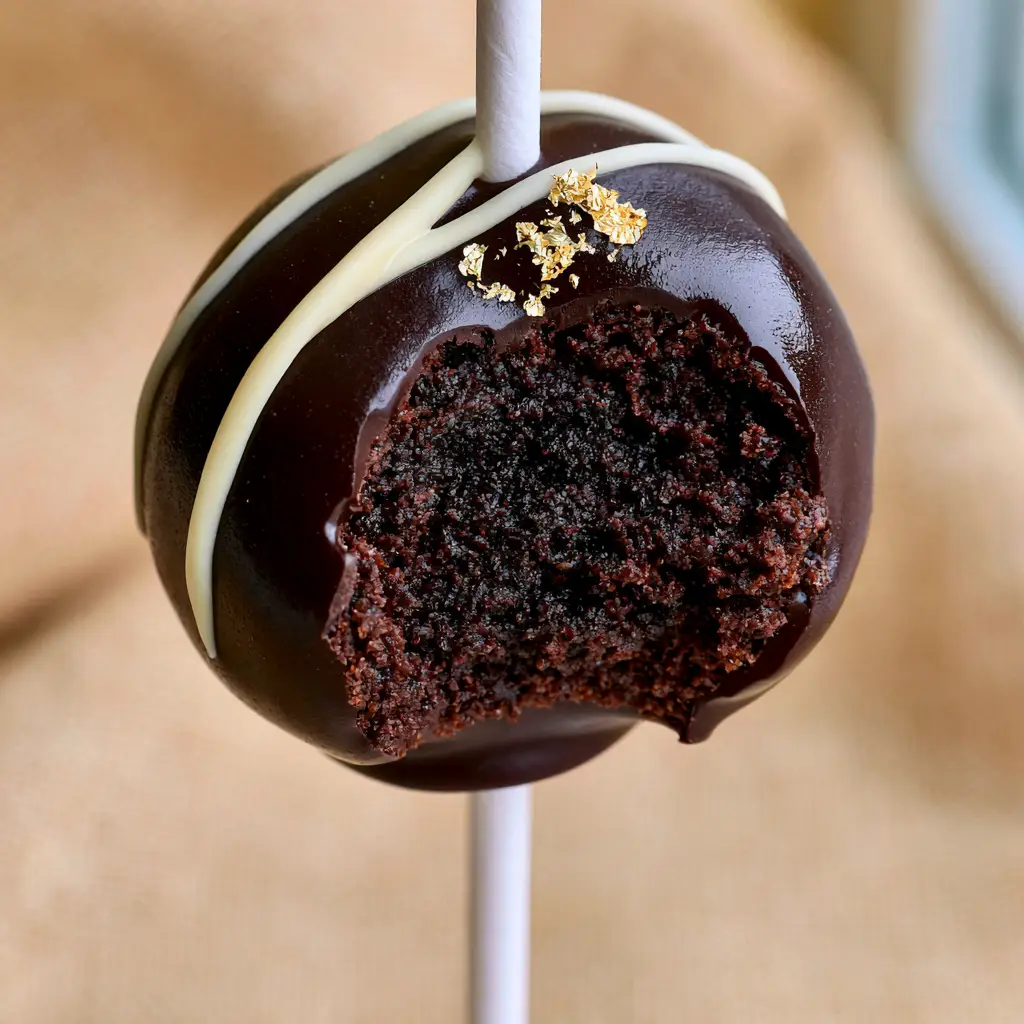
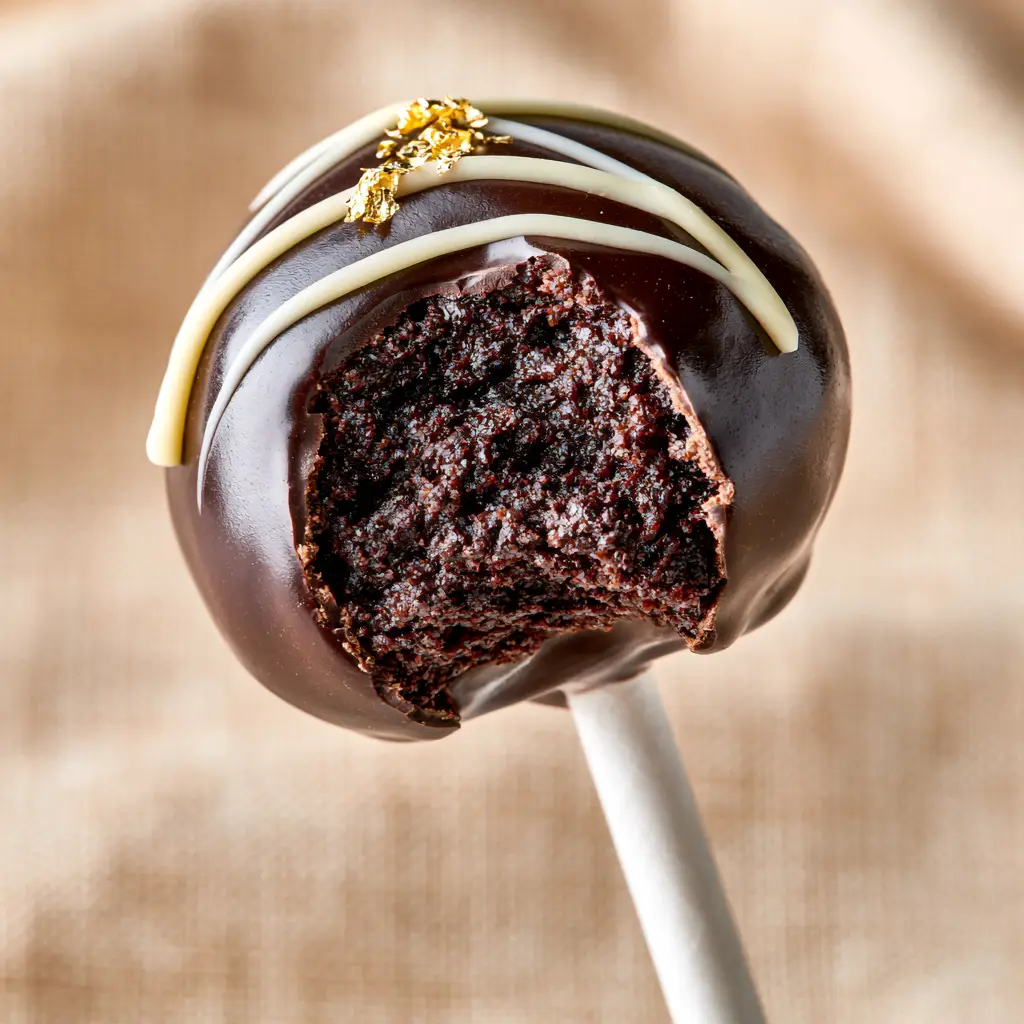
When you take that first bite, as captured in our visual guide, you reveal a moist, dark-as-night center that glistens with the moisture of a rich ganache binder. The exterior is a mirror-finished obsidian, decorated with a precise white chocolate zigzag and the ethereal shimmer of microscopic gold leaf. This recipe will guide you through the professional techniques required to achieve this exact gourmet result in your home kitchen.
By focusing on the science of crumb-to-binder ratios and the physics of chocolate tempering, we ensure your Chocolate cake pops are structurally sound yet melt-on-the-tongue soft. Whether you are looking to expand your dessert repertoire or seeking the perfect centerpiece for a celebration, these cake pops represent the pinnacle of chocolate indulgence.
The Gourmet Anatomy: What Makes These Chocolate cake pops Superior
- The Fudgy Core: Unlike traditional recipes that use buttercream, we utilize a creamy chocolate ganache binder to create a texture that is closer to a brownie-truffle hybrid.
- High-Gloss Finish: We eschew standard candy melts in favor of tempered dark chocolate, providing that professional, ultra-high-gloss coating that reflects light beautifully.
- Artisanal Garnishes: The delicate white chocolate drizzle and microscopic gold leaf flakes provide a multi-tonal visual appeal that screams “luxury.”
- Structural Integrity: Using a matte white paper stick provides the necessary friction to keep the heavy, fudgy cake anchored firmly during the dipping process.
The Ultimate Dark Chocolate Pantry List: Ingredients for Success
To achieve the deep, moist interior and the mirror-like exterior seen in our visual blueprint, you must select high-quality ingredients. Each component serves a specific structural and flavor-profile purpose.
All-Purpose Flour: 1 ¾ cups (210g). This provides the structural framework for our cake. We want enough protein to hold the pop together, but not so much that it becomes bread-like.
Dutch-Processed Cocoa Powder: ¾ cup (75g). This is critical for that “dark chocolate” visual. Dutch-processing neutralizes acidity and darkens the color, providing a smooth, earthy flavor.
Granulated Sugar: 2 cups (400g). Sugar does more than sweeten; it interferes with gluten development to keep the fudgy interior tender and moist.
Baking Powder & Soda: 1 ½ tsp each (7g). These leavening agents ensure the cake rises enough to have a crumb that can later be broken down and re-hydrated by the ganache.
Large Eggs: 2 (100g). At room temperature, eggs emulsify the fats and liquids, ensuring the cake doesn’t become oily or dense in a “heavy” way.
Whole Milk: 1 cup (240ml). The fat content in whole milk adds richness to the crumb, which is essential when you want the center to feel like a “gourmet bite.”
Vegetable Oil: ½ cup (120ml). Oil remains liquid at room temperature, which is the secret to a cake pop that feels moist even after being refrigerated.
Boiling Water: 1 cup (240ml). Adding boiling water at the end of the batter process “blooms” the cocoa powder, intensifying the chocolate flavor and thinning the batter for a fine crumb.
Heavy Cream: ½ cup (120ml). This is for the ganache binder. It provides the “creamy” element of the “creamy chocolate ganache binder” specified in our blueprint.
Dark Chocolate Couverture: 16 oz (450g). For the coating, use chocolate with at least 60% cocoa butter. This is what allows for a “thick, ultra-high-gloss” finish.
White Chocolate: 2 oz (55g). A small amount is melted for the “thin white chocolate drizzle” garnish.
Edible Gold Leaf: 1 book. Only a microscopic amount is needed to catch the light and add that “gourmet” flair.
If you find yourself loving the process of rolling and dipping, you might also enjoy experimenting with our Red Velvet Cake Pops or even our whimsical Hello Kitty Cake Pops for a different aesthetic.
Essential Tools for the Confectionery Architect
Achieving a “perfectly smooth without cracks” exterior requires more than just a steady hand. You need the right equipment to manage the temperature and texture of the chocolate.
You will need a Digital Instant-Read Thermometer. This is non-negotiable for tempering your dark chocolate coating to the exact degree required for a high gloss. A Stand Mixer or hand mixer is needed to thoroughly incorporate the ganache into the cake crumbs until a “dough” forms. Matte White Paper Sticks are essential for the visual aesthetic; plastic sticks often lack the grip needed for a heavy, fudgy pop. Finally, a Styrofoam Block or cake pop stand is required to allow the pops to set vertically without flat spots.
The Masterclass: Crafting Your Cake Pops Step-by-Step
Phase 1: Baking the Fudgy Dark Chocolate Foundation
Preheat your oven to 350°F (175°C). Whisk together your flour, sugar, cocoa, baking powder, baking soda, and a pinch of salt. In a separate bowl, combine the eggs, milk, oil, and vanilla. Slowly incorporate the wet ingredients into the dry.
Stir in the boiling water by hand. The batter will be very thin—this is normal. Pour into a greased 9×13 inch pan and bake for 30-35 minutes. You are looking for a visual cue: the edges should just start to pull away from the pan, and a toothpick should come out with a few moist crumbs. Do not overbake, as we need that “moist, fudgy” starting point.
Phase 2: The Ganache Binder and the Crumb
Once the cake is completely cool, crumble it into a large bowl. You want fine, uniform crumbs. In a small saucepan, bring the heavy cream to a simmer, then pour it over 4 oz (115g) of dark chocolate. Let it sit for 5 minutes, then stir until a “creamy chocolate ganache” forms.
Pour the ganache over the cake crumbs. Use your mixer to combine them. The result should look like a dark, glossy dough. If you squeeze a handful, it should hold its shape perfectly without cracking. This is the “dense, moist” interior revealed in the bite of the final product.
Phase 3: Precision Rolling and Anchoring
Scoop about 2 tablespoons of dough and roll it between your palms until it is a perfectly smooth sphere. Place them on a parchment-lined tray and chill for at least 2 hours. This chilling is vital for the “structurally sound” aspect of the recipe.
Melt a tiny bit of your dark chocolate. Dip the tip of a matte white paper stick into the melted chocolate, then insert it halfway into a chilled cake ball. This “chocolate glue” ensures the pop is “firmly anchored” to the stick, preventing it from falling off during the dipping process.
Phase 4: The Art of the Tempered Gloss
Tempering is what creates the “thick, ultra-high-gloss dark chocolate coating.” Melt two-thirds of your remaining dark chocolate in a double boiler until it reaches 115°F (46°C). Remove from heat and stir in the remaining one-third of finely chopped chocolate (the “seed”).
Stir constantly until the temperature drops to 88-90°F (31-32°C). This process aligns the cocoa butter crystals. Dip each cake pop vertically into the chocolate, lift, and gently tap your wrist to remove the excess. You will see the chocolate go from a liquid state to a “perfectly smooth” semi-matte as it sets, eventually reaching a high-gloss finish.
Phase 5: The Final Gourmet Flourish
While the dark chocolate is set but still slightly tacky, melt your white chocolate. Using a small piping bag with a microscopic tip, create a “delicate zigzag of thin white chocolate drizzle” across the top. Immediately after drizzling, use a pair of tweezers to place a “tiny pinch of microscopic gold leaf flakes” onto the center of the drizzle.
The gold leaf will adhere to the white chocolate, creating a focal point that contrasts with the dark shell. Allow the pops to set completely in a cool, dry place (not the fridge, which can cause condensation and ruin the gloss) before serving.
Expert Tips for a Professional Finish
- Avoid the “Sweat”: Never dip a frozen cake pop into warm chocolate. The temperature delta will cause the chocolate to crack. Use “chilled” but not “frozen” balls.
- The “Tap” Technique: When removing excess chocolate, tap your wrist, not the stick. This creates a smoother vibration that levels the chocolate without introducing air bubbles.
- Consistency is Key: If your “dough” is too dry, it will crumble. If it is too wet, it will slide off the stick. Aim for the texture of play-dough.
- White Chocolate Temp: White chocolate burns easily. Melt it in 15-second intervals and stir vigorously to maintain a fluid consistency for that “thin drizzle.”
Pairing Your Gourmet Treats
These Chocolate cake pops are incredibly rich, making them the perfect companion for refreshing beverages or complementary desserts. For a summer party, try pairing them with our Butterfly Pea Lemonade for a stunning color contrast. If you are hosting a fall-themed gathering, these pops look beautiful next to Chocolate Pumpkin Cupcakes.
For those who love the “cake batter” flavor profile but want a different texture, our Cake Batter Chocolate Chip Cookies offer a chewy alternative that children and adults alike adore.
Storage and Longevity
Because of the tempered shell, these cake pops are remarkably stable. They can be stored in an airtight container at room temperature for up to 3 days. If you need to store them longer, they will last in the refrigerator for up to 10 days. However, be aware that moving them from a cold fridge to a warm room can cause “sugar bloom” or condensation on the high-gloss surface. For the best visual result, serve them at a cool room temperature.
Frequently Asked Questions
You can, but for the ‘fudgy’ gourmet texture seen in our visual guide, ganache is superior. Frosting tends to make the interior sweeter and more ‘doughy,’ whereas ganache creates a rich, truffle-like consistency.
Edible gold leaf is incredibly thin and reacts to the static and oils on your skin. Always use clean, dry tweezers or a dedicated food-safe brush to pick up microscopic flakes and place them onto the tacky chocolate.
The secret to a high-gloss finish is tempering the chocolate. By melting and then cooling the chocolate to specific temperatures (90°F for dark chocolate), you align the cocoa butter crystals for a professional sheen and a firm snap.
This happens if the cake balls are too heavy or if you haven’t ‘glued’ them. Always dip the stick in a bit of melted chocolate before inserting it into the cake ball and let it set completely before dipping the whole pop.
Cracking usually occurs due to an extreme temperature difference. If the cake balls are too cold (frozen) and the chocolate is warm, the cake expands slightly as it hits the chocolate, causing cracks. Ensure your cake balls are chilled but not frozen.
The Master Blueprint: Fudgy Dark Chocolate Cake Pops
Chocolate cake pops: The Ultimate Fudgy Dark Chocolate Gourmet Recipe
Ingredients
Equipment
Method
- Mix wet and dry ingredients, adding boiling water last. Bake at 350°F (175°C) for 30-35 minutes until a toothpick comes out with moist crumbs.
- Crumble the cooled cake and mix with a creamy chocolate ganache (heavy cream and melted chocolate) until a moist, dough-like consistency forms.
- Roll the dough into smooth spheres and chill for 2 hours. Anchor each sphere onto a matte white paper stick using a drop of melted chocolate.
- Temper the dark chocolate to 90°F (32°C). Dip the pops vertically to achieve an ultra-high-gloss dark chocolate coating.
Notes
Do not use frozen cake balls as they will crack the chocolate shell.
Conclusion: The Ultimate Chocolate Experience
Crafting the perfect Chocolate cake pops is a journey through texture and temperature. By following this guide, you have created a dessert that is as visually stunning as it is delicious—a true gourmet treat with a fudgy heart and a mirror-finish shell. These pops are designed to impress and satisfy the most ardent chocolate lovers.
If you enjoyed this deep dive into confectionery science, please consider sharing this recipe to Pinterest or signing up for our newsletter for more elite baking guides. We would love to see your results—leave a comment below and tell us how your tempering went!


