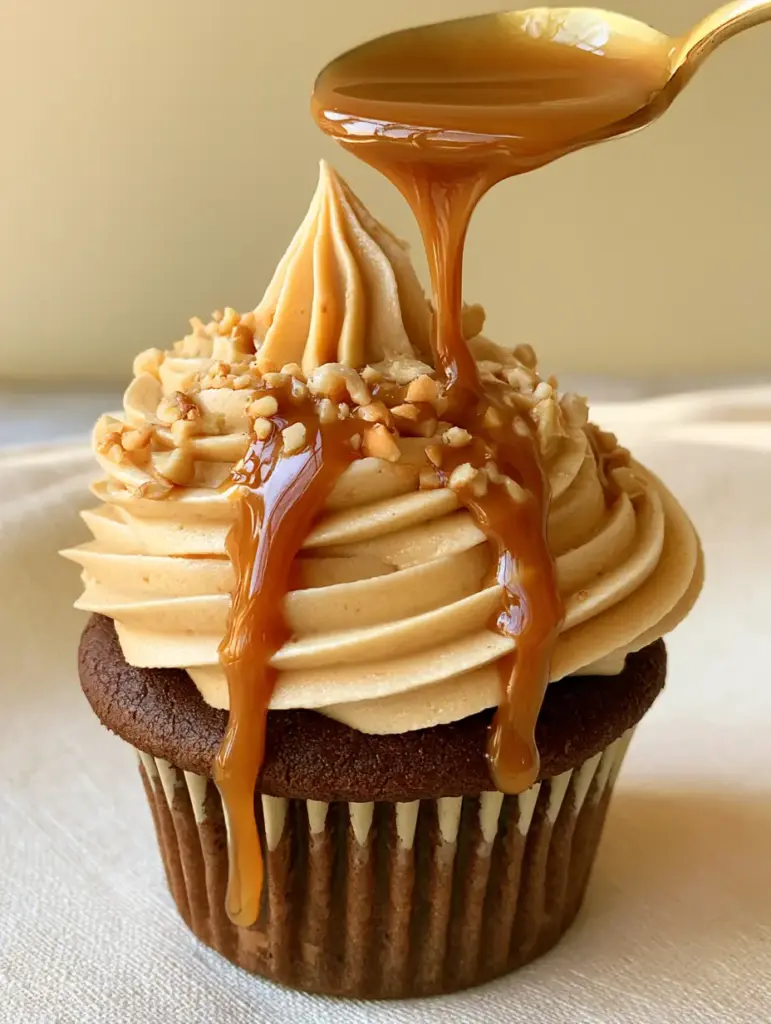
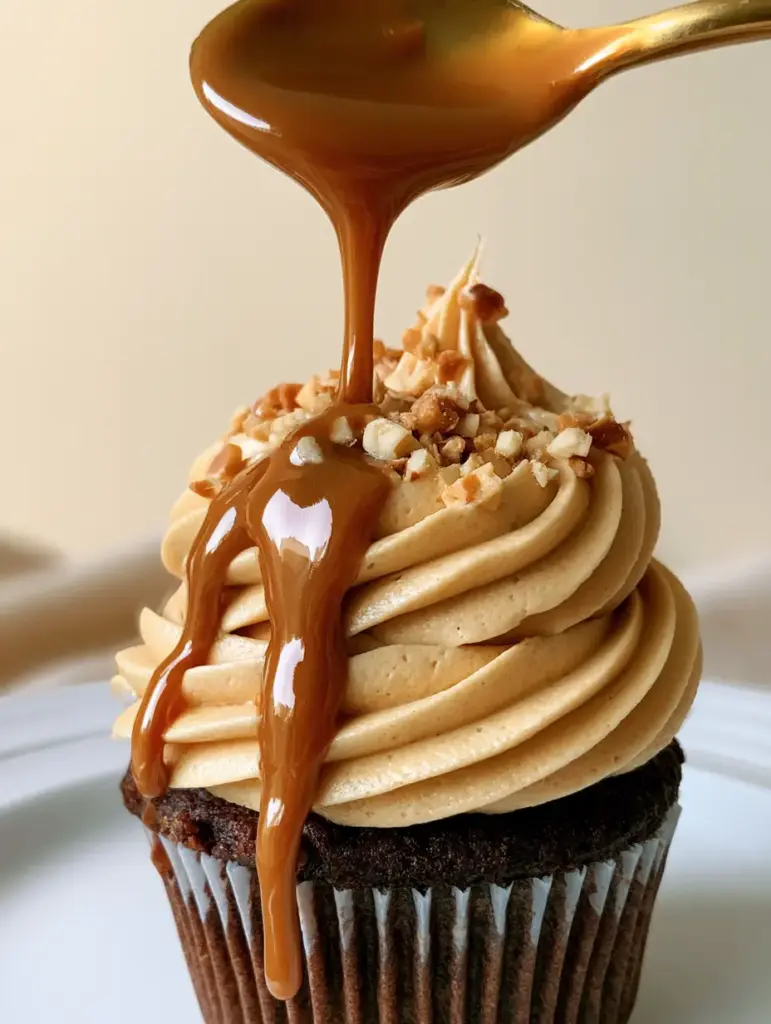
When it comes to the perfect dessert, nothing rivals the decadence of a towering swirl of peanut butter frosting perched atop a rich, dark chocolate cupcake. The visual of a light-golden, ultra-fluffy buttercream catching the natural daylight is enough to make any home baker reach for their stand mixer.
This recipe isn’t just about flavor; it is a masterclass in texture. We are aiming for a whipped, airy consistency that holds its shape while melting effortlessly on the tongue, much like a gourmet chocolate buttercream frosting.
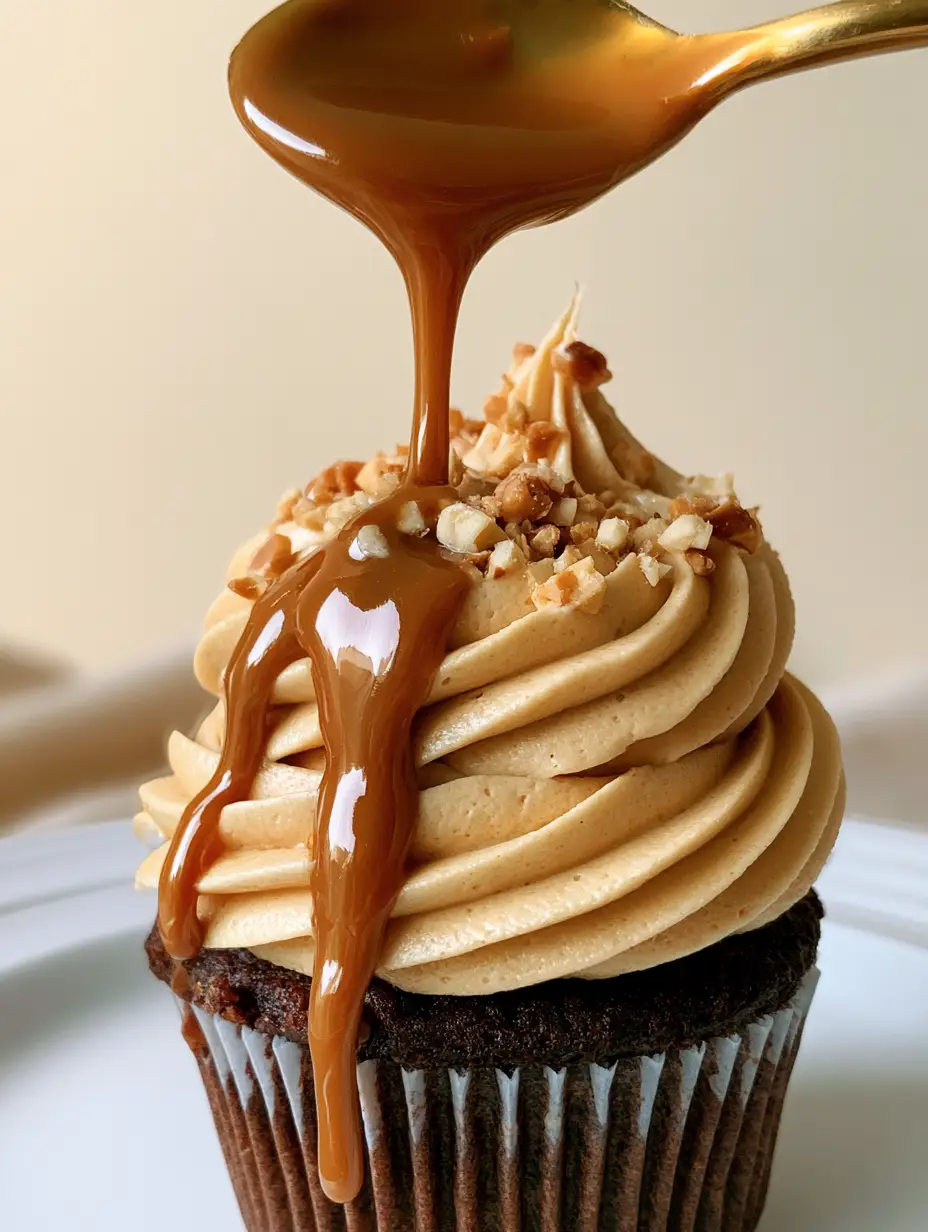
The secret lies in the marriage of high-quality fats and a specific aeration technique. By the time you finish this guide, you will be able to recreate those slow-dripping glistening runs of glossy peanut butter glaze that look like they were styled for a professional photoshoot.
Why This Light-Golden Whipped Peanut Butter Frosting Stands Out
- Structural Integrity: This buttercream is engineered to be piled high into a towering swirl without collapsing under its own weight.
- The Glossy Factor: We utilize a specific warm peanut butter drizzle that creates a high-contrast macro focus against the matte finish of the chopped nuts.
- Flavor Balance: By using roasted, micro-chopped peanuts, we introduce a salty crunch that cuts through the sweetness of the powdered sugar.
- Glistening Visuals: The reflective glaze is designed to drip slowly, ensuring every bite has that “just-poured” artisanal look.
The Anatomy of the Perfect Piped Peanut Butter Buttercream
To achieve the visual result of a handheld smartphone photo with high-contrast focus, every ingredient must serve a structural and aesthetic purpose. We aren’t just making a topping; we are building a culinary sculpture.
Unsalted Butter (Room Temperature): 1 cup (227g) of high-quality butter provides the creamy foundation. Ensure it is soft to the touch but not oily, as this is the key to achieving that “ultra-fluffy” aeration.
Creamy Peanut Butter: 1.5 cups (380g) of a standard commercial brand works best here. Avoid “natural” varieties where the oil separates, as we need the stabilizers to maintain the “light-golden” hue and stiff peaks.
Powdered Sugar: 4 cups (500g) of sifted confectioners’ sugar provides the body. Sifting is non-negotiable if you want to avoid graininess in your macro shots.
Heavy Whipping Cream: 3-4 tbsp (45-60ml) of cold cream is the secret to the “airy” texture. It acts like a lubricant for the sugar crystals, allowing more air to be trapped during the whipping process.
The Glossy Drizzle: A combination of 1/4 cup (64g) peanut butter and 1 tbsp (15ml) of honey or corn syrup. This creates the “reflective glaze” seen dripping from the gold spoon.
The Crunch: 1/4 cup (35g) of dry roasted peanuts, micro-chopped. This adds the final “scatter” that defines the top of the cupcake.
Essential Tools for Professional Cupcake Styling
Achieving a professional result requires more than just a bowl and a spoon. To replicate the “towering, ultra-fluffy swirl,” you need the right gear.
A stand mixer with a paddle attachment is your best friend for the initial mixing, while the whisk attachment handles the final aeration. For the piping, a large open-star tip (like a 1M or 2D) is essential for those deep ridges that catch the drizzle.
If you enjoy making oreo sunflower cupcakes, you already know that the right piping bag control is the difference between a messy blob and a masterpiece.
Step-by-Step Guide to the Fluffiest Peanut Butter Frosting
Achieving the Creamy Foundation
In the bowl of your stand mixer, combine the room-temperature butter and the creamy peanut butter. Beat on medium-high speed for at least 3 minutes.
You are looking for a visual change: the mixture should turn from a deep tan to a light-golden, pale straw color. This indicates that enough air has been incorporated to support a “towering swirl.”
Building Structure with Sifted Sugar
Reduce the mixer speed to low and gradually add the sifted powdered sugar one cup at a time. This prevents a “sugar cloud” from covering your kitchen and ensures the peanut butter frosting remains smooth.
Once the sugar is incorporated, increase the speed to medium. The mixture may look thick and slightly heavy at this stage, but we will fix that in the next step.
The Aeration Phase for Ultra-Fluffy Texture
Add the heavy whipping cream and vanilla extract. Switch to the whisk attachment and beat on high speed for an additional 2-4 minutes.
Listen to the mixer; the sound will change from a heavy thud to a light, rhythmic slapping. The frosting should double in volume and feel as light as a cloud, perfect for the dark chocolate cupcake base.
Mastering the Glossy Peanut Butter Drizzle
While the frosting rests, prepare the warm glaze. In a small microwave-safe bowl, combine the peanut butter and honey. Heat for 15-20 seconds until it reaches a fluid, pourable state.
The goal is “perfect, slow-dripping glistening runs.” If the glaze is too thick, it will sit on top; if it is too thin, it will soak into the frosting. It should coat the back of a gold spoon beautifully.
Expert Tips for Bakery-Quality Results
- Temperature Control: If your kitchen is too warm, the butter will lose its ability to hold air. Chill the bowl for 10 minutes if the frosting feels “soupy.”
- The Micro-Chop: When chopping your roasted peanuts, aim for the size of coarse sand. This “light scatter” adds texture without overwhelming the delicate swirls.
- The Drizzle Timing: Always drizzle your warm peanut butter glaze onto cold or room-temperature frosting to ensure the “glistening runs” set perfectly.
- Salt Balance: If your frosting feels too sweet, add a pinch of fine sea salt to enhance the roasted peanut notes.
Storing and Reviving Your Buttercream
This peanut butter frosting can be made in advance. Store it in an airtight container in the refrigerator for up to one week. However, the air bubbles will eventually deflate.
To revive it, bring the frosting to room temperature and re-whip it with the whisk attachment for 2 minutes. This restores the “airy, whipped texture” required for those macro-focus photos.
If you have leftovers, they make an incredible filling for banana chocolate muffins or a dip for apple slices.
Perfect Pairings for Peanut Butter Lovers
While this frosting is designed for a moist chocolate cupcakes base, its versatility is endless. The salty-sweet profile pairs beautifully with tart fruits or deep caramels.
Try piping this over pumpkin spice cupcakes for a unique autumnal twist, or use it as a decadent middle layer for milky way brownies. The light-golden color provides a stunning contrast against dark cocoa or bright orange batters.
Frequently Asked Questions
It is not recommended. Natural peanut butters separate easily, which can cause the frosting to break or become too oily to hold a piped shape.
The key is high-speed aeration and keeping your butter at a cool room temperature. If the frosting is too soft, chill it for 10 minutes before piping.
Heat the glaze until just pourable and use a small spoon to carefully guide the ‘runs’ down the ridges of the piped frosting for a professional look.
Graininess usually comes from unsifted powdered sugar or using a ‘natural’ peanut butter with grit. Ensure you sift your sugar and use a smooth, commercial-style peanut butter.
The Ultimate Peanut Butter Frosting Recipe
Peanut Butter Frosting: How to Make the Ultimate Airy Whipped Buttercream
Ingredients
Equipment
Method
- In a stand mixer, beat the butter and 1.5 cups of peanut butter on medium-high speed for 3 minutes until light-golden and fluffy.
- Slowly incorporate the sifted powdered sugar on low speed until combined.
- Add heavy cream and vanilla. Switch to the whisk attachment and beat on high for 3 minutes until an airy, whipped texture is achieved.
- Transfer frosting to a piping bag and pipe towering swirls onto the dark chocolate cupcakes.
- Heat the drizzle ingredients in the microwave. Use a spoon to create slow-dripping glistening runs down the frosting.
- Lightly scatter the micro-chopped roasted peanuts over the glaze.
Notes
Ensure the butter is exactly room temp—neither too cold nor oily.
Ready to Bake Your Own Towering Masterpiece?
Creating the perfect peanut butter frosting is a journey of sensory delights, from the smell of roasted nuts to the sight of a glistening glaze. This recipe provides the structural integrity and aesthetic appeal needed for any high-end dessert spread.
If you enjoyed this tutorial, please leave a comment below and let us know how your towering swirls turned out! Don’t forget to share your creations and follow us on Pinterest for more culinary inspiration.