There is a specific culinary magic that happens when a strawberry sauce recipe is executed with precision. It transforms a simple dessert into a masterpiece. Imagine a pristine slice of thick, velvety New York cheesecake, sitting elegantly on a modern white plate, waiting for its crowning glory.
The perfect sauce isn’t just a liquid; it is a luxurious, deep-crimson glaze that clings to the sides of your dessert in slow, heavy drips. It must be thick enough to hold its shape yet tender enough to melt on the tongue. This recipe focuses on achieving that exact “jammy” consistency, featuring simmered strawberry halves that showcase their tiny yellow seeds.
Whether you are dressing up a classic New York cheesecake or looking for a way to elevate your morning breakfast, this sauce is the gold standard. We are moving beyond watery syrups to a professional-grade fruit compote that looks as stunning as it tastes.

Why This Thick Crimson Glaze Redefines Dessert Perfection
- Visual Forensics: We achieve a deep-crimson hue and a high-gloss finish that looks professionally styled without artificial dyes.
- Structural Integrity: This sauce features heavy drips that cling to the cake, ensuring every bite is saturated with flavor.
- Textural Contrast: By using a two-stage cooking process, we maintain whole “jammy” strawberry halves for a rustic, high-end feel.
- Balanced Acidity: The addition of fresh lemon juice cuts through the sugar, highlighting the natural brightness of the fruit.
The Essential Components for a Glossy Strawberry Glaze
Fresh or Frozen Strawberries: 1 lb (450g) of hulled strawberries serves as the foundation. We split these into two portions—one to break down into the base and one to remain as jammy halves for that signature forensic visual appeal.
Granulated Sugar: 1/2 cup (100g) of sugar is necessary to macerate the fruit and create the syrup. As it simmers, the sugar undergoes a slight inversion, contributing to the “heavy drip” texture we see on the cheesecake.
Fresh Lemon Juice: 1 tbsp (15ml) of lemon juice provides the essential acid to brighten the deep-crimson color. It also reacts with the natural pectin in the fruit to help the sauce set correctly.
Cornstarch (Maize Starch): 1 tbsp (8g) of cornstarch dissolved in water creates the “gloss.” Unlike flour, cornstarch ensures the sauce remains translucent and vibrant rather than cloudy.
Pure Vanilla Extract: 1 tsp (5ml) adds a floral aromatic layer that rounds out the sweetness. It acts as a background note that makes the strawberry flavor “pop.”
Cold Water: 2 tbsp (30ml) is used specifically to create a slurry with the cornstarch. Never add dry starch to hot liquid, or it will clump and ruin the velvet-smooth finish.
Fine Sea Salt: A tiny pinch (approx. 1g) is a “hidden” ingredient. Salt suppresses bitterness and enhances the perception of sweetness and fruitiness on the palate.
Fresh Mint: A single, vibrant green mint leaf is the final touch. It provides a sharp color contrast against the deep red sauce, as seen in our visual blueprint.
Professional Tools for a Flawless Reduction
To achieve the specific “simmered” look of this strawberry sauce recipe, you need a heavy-bottomed stainless steel saucepan. This ensures even heat distribution, preventing the sugar from scorching while the strawberries release their juices.
A silicone spatula is preferred for stirring. It allows you to gently fold the strawberry halves without breaking them apart, preserving the “tiny yellow seeds” and the integrity of the fruit. You will also need a small whisk to ensure your cornstarch slurry is perfectly homogenous before it hits the pan.

Step-by-Step Evolution of the Perfect Sauce
Phase 1: Macerating for Maximum Color Extraction
Begin by selecting the finest berries. Slice half of your 1 lb (450g) of strawberries into quarters and the other half into clean halves. In your saucepan, combine the quartered berries with 1/2 cup (100g) of sugar and 1 tbsp (15ml) of lemon juice.
Let this mixture sit for 10 minutes before applying heat. This process, known as maceration, draws out the liquid and ensures the strawberry sauce recipe starts with a concentrated fruit base rather than added water, leading to a deeper crimson color.
Phase 2: The Initial Simmer and Breakdown
Place the saucepan over medium heat. Bring the mixture to a gentle simmer, stirring occasionally with your silicone spatula. You will hear the sugar dissolve and see the quartered berries begin to soften and lose their shape.
Continue simmering for about 5-7 minutes. The liquid should begin to look syrupy and the color will shift from a bright pink to a more sophisticated deep red. This is the “base” of your sauce that provides the flavor punch.
Phase 3: Achieving the Gloss and the “Jammy” Halves
In a small bowl, whisk together 1 tbsp (8g) of cornstarch and 2 tbsp (30ml) of water until smooth. Slowly pour this slurry into the simmering pot while stirring constantly. You will notice an immediate change: the liquid will go from watery to a thick, glossy glaze.
Immediately fold in the remaining strawberry halves. Simmer for an additional 2-3 minutes. This timing is critical; it allows the whole halves to become “jammy” and tender without completely disintegrating. They should still look like fruit, showing those beautiful tiny seeds.
Phase 4: The Final Polish and Cooling
Remove the pan from the heat and stir in 1 tsp (5ml) of vanilla extract and a pinch of salt. The aroma should be intoxicating. At this stage, the sauce will look slightly thinner than the final result—don’t be tempted to add more starch.
The “heavy drips” seen in our visual prompt occur as the sauce cools. Pour the sauce into a glass bowl and let it reach room temperature. As the temperature drops, the starch molecules lock together, creating that luxurious, clinging texture.
Expert Tips for the Ultimate Glossy Texture
- The Cold Plate Test: To check the thickness, place a small spoonful of sauce on a chilled plate. Run your finger through it; if the path stays clear, your sauce is perfect.
- Clarity Control: If your sauce looks cloudy, it usually means the cornstarch hasn’t cooked long enough. Simmer for another 30 seconds until the mixture turns translucent.
- Avoid Over-Stirring: Once the strawberry halves are added, handle them like jewels. Over-stirring will break the fruit and release too much pulp, clouding the gloss.
- Temperature Matters: Never pour hot sauce directly onto a cheesecake. It will melt the fats in the cake, creating a messy, oily appearance instead of the clean drips we want.
Storage and Preservation Guidelines
This strawberry sauce recipe is excellent for make-ahead prep. Store it in an airtight glass jar in the refrigerator for up to 7 days. The flavors actually deepen after 24 hours as the sugar and acid continue to meld.
If the sauce becomes too thick in the fridge, do not microwave it on high. Instead, let it sit at room temperature for 30 minutes, or gently warm it in a double boiler with a teaspoon of water to loosen the consistency without losing the gloss.
The Best Ways to Showcase Your Strawberry Sauce
While the visual blueprint highlights a slice of New York cheesecake, this sauce is incredibly versatile. It acts as a vibrant focal point for many desserts. Try drizzling it over warm strawberry shortcake biscuits for a double dose of berry flavor.
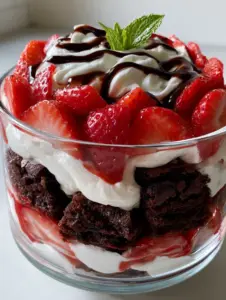
For a chocolate-heavy option, use this sauce as a layer in a decadent strawberry brownie trifle. The acidity of the berries cuts through the richness of the chocolate perfectly. It also makes a fantastic topping for fudgy chocolate brownies or even stirred into a batch of freshly baked muffins.
Common Questions About This Strawberry Sauce Recipe
You can, but the texture will be different. Without cornstarch, you must reduce the sauce much longer, which may result in the strawberry halves breaking down too much and losing their jammy appearance.
Yes, you can use frozen strawberries. Thaw them slightly first and include any released juices in the pan. You may need to simmer for an extra 2 minutes to account for the additional moisture.
The key is a combination of fresh lemon juice and macerating the berries with sugar before cooking. This extracts the natural pigments and keeps them bright and concentrated.
Stored in an airtight glass jar, this sauce stays fresh and glossy for up to 7 days in the refrigerator. Do not freeze if you want to maintain the specific texture of the whole strawberry halves.
Runny sauce usually happens if the cornstarch slurry wasn’t cooked long enough to activate or if there wasn’t enough sugar to create a syrup. Ensure you bring the sauce to a full simmer after adding the slurry.
The Master Strawberry Topping Recipe
[Image-Pin]

Strawberry Sauce Recipe: The Ultimate Glossy Crimson Topping for Cheesecakes
Ingredients
Equipment
Method
- In a saucepan, combine quartered strawberries, sugar, and lemon juice. Let sit for 10 minutes until juices release.
- Heat over medium heat for 5-7 minutes until berries soften and liquid turns deep red.
- Whisk cornstarch and water; stir into pan until sauce becomes glossy and thick.
- Add the remaining strawberry halves and simmer for 2 minutes until jammy but intact.
- Remove from heat, stir in vanilla and salt. Cool to room temperature and garnish with a mint leaf before serving.
Notes
The sauce will thicken significantly as it cools, so don't over-reduce on the stove.
[Image-Pin-2]
Concluding the Ultimate Fruit Glaze Experience
Creating a professional-grade strawberry sauce recipe is about balancing the science of thickeners with the natural beauty of the fruit. By following these steps, you achieve a sauce that isn’t just a side thought, but the star of the show. The deep crimson color, the glossy sheen, and the jammy texture provide a sensory experience that rivals any high-end bakery.
We would love to see how your sauce turned out! Did you achieve those perfect, heavy drips? Leave a comment below and let us know. Don’t forget to save this recipe to your favorite boards on Pinterest so you always have it on hand for your next dessert creation.
[Image-Pin-3]