White Chocolate Candy Cane Cookies are the definitive flavor of the holiday season, combining a rich, buttery base with the cooling crunch of peppermint. These aren’t your average thin holiday wafers; they are thick, chewy, and designed to look as stunning as they taste.
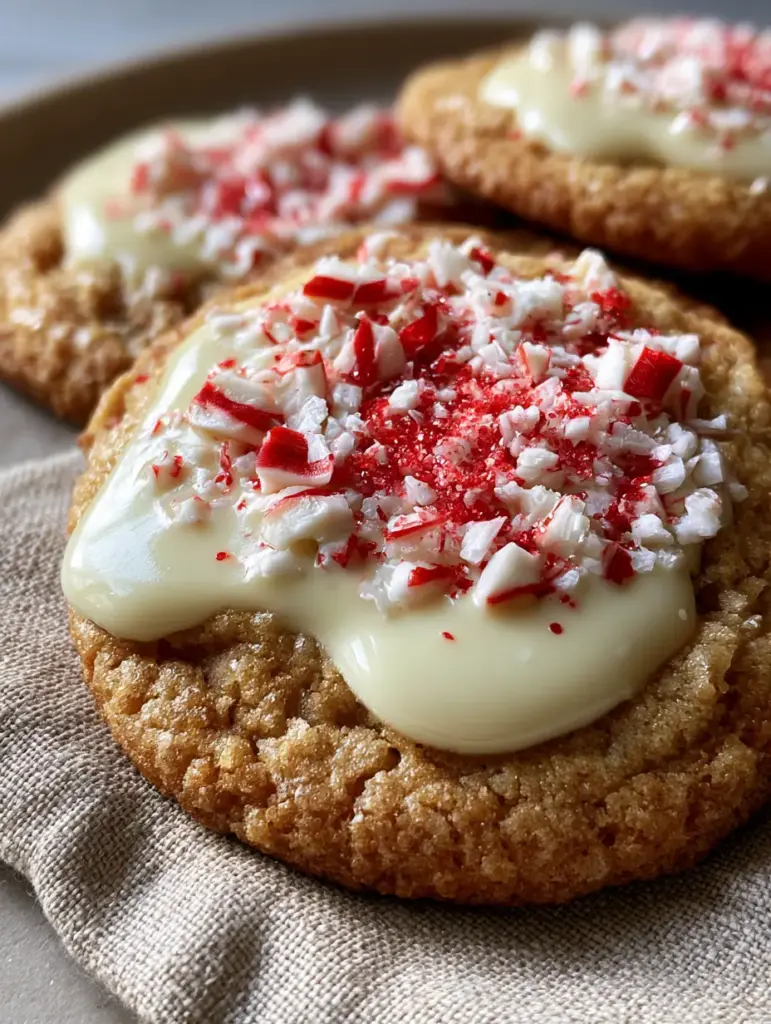
The visual appeal of these cookies is unmatched, featuring large, glossy pools of melted white chocolate that contrast beautifully against a golden-brown, crackled surface. Topped with vibrant red and white crushed peppermint, every bite offers a sensory journey of textures.
Whether you are preparing a festive gift box or looking for the perfect treat to pair with a cold glass of milk, these cookies deliver. Let’s dive into how you can achieve that professional, handheld smartphone photograph look right in your own kitchen.

Why These Festive Cookies Command the Holiday Dessert Table
- The Perfect Texture: A soft-baked, chewy interior with a slight golden-brown crackle on the outer edges.
- Decadent Chocolate Pools: By using chopped baking bars alongside chips, we create large, gooey white chocolate pulls.
- Sparkling Visuals: The crushed peppermint shards stay vibrant and sparkling because we apply them at the precise culinary moment.
- Balanced Flavor Profile: The sweetness of the white chocolate is perfectly cut by the refreshing burst of peppermint and a hint of sea salt.
Foundational Ingredients for the Ultimate Soft-Baked Texture
Unsalted Butter (1 cup / 227g): Use high-quality butter softened to room temperature to ensure a creamy emulsion with the sugars. This provides the foundational richness and helps achieve the golden-brown finish.
Light Brown Sugar (1 cup / 200g): This is the secret to the “chewy” blueprint. The molasses in the brown sugar keeps the cookie soft and creates that desirable crackled texture.
Granulated Sugar (1/2 cup / 100g): White sugar helps the edges crisp up slightly, providing the structural integrity needed for a thick, soft-baked cookie.
Large Egg + One Egg Yolk (Room Temperature): Adding an extra yolk introduces more fats and lecithin. This results in an ultra-fudgy, dense center rather than a cakey one.
Pure Vanilla Extract (1 tbsp / 15ml): Vanilla acts as a flavor enhancer for the white chocolate. It rounds out the sweetness and adds depth to the dough.
All-Purpose Flour (2 ½ cups / 312g): This provides the necessary structure. Be sure to measure by weight to avoid a dry, crumbly cookie.
Cornstarch (1 tsp / 3g): An invisible but essential ingredient. Cornstarch softens the flour’s proteins, ensuring the cookies remain “thick and soft” for days.
Baking Soda (1 tsp / 6g) and Fine Sea Salt: Baking soda provides the lift and the “crackle,” while salt balances the sugar-forward white chocolate.
White Chocolate Chips (1 cup / 170g): These stay relatively intact during the bake, providing a consistent chocolate presence throughout the dough.
High-Quality White Chocolate Bar (4 oz / 113g): Chop this into large, irregular chunks. These will melt into the “glossy pools” seen in the visual prompt.
Crushed Peppermint Candy Canes (1/2 cup / 60g): Use a mix of fine dust and larger “sparkling shards” for the best visual and textural contrast.
Essential Baking Tools for Cookie Perfection
To achieve the eye-level, professional look of these White Chocolate Candy Cane Cookies, you will need a few specific tools. A heavy-duty stand mixer or hand mixer is vital for properly creaming the butter and sugars to incorporate air.
A large cookie scoop (about 3 tablespoons) ensures every cookie is uniform in size, which is critical for even baking. You will also need parchment paper or a silicone baking mat to prevent sticking and ensure the bottoms don’t brown too quickly.
Finally, a heavy-duty rolling pin or a meat mallet is required to crush your candy canes. Placing the candies in a thick freezer bag before crushing prevents peppermint “dust” from flying everywhere in your kitchen.
Mastering the Perfect Bake: Step-by-Step Instructions
Phase 1: Creaming and Emulsifying the Base
In your mixer, beat the softened butter, brown sugar, and granulated sugar on medium-high for 3 minutes. You are looking for a pale, fluffy texture that has significantly expanded in volume.
Add the whole egg, the extra yolk, and the vanilla extract. Continue mixing until the batter looks like a smooth, cohesive ribbon; this ensures the fats and liquids are perfectly emulsified.
Phase 2: Folding in the Dry Ingredients
Whisk together the flour, cornstarch, baking soda, and salt in a separate bowl. Turn your mixer to the lowest setting and slowly add the dry mixture to the wet.
Stop mixing the moment the last streak of flour disappears. Overmixing at this stage will develop gluten, turning your chewy cookies into tough, bread-like discs.
Phase 3: The “Pool and Chip” Technique
Gently fold in the intact white chocolate chips using a spatula. Then, take your chopped white chocolate bar chunks and fold half of them into the dough.
Scoop the dough into large balls (about 50g each). Take the remaining large chunks of chocolate and press them firmly into the top of each dough ball. This technique is what creates those “glossy pools” of melted chocolate on the surface.
Phase 4: Chilling and Baking for Depth
Place the dough balls in the refrigerator for at least 30 minutes. This prevents the cookies from spreading too thin, maintaining the “thick and chewy” profile described in our blueprint.
Preheat your oven to 350°F (175°C). Place the chilled dough on a baking sheet and bake for 10-12 minutes. Look for the “Visual Cue”: the edges should be just barely golden, while the centers still look slightly soft and underdone.
Phase 5: The Peppermint Finishing Touch
Immediately upon removing the cookies from the oven, while the chocolate pools are still molten, generously sprinkle the crushed peppermint candy cane shards over the top.
The heat from the cookie will slightly soften the candy, allowing it to adhere, but it won’t be in the oven long enough to melt or lose its vibrant red and white color. Let them cool on the pan for 10 minutes to set the structure.
Pro Tips for Melting Chocolate Pools and Vibrant Candy Shards
- Don’t Bake the Peppermint: Peppermint candy tends to melt and turn into a sticky, brown syrup if baked for the full 12 minutes. Always apply immediately after the bake for that “sparkling” look.
- The “Pan Bang” Method: If your cookies aren’t showing enough crackle, gently tap the baking sheet on the counter halfway through baking. This collapses air pockets and creates those beautiful ripples.
- Use a Bar, Not Just Chips: White chocolate chips contain stabilizers that prevent them from melting completely. For the “gooey chocolate pull,” you must use a chopped cocoa butter-based chocolate bar.
- Room Temperature Ingredients: Ensure your eggs are not cold. Cold eggs can re-solidify the creamed butter, leading to a lumpy dough and uneven spread.
Optimal Storage and Freezing Methods
These cookies stay incredibly soft for up to 5 days when stored in an airtight container at room temperature. To maintain the “sparkle” of the peppermint, avoid stacking them directly on top of each other without a layer of parchment paper in between.
For long-term storage, you can freeze the baked cookies for up to 3 months. Alternatively, freeze the unbaked dough balls (without the peppermint) and bake them fresh whenever a craving strikes, adding the candy shards after they come out of the oven.
Festive Pairings and Holiday Serving Ideas
These White Chocolate Candy Cane Cookies are a star on their own, but they also pair beautifully with other seasonal favorites. If you’re building a holiday dessert board, consider adding some Funfetti Cookies for a pop of color or our decadent No-Bake Oreo Cheesecake for a creamy contrast.
For an adult-only holiday party, serve these alongside Christmas Peppermint Shots. The peppermint in the drink echoes the candy shards on the cookie for a cohesive flavor experience.
If you have leftover peppermint bits, they make an excellent topping for a Strawberry Cheesecake Trifle or even as a garnish for a fun Homemade Cake Pop.
Answers to Your Holiday Baking Questions
Yes, you can substitute the all-purpose flour with a high-quality 1:1 gluten-free flour blend. Ensure the blend contains xanthan gum to maintain the chewy structure.
You can, but chips contain stabilizers that prevent them from melting into the ‘glossy pools’ seen in the photos. For the best visual result and gooey texture, use a chopped high-quality white chocolate baking bar.
Yes. Chilling the dough for at least 30 minutes solidifies the fat, which prevents the cookies from spreading too much. This ensures your cookies stay thick and soft-baked rather than thin and crispy.
The crackle comes from the balance of brown sugar and baking soda. For extra ripples, try the ‘pan bang’ method: firmly tap the baking sheet on the oven rack or counter halfway through baking to deflate the cookies.
Candy canes are mostly sugar and melt quickly at high temperatures. To keep them vibrant and sparkling, always sprinkle the crushed peppermint on the cookies immediately after they come out of the oven while the chocolate is still molten.
The Ultimate White Chocolate Candy Cane Cookies Recipe
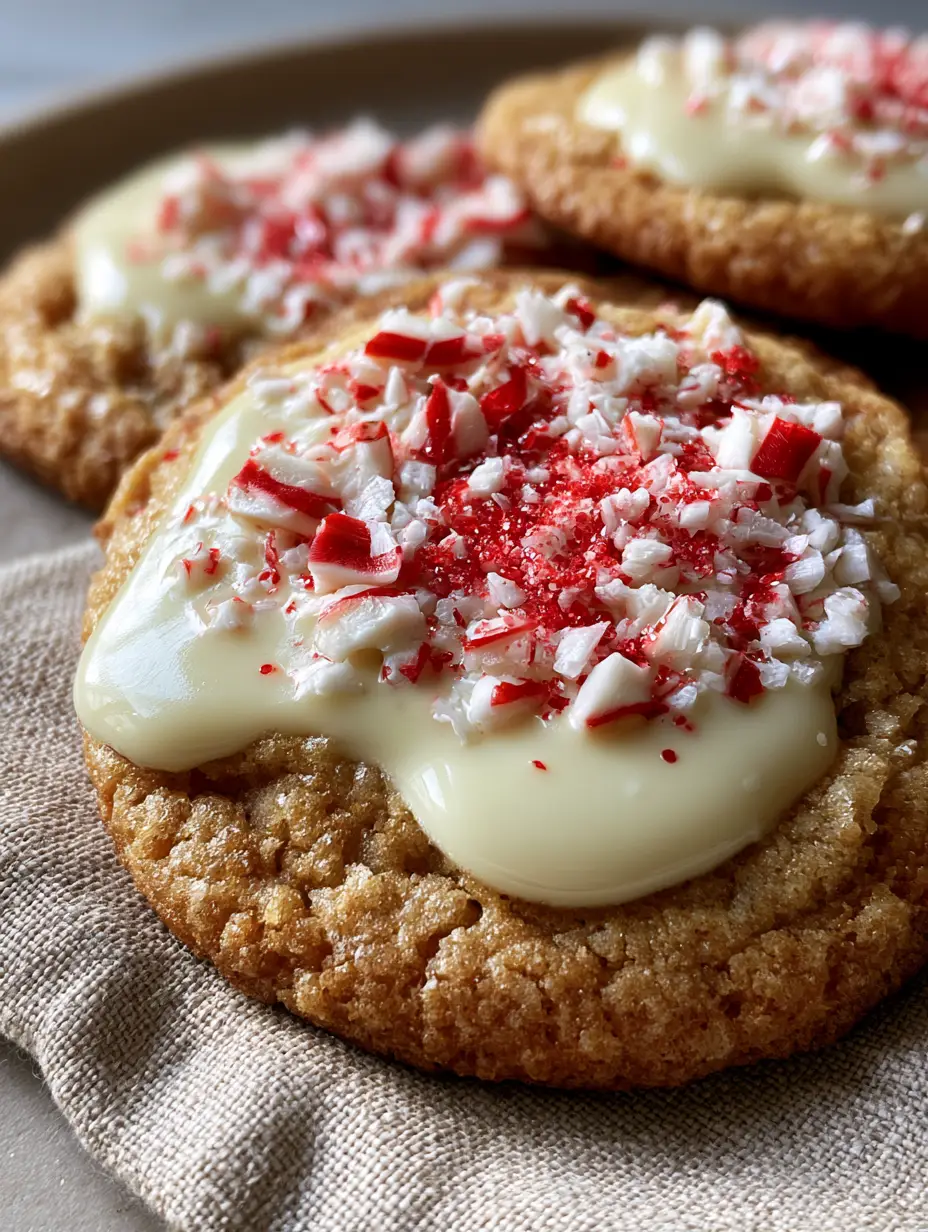
White Chocolate Candy Cane Cookies with Soft-Baked Peppermint Shards
Ingredients
Equipment
Method
- Cream the softened butter, brown sugar, and granulated sugar in a stand mixer for 3 minutes until light and fluffy.
- Beat in the egg, extra yolk, and vanilla extract until a smooth emulsion forms.
- Slowly mix in the flour, cornstarch, baking soda, and salt on low speed until just combined.
- Fold in white chocolate chips and half of the chopped bar. Scoop 3-tbsp balls and press remaining chocolate chunks onto the tops.
- Chill dough for 30 minutes. Bake at 350°F (175°C) for 10-12 minutes until edges are golden and centers are soft.
- Immediately press crushed candy cane shards into the warm white chocolate pools upon removing from the oven.
Notes
Apply peppermint shards immediately after baking to keep them vibrant and sparkling.

Wrapping Up This Seasonal Sweet Treat
Mastering these White Chocolate Candy Cane Cookies is about more than just mixing ingredients; it’s about capturing the essence of the holidays in a single, thick, chewy bite. The combination of molten white chocolate and sparkling peppermint creates a professional-grade dessert that anyone can make at home.
I would love to see how your cookies turned out! Did you get those perfect chocolate pools? Leave a comment below and share your baking success. Don’t forget to follow me and save this recipe to your holiday boards on Pinterest for easy access all season long!