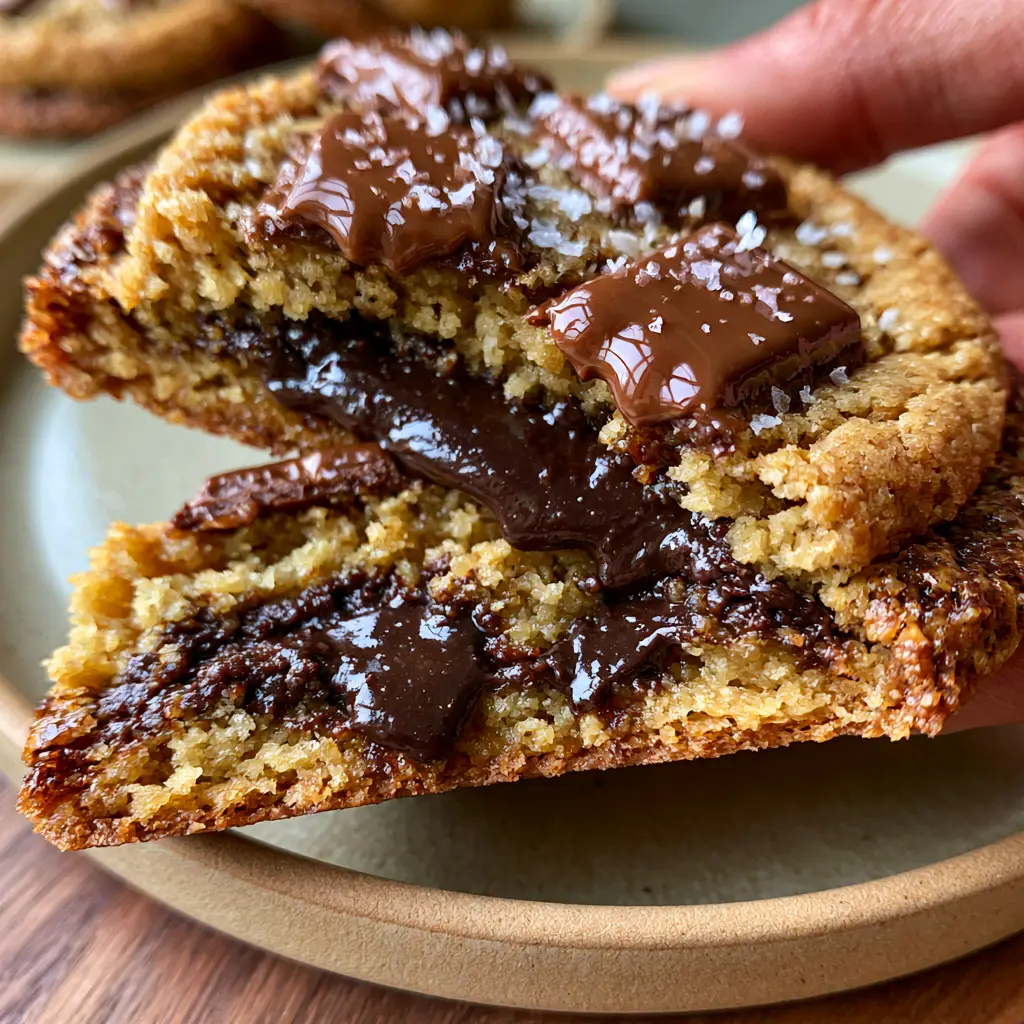
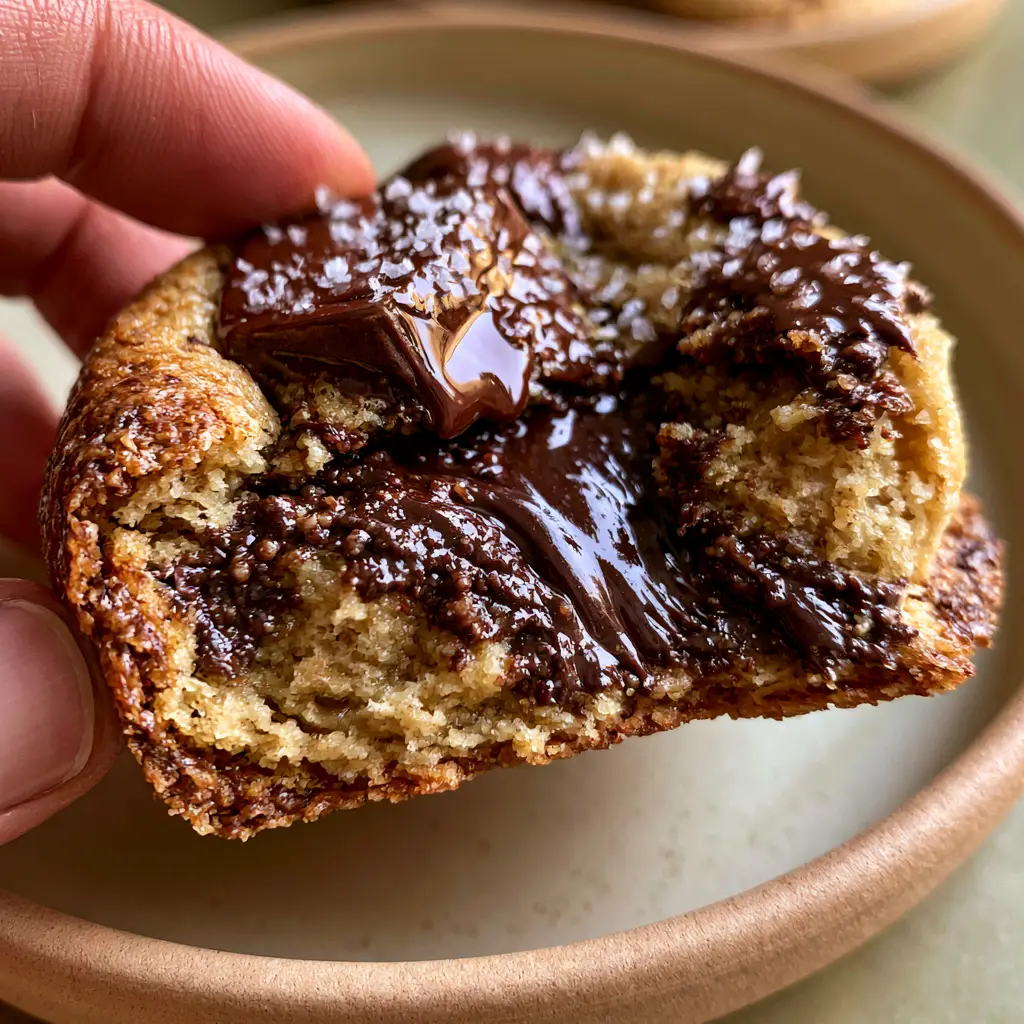
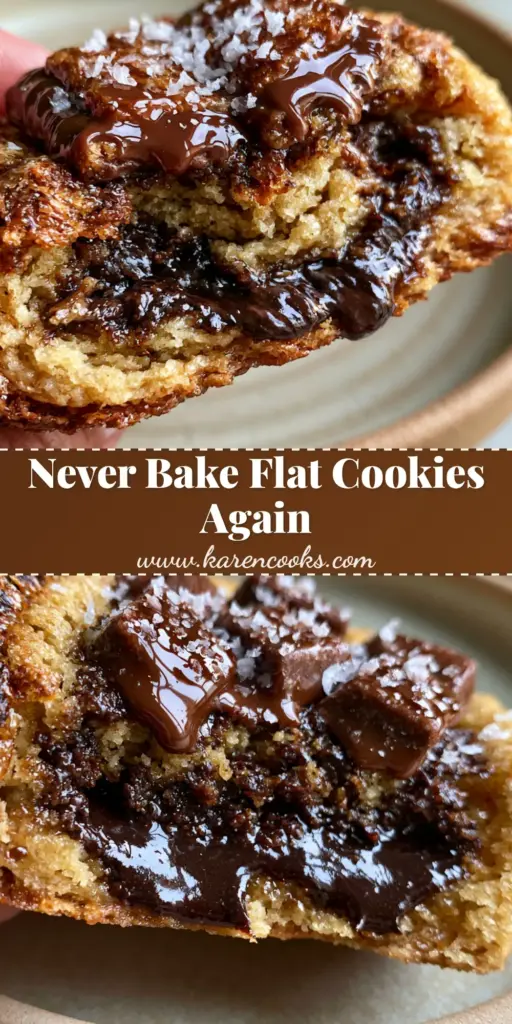
There is a specific, almost spiritual moment when you pull a bakery-style cookie apart and witness the slow, rhythmic stretch of a molten chocolate pool. This recipe for the Perfect chocolate chip cookies is designed to recreate that exact handheld smartphone-worthy moment in your own kitchen. We aren’t just making a snack; we are engineering a sensory experience defined by golden brown butter dough and crispy, caramelized edges.
When you look at a truly professional cookie, you see more than just dough and chips. You see glistening, melted dark chocolate chunks that have surrendered to the heat, nestled within a thick, soft center. The final touch of flaky sea salt provides a crystalline contrast that makes the deep cocoa flavors absolutely sing. This is the ultimate guide to mastering the science and soul of the Perfect chocolate chip cookies.
The Anatomy of a World-Class Bakery Cookie
- The Beurre Noisette Base: By browning the butter, we introduce toasted, nutty notes that transform the dough into a rich, caramel-colored canvas.
- The “Puddle” Factor: We skip standard chips in favor of chopped dark chocolate bars or fèves to ensure those iconic, molten dark chocolate pools.
- Contrast Textures: A high-moisture center remains ultra-gooey and soft, while the perimeter develops a shattered-glass crispy caramelized edge.
- The Saline Spark: A light sprinkle of flaky sea salt (Maldon) cuts through the richness and balances the brown sugar’s sweetness.
The Science Behind Our Essential Ingredients
1 cup (225g) Unsalted Grass-Fed Butter: We start with high-quality butter because it will be reduced and browned. This process removes water and toasts the milk solids, creating the foundation for the Perfect chocolate chip cookies.
1 cup (200g) Dark Brown Sugar: The high molasses content in dark brown sugar is non-negotiable for achieving that chewy, moist texture. It reacts with the baking soda to create a deeper rise and better browning.
1/2 cup (100g) Granulated White Sugar: While brown sugar provides chew, white sugar is responsible for those crispy caramelized golden edges. It aids in the Maillard reaction during the final minutes of baking.
2 tsp (10ml) Pure Vanilla Bean Paste: Using paste instead of extract introduces those beautiful tiny black specks. It provides a more concentrated, floral aroma that survives the high heat of the oven.
2 Large Eggs (Room Temperature): Eggs provide the protein structure needed to hold the molten chocolate pools in place. Ensure they are room temperature so they emulsify perfectly with the browned butter.
2 cups (300g) All-Purpose Flour: This provides enough gluten for a “thick bakery-style” height without making the cookie tough. It is the structural skeleton of our dough.
1 tsp (5g) Baking Soda: This is our primary leavening agent. It works with the acidic brown sugar to create carbon dioxide bubbles, resulting in a soft, aerated center.
1/2 tsp (3g) Fine Sea Salt: This is the “invisible” seasoning that enhances the chocolate. It’s separate from the flaky salt used for topping.
10 oz (280g) 70% Dark Chocolate: Use high-quality bars chopped into irregular chunks. These irregular shapes are what create the “molten dark chocolate pools” seen in our visual blueprint.
Must-Have Tools for the Ultimate Cookie Texture
To achieve the look of a professional handheld smartphone photo, you need a heavy-duty light-colored baking sheet. Dark pans absorb too much heat and can burn the bottoms before the center is set. A mechanical cookie scoop (3-tablespoon size) ensures every cookie is uniform in thickness for even baking. Finally, a wire cooling rack is essential to prevent the bottoms from becoming soggy due to residual steam.
The Alchemy of Browning Your Butter
Mastering Beurre Noisette
In a light-colored saucepan over medium heat, melt your butter while whisking constantly. Watch for the butter to begin foaming; this is the water evaporating. Soon, you will hear a crackling sound, followed by a quiet “swish” as the milk solids begin to brown. Look for a deep amber color and a nutty, toasted aroma—this is the secret to the Perfect chocolate chip cookies.
The Cool-Down Phase
Never add hot butter to your sugars, as it will melt the sugar crystals and lead to a greasy, flat cookie. Pour the brown butter into a heat-proof bowl and let it sit until it reaches a room-temperature, slightly thickened state. This ensures the dough remains thick and holds its shape in the oven.
Step-by-Step Instructions for the Perfect Chocolate Chip Cookies
1. Creating the Flavor Foundation
In a large stand mixer bowl, combine your cooled brown butter with the dark brown and granulated sugars. Cream them together on medium-high for about 3 minutes until the mixture looks like wet sand. Add the vanilla bean paste and eggs one at a time, beating well after each addition until the batter is pale and voluminous.
2. Folding in the Dry Elements
Sift the flour, baking soda, and fine sea salt directly into the wet ingredients. Use a silicone spatula to fold the mixture gently by hand. Stop the moment you see no more white flour streaks to avoid over-developing the gluten, which would ruin the soft center.
3. The Chocolate Integration
Fold in your roughly chopped dark chocolate chunks. Reserve a handful of the largest “shards” to press into the tops of the dough balls later. If you’ve ever enjoyed a fudgy chocolate brownie, you’ll recognize the importance of using high-quality cacao here.
4. The Essential Chill Period
Cover the dough and refrigerate for at least 4 to 24 hours. This allows the flour to fully hydrate and the fats to solidify. Chilling is the difference between a mediocre cookie and the Perfect chocolate chip cookies with a complex, developed flavor profile.
5. Precision Baking for Golden Edges
Preheat your oven to 350°F (175°C). Scoop large mounds of dough (about 3.5 oz or 100g each) onto your prepared baking sheet. Press those reserved chocolate shards onto the top of each mound. Bake for 11-13 minutes. Look for the “Visual Cue”: the edges should be a deep caramelized gold, while the centers still look slightly “underdone” and soft.
Expert Tips for Bakery-Style Success
- The Pan Bang: Halfway through baking, lift the pan and drop it firmly against the oven rack. This ripples the dough and creates those beautiful “crispy caramelized golden edges.”
- The Cookie Scoot: Immediately after removing from the oven, use a large circular cutter to “scoot” the cookie into a perfect circle. This compacts the edges for a thicker profile.
- Top While Hot: Apply the flaky sea salt the very second the cookies come out of the oven so the crystals adhere to the glistening melted chocolate chunks.
- Quality of Chocolate: Avoid “stabilized” chips which contain soy lecithin to keep their shape. We want fèves or bars that melt into pools.
Optimal Storage and Reheating Methods
Store these cookies in an airtight container at room temperature for up to 4 days. To recapture that “ultra-gooey soft center,” microwave a single cookie for 8-10 seconds before serving. You can also freeze the raw dough balls for up to 3 months—simply bake from frozen and add 2 minutes to the total time.
What to Pair with Your Perfect Cookies
These cookies are incredibly rich, making them a perfect companion to a glass of cold milk or a bitter espresso. If you are hosting a dessert party, consider serving them alongside warm banana muffins for a brunch spread. For a more decadent experience, they can be crumbled over a silk chocolate pie or served with a side of dark chocolate frosting for dipping.
Commonly Asked Questions about Bakery Cookies
While you can, chips contain stabilizers that prevent them from melting into the ‘molten pools’ seen in the photos. Chopped high-quality bars or fèves provide a superior texture.
Use a round glass or cookie cutter slightly larger than the cookie. Immediately after taking them out of the oven, ‘scoot’ the cutter around the cookie in a circular motion to shape it.
Yes. Chilling allows the flour to hydrate and the fats to solidify, which prevents the cookies from spreading too thin and ensures a thick, soft center with crispy edges.
Browning the butter removes water content and toasts the milk solids, creating a deep nutty flavor and a characteristic golden brown dough that standard butter cannot match.
The glistening look comes from high cocoa butter content in premium chocolate. If yours looks dull, try adding a few extra chocolate shards on top immediately after baking.
The Ultimate Recipe for Perfect Chocolate Chip Cookies
Perfect chocolate chip cookies with Brown Butter and Molten Dark Chocolate
Ingredients
Equipment
Method
- Melt butter in a saucepan over medium heat, whisking until milk solids turn amber and smell nutty. Cool to room temperature.
- Beat the cooled brown butter with both sugars for 3 minutes until well combined.
- Add eggs and vanilla paste, beating until the mixture is pale and thick.
- Gently fold in flour, baking soda, and fine salt until just combined. Do not overmix.
- Fold in the dark chocolate chunks, reserving a few for the tops.
- Refrigerate the dough for at least 4 hours to hydrate the flour.
- Scoop 3.5oz mounds onto a tray. Bake at 350°F (175°C) for 11-13 minutes until edges are golden but centers are soft.
- Immediately sprinkle with flaky sea salt while chocolate is molten.
Notes
Use a circular cutter to 'scoot' cookies into perfect rounds immediately after baking.
Closing & Call to Action
Mastering the Perfect chocolate chip cookies is a journey of patience and precision. From the browning of the butter to the final sprinkle of salt, every step contributes to that bakery-style masterpiece you’ve been dreaming of. If you enjoyed this deep dive into cookie science, please leave a comment below and share your results!
Don’t forget to follow me on Pinterest for more culinary forensics and visual recipe blueprints. If you’re looking for more caramel-forward treats, check out my recipe for Salted Caramel Cookies. Happy baking!