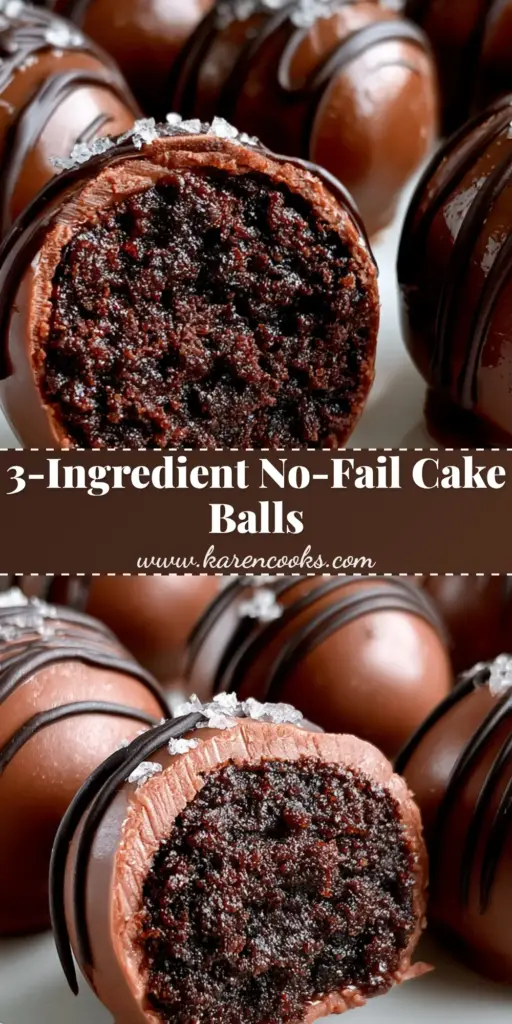
Mastering the perfect cake balls recipe is the ultimate milestone for any home baker looking to elevate their dessert game. Imagine a treat so decadent that it bridges the gap between a rustic cake and a high-end chocolatier’s truffle. These aren’t your average party leftovers; we are crafting a gourmet experience featuring a dense, velvety dark chocolate core encased in a snap-crisp milk chocolate shell.
The secret to this specific cake balls recipe lies in the forensic attention to texture. We aren’t just mashing cake; we are creating a refined crumb that remains moist without being oily. When you bite through the glossy exterior, you reveal a rich, dark interior that provides a stunning visual contrast, just like the artisanal treats found in a boutique patisserie.
Whether you are preparing a sophisticated gift or a show-stopping centerpiece for a dessert table, this guide will walk you through the professional techniques required to achieve that mirror-like chocolate finish. Let’s dive into the science of the perfect crumb and the art of the chocolate drizzle.
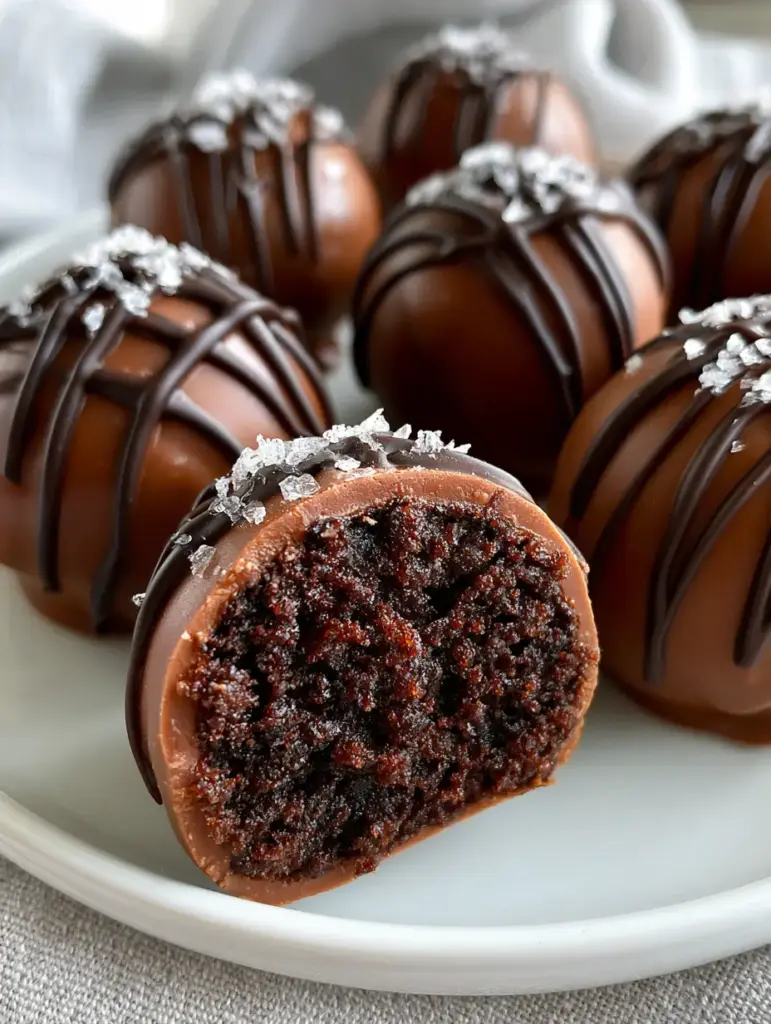
The Signature Elements of Professional-Grade Cake Balls
- The Contrast of Textures: A clean, sharp snap of milk chocolate gives way to a fudgy, moist dark chocolate cake crumb center that melts on the tongue.
- Glossy, Crack-Free Aesthetics: By utilizing specific tempering shortcuts, we ensure a perfectly smooth shell that looks professional and stays stable at room temperature.
- Elegant Visual Accents: A sophisticated dark chocolate drizzle and a garnish of flaky sea salt crystals provide both visual height and a necessary flavor balance to the sweetness.
- Rich Flavor Profile: We use Dutch-processed cocoa and a hint of espresso to ensure the dark chocolate flavor is deep, complex, and not overly sugary.
Essential Components for the Ultimate Chocolate Experience
To achieve the results seen in our Visual Recipe Blueprint, every ingredient must serve a structural and flavor-driven purpose. Here is what you will need for this cake balls recipe.
For the Moist Dark Chocolate Base:
1 & 1/2 cups (190g) All-Purpose Flour: This provides the structural foundation for our cake crumb without making it too heavy.
1 cup (200g) Granulated Sugar: Provides sweetness and helps retain moisture within the cake fibers during the baking process.
1/2 cup (45g) Dutch-Processed Cocoa Powder: Crucial for that deep, dark color and the “rich” flavor profile described in our visual prompt.
1 tsp (5g) Baking Soda & 1/2 tsp (2.5g) Baking Powder: These chemical leaveners ensure the cake is airy enough to crumble into a light, moist texture.
1/2 tsp (3g) Fine Sea Salt: Essential for enhancing the cocoa notes and balancing the sugars.
1/2 cup (120ml) Whole Milk: Adds fat and moisture, creating a tender crumb that binds easily with the frosting.
1/4 cup (60ml) Vegetable Oil: Unlike butter, oil keeps the cake balls moist even when refrigerated.
1 Large Egg: Acts as the primary binder for the cake structure.
1/2 cup (120ml) Boiling Water: The “secret” step that blooms the cocoa powder, intensifying the chocolate flavor significantly.
For the Binder and Coating:
1/3 cup (75g) Dark Chocolate Frosting: Use just enough to bind the crumbs into a “dough” that holds its shape when rolled.
16 oz (450g) High-Quality Milk Chocolate Melting Wafers: Provides the smooth, glossy, crack-free shell required for the gourmet look.
2 oz (55g) Dark Chocolate: Melted specifically for the thin, elegant drizzle decoration.
1 tbsp (10g) Flaky Sea Salt (Maldon style): These crystals provide the final “pop” of flavor and a beautiful crystalline garnish.
The Baker’s Tool Kit for Precision Shaping
Achieving a “cleanly cut” look and “perfectly smooth” shells requires the right equipment. You will need a standard 9×9 inch (23x23cm) baking pan for the base cake. A wire cooling rack is essential to let the cake steam off before crumbling.
For the shaping phase, a small cookie scoop (about 1 tablespoon capacity) ensures every ball is uniform in size. For the dipping process, professional dipping forks or a simple plastic fork with the middle tines removed will help you achieve that seamless finish without leaving large marks in the chocolate.
Crafting the Dense Dark Chocolate Center
Step 1: Baking the High-Moisture Foundation
Preheat your oven to 350°F (175°C). In a large bowl, whisk together your flour, sugar, cocoa, baking soda, baking powder, and fine salt. In a separate container, mix the milk, oil, and egg until fully emulsified.
Slowly combine the wet and dry ingredients, then carefully stir in the boiling water. The batter will be thin, but this is the key to an ultra-moist cake balls recipe. Pour into your greased pan and bake for 25-30 minutes, or until a toothpick comes out clean.
Step 2: The Art of the Perfect Crumb
Once the cake has cooled completely, remove the dark edges (the “crust”) if they feel too dry. Break the cake into large chunks and place them in a bowl. Using your hands or a stand mixer with the paddle attachment, break the cake down into fine, uniform crumbs.
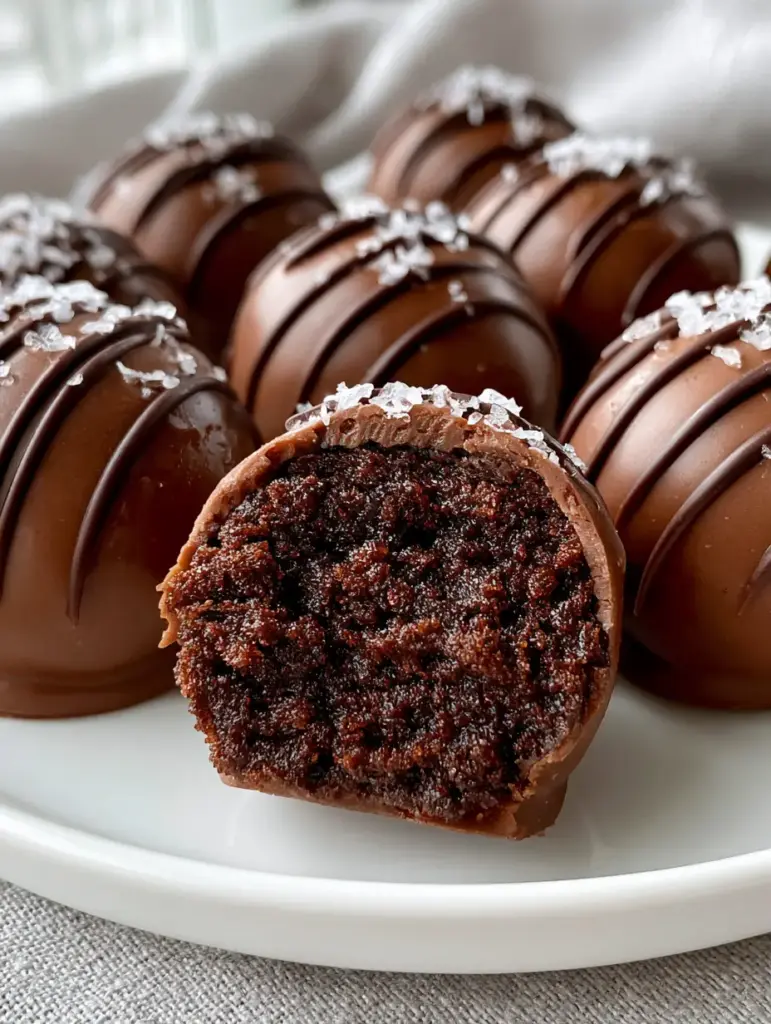
Add the dark chocolate frosting one tablespoon at a time. You are looking for a texture that resembles damp sand—it should hold together when squeezed but not feel “mushy.” This is how you achieve the dense, rich center seen in the cross-section of our blueprint.
Step 3: Precision Rolling and Chilling
Scoop the mixture and roll between your palms until you have a perfectly spherical shape. Place the balls on a parchment-lined tray. Chill in the refrigerator for at least 1 hour or the freezer for 20 minutes. If the balls are too warm, they will fall apart in the chocolate; if they are too cold, the chocolate shell may crack.
Mastering the Glossy Milk Chocolate Shell
Step 4: The Professional Dipping Technique
Melt your milk chocolate wafers in a deep, narrow bowl to allow for full submersion. Ensure the chocolate is smooth and fluid. Submerge a chilled cake ball completely, then lift it out using your dipping tool.
Tap the tool against the side of the bowl gently to remove excess chocolate. This prevents a “foot” (a pool of chocolate at the base) from forming. Slide the ball back onto the parchment paper with a smooth motion. The shell should look glossy and mirror-like as it sets.
Step 5: The Signature Drizzle and Garnish
Melt the dark chocolate and place it in a small piping bag with a tiny tip snipped off. While the milk chocolate shell is nearly set but still slightly tacky, wave the piping bag back and forth in a quick, fluid motion to create the elegant drizzle. Immediately sprinkle a few flakes of sea salt onto the wet drizzle so they adhere perfectly.
Expert Tips for a Flawless Finish
- Temperature Control: Never dip frozen cake balls into hot chocolate. The extreme temperature difference is the primary cause of cracking shells. Aim for “cool to the touch” rather than “ice cold.”
- Thinning the Chocolate: If your dipping chocolate is too thick, add 1 teaspoon of refined coconut oil. This thins the consistency, allowing for a more delicate, professional shell.
- Avoid Water Contact: Even a single drop of water will cause your melting chocolate to “seize,” turning it into a grainy mess. Ensure all tools are bone-dry.
- The “Clean Cut” Secret: To get the beautiful cross-section shown in the photos, use a sharp knife dipped in hot water and wiped dry before slicing through the cake ball.
Storage and Preservation
This cake balls recipe yields treats that stay fresh for quite a while. Store them in an airtight container in the refrigerator for up to 7 days. For the best flavor experience, let them sit at room temperature for 15 minutes before serving so the center softens slightly.
You can also freeze these for up to 2 months. Place them in a single layer in a freezer bag. To thaw, move them to the fridge overnight to prevent condensation from forming on the glossy shells, which can dull their shine.
Pairing Your Gourmet Treats
These rich chocolate delights are the perfect conclusion to a meal. If you are hosting a dessert party, they pair beautifully alongside a decadent chocolate pie or even a lighter refreshing strawberry poke cake.
For those who love a variety of handheld treats, consider serving these alongside seasonal pumpkin cake pops or protein-packed peanut butter bites to offer a range of flavors and textures to your guests. If you have leftover dark chocolate, it’s the perfect excuse to whip up a batch of ultra-moist chocolate cupcakes!
Frequently Asked Questions
Absolutely! A white chocolate drizzle provides a high-contrast look, though the dark chocolate drizzle in this recipe offers a more sophisticated, triple-chocolate flavor profile.
Yes, a binder is necessary to turn the crumbs into a moldable dough. If you prefer not to use frosting, you can substitute with a thick chocolate ganache or even softened cream cheese.
After dipping, tap your fork gently against the side of the bowl to let excess chocolate drip off. Then, scrape the bottom of the fork against the edge of the bowl before placing the ball on parchment paper.
When stored in an airtight container in the refrigerator, these cake balls will stay moist and delicious for up to 7 days. They can also be frozen for up to 2 months.
Cracking usually happens when the cake balls are too cold (frozen) and the dipping chocolate is too hot. The rapid expansion/contraction causes the shell to split. Aim for refrigerated, not frozen, cake balls.
The Ultimate Gourmet Cake Balls Recipe
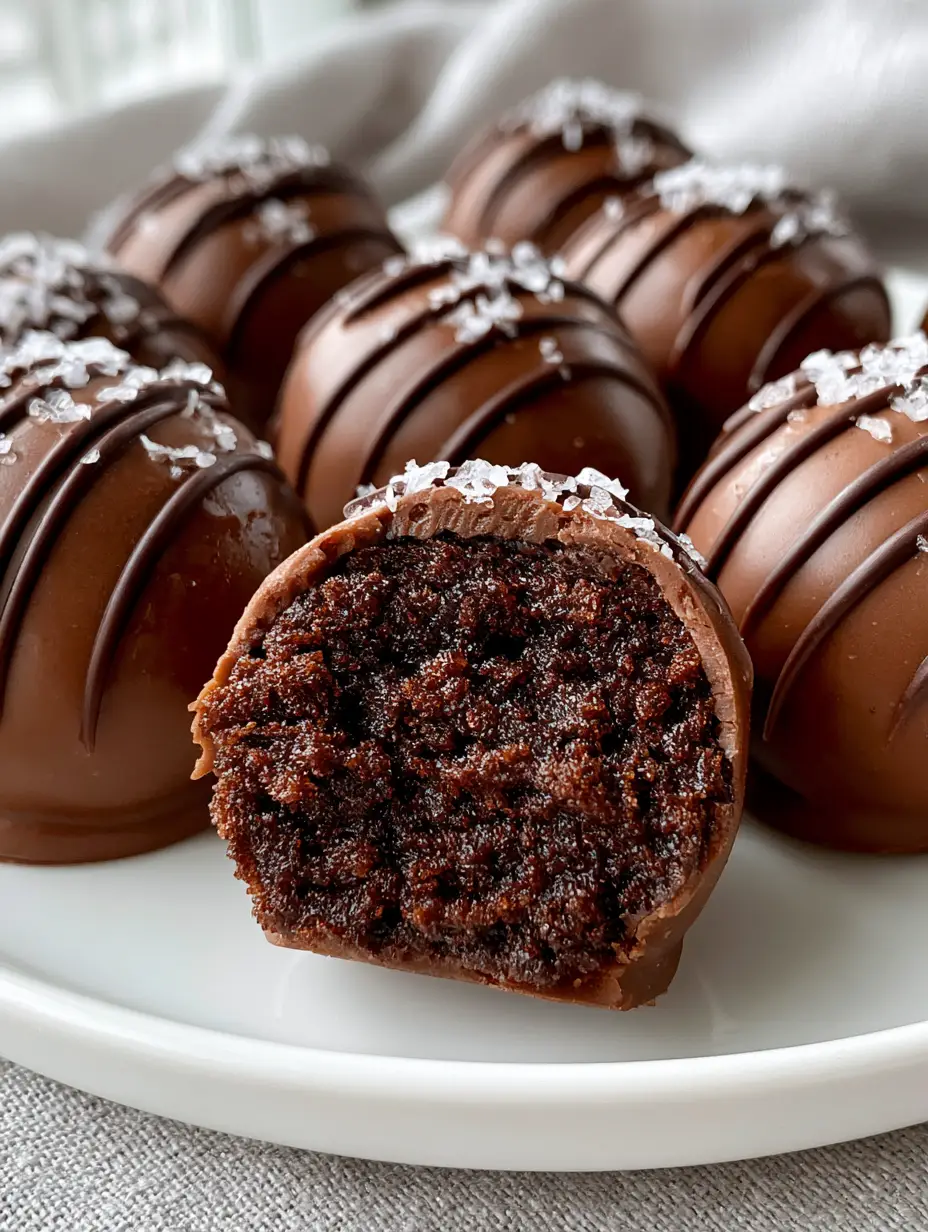
Cake Balls Recipe: Gourmet Dark Chocolate Truffles with Flaky Sea Salt
Ingredients
Equipment
Method
- Whisk dry ingredients, add wet ingredients except water. Stir in boiling water. Bake in 9x9 pan at 350°F (175°C) for 25-30 minutes.
- Cool cake completely. Crumble into fine pieces in a large bowl and mix with dark chocolate frosting until it holds its shape.
- Scoop 1 tablespoon of mixture and roll into smooth spheres. Chill in the refrigerator for 1 hour.
- Melt milk chocolate wafers. Submerge each ball, tap off excess, and place on parchment paper to set.
- Drizzle with melted dark chocolate and sprinkle immediately with flaky sea salt crystals.
Notes
If the dipping chocolate is too thick, stir in 1 teaspoon of coconut oil to improve the flow.
Share Your Creations with Us!
We hope this cake balls recipe brings a touch of gourmet flair to your kitchen. The combination of the rich, dark center and the salty-sweet shell is truly a sensory delight. If you enjoyed this recipe, please leave a comment below and tell us how yours turned out!
Don’t forget to take a photo of your beautiful drizzled truffles and share them with us. For more dessert inspiration and professional baking tips, follow us on Pinterest and save this recipe to your favorite boards!