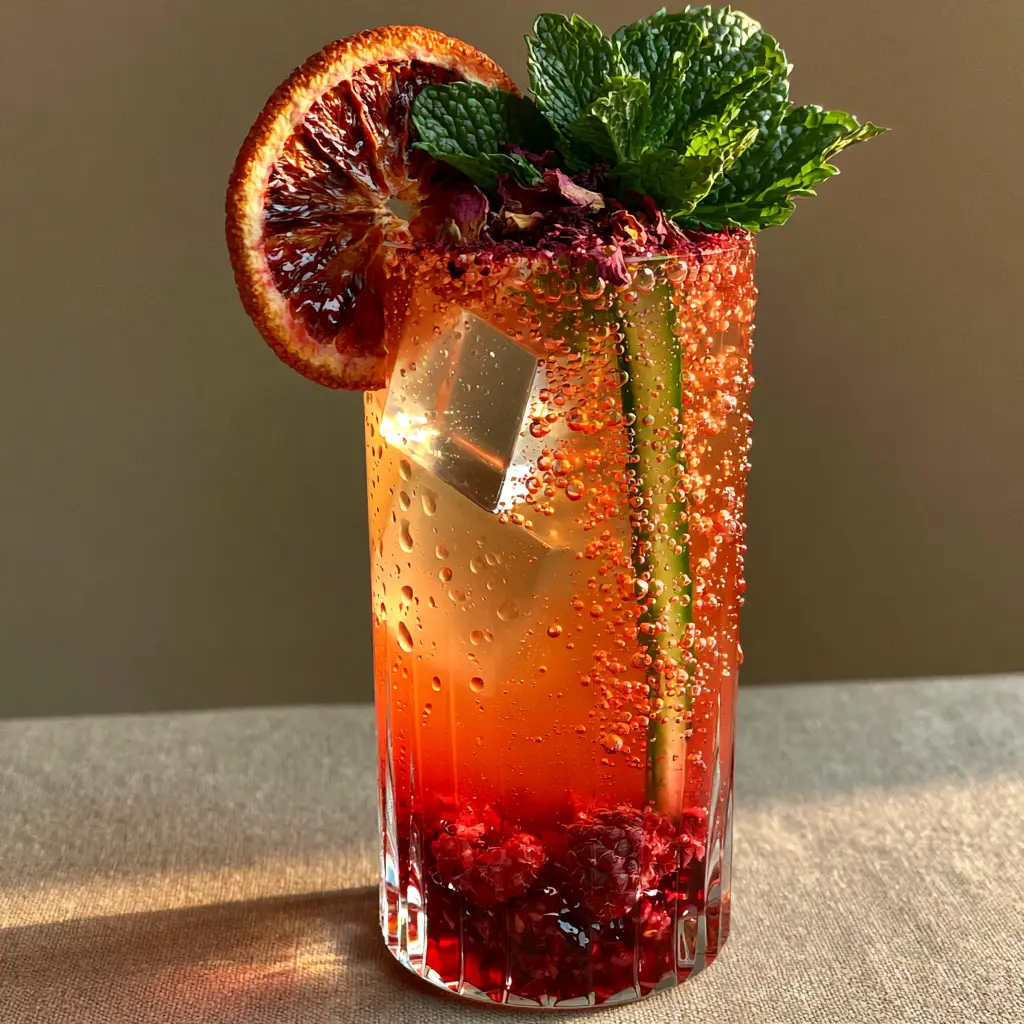
Experience the ultimate sunset in a glass with these sophisticated Non Alcoholic Mocktails. When you crave the complexity of a craft cocktail without the spirits, this botanical hibiscus and raspberry spritz delivers a multi-dimensional flavor profile and a visual aesthetic that rivals the world’s best high-end bars.
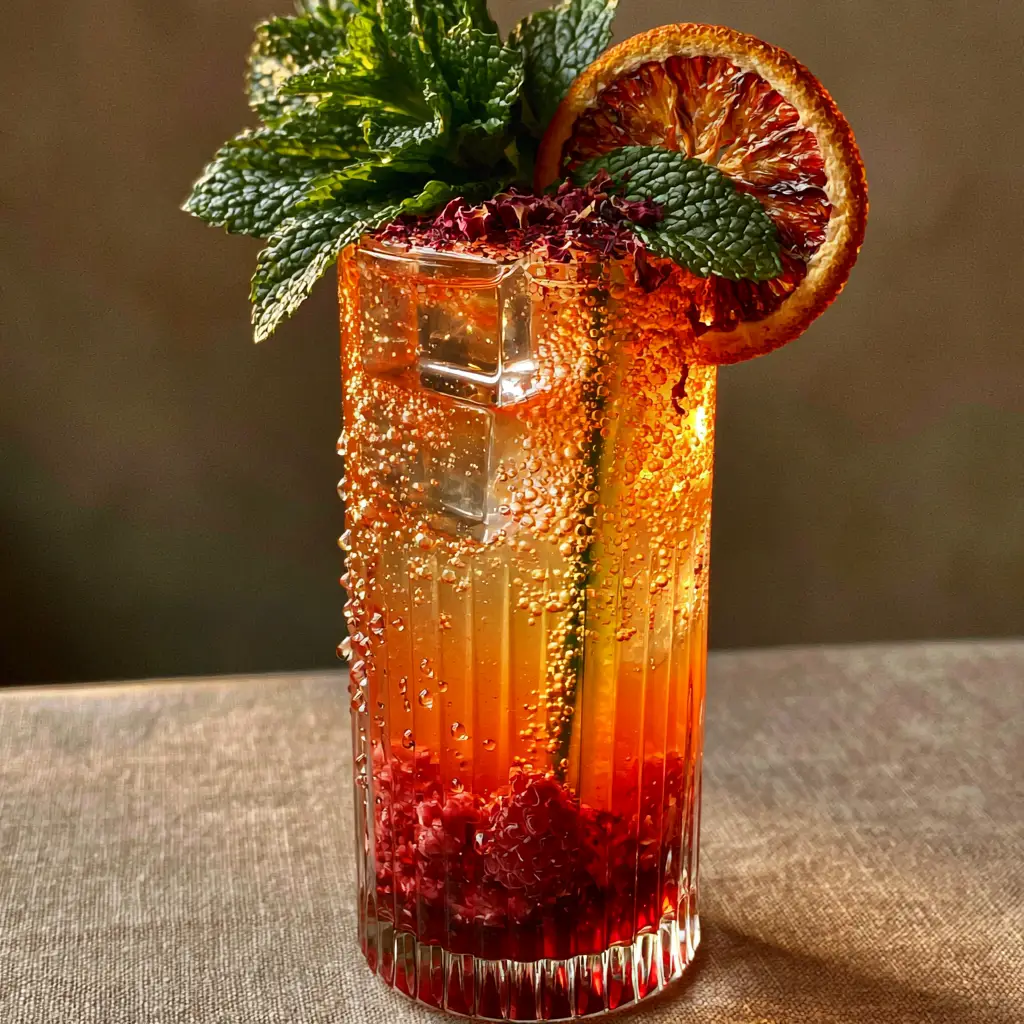
Imagine holding a chilled, ribbed crystal highball glass, its surface beaded with icy condensation. As the golden hour light hits the translucent sunset-orange liquid, you see vigorous bubbles dancing around a spiraling cucumber ribbon while a deep ruby hibiscus gradient anchors the base. This isn’t just a drink; it’s a sensory experience designed for the discerning palate.
Crafting high-end Non Alcoholic Mocktails requires more than just mixing juice and soda. It is about layering textures, managing sweetness with botanical bitterness, and utilizing professional garnishing techniques to create a “wow” factor that keeps your guests talking long after the last sip.
Why This Botanical Spritz Redefines Modern Temperance Drinks
- Visual Masterpiece: The deep ruby hibiscus gradient and vibrant orange body create a stunning sunset effect that is perfect for social media and special occasions.
- Textural Complexity: From the crunch of muddled raspberry seeds to the effervescence of vigorous carbonation and the velvety dust of dried rose petals.
- Botanical Depth: Unlike sugary sodas, this recipe uses a homemade hibiscus syrup and fresh mint to provide earthy, floral, and cooling notes.
- Professional Aesthetics: The combination of clear square ice cubes and a precision-carved cucumber spiral elevates this to a five-star lounge standard.
The Anatomy of a Sophisticated Sip: Essential Ingredients
Fresh Raspberries: You will need 1/4 cup (30g) of ripe berries to provide the jammy, muddled base that creates the signature ruby gradient. Their natural acidity balances the floral notes of the hibiscus.
Hibiscus Simple Syrup: This 2 tbsp (30ml) addition provides the concentrated floral backbone and the deep red pigment. It acts as the “weight” in our glass, sitting at the bottom to create that beautiful color transition.
Blood Orange Juice: Use 2 oz (60ml) of freshly squeezed juice to achieve the translucent sunset-orange hue. Blood orange offers a more complex, slightly bitter edge compared to standard navel oranges.
Sparkling Mineral Water: Choose a high-carbonation brand to ensure those tiny, vigorous bubbles cling to the sides of the glass. You will need approximately 4 oz (120ml) to top off the drink.
English Cucumber: One long, thin ribbon is required for the internal spiral. The cucumber adds a clean, spa-like aroma that cuts through the richness of the hibiscus.
Clear Ice Cubes: Large 2-inch (5cm) square cubes are essential for slow dilution. Clear ice is free of air bubbles, ensuring the drink remains translucent and glowing under golden hour light.
Fresh Mint Sprig: A large, lush sprig serves as the primary aromatic garnish. “Slapping” the mint before placing it releases the essential oils without the bitterness of bruising.
Dehydrated Blood Orange Wheel: This garnish adds a concentrated citrus aroma and a professional, architectural finish to the rim of your ribbed crystal glass.
Dried Rose Petals: A light dusting of 1/4 tsp (0.5g) of crushed petals adds a final floral note and a delicate visual texture to the top of the ice cubes.
Precision Tools for The Perfect Highball
To achieve the visual perfection seen in our homemade drink recipes, you will need a few specific tools. A ribbed crystal highball glass is non-negotiable for the way it refracts light through the liquid and condensation.
A wooden muddler is necessary to break down the raspberries into a consistent pulp without over-processing them. You will also need a Y-peeler or a mandoline to create the ultra-thin, flexible cucumber ribbon that spirals effortlessly inside the glass.
For the ice, a clear ice mold is the secret to getting those perfectly transparent, air-free squares. Finally, a long-handled bar spoon is essential for the gentle stirring required to maintain the carbonation while integrating the flavors.
Crafting the Gradient: A Masterclass in Layering
Step 1: The Muddled Foundation
Place your fresh raspberries into the bottom of the empty ribbed crystal glass. Using your muddler, apply firm downward pressure and a slight twist until the berries are completely broken down into a thick, ruby-red paste. This creates the “anchor” for your gradient.
Step 2: The Hibiscus Infusion
Pour the hibiscus syrup directly over the muddled raspberries. The syrup will mingle with the berry juices, creating a heavy, dense liquid that will stay at the base of the glass even after other liquids are added. Do not stir at this stage.
Step 3: The Cucumber Spiral
Using a Y-peeler, shave a full-length ribbon from an English cucumber. Carefully slide the ribbon into the glass, using your bar spoon to press it against the interior walls in a spiral motion. The ribbon should stand vertically, held in place by its own tension against the ribbed glass.
Step 4: The Clear Ice Assembly
Carefully drop two large, clear square ice cubes into the glass. The ice should sit on top of the cucumber ribbon, further securing it against the glass walls. The clarity of the ice is vital here, as it allows the light to pass through the orange liquid later.
Step 5: The Sunset Pour
Slowly pour the freshly squeezed blood orange juice over the ice cubes. You will see the orange liquid begin to sit above the ruby red base. Follow this immediately with the sparkling mineral water, pouring it gently down the side of the glass to preserve the carbonation. Look for those vigorous bubbles clinging to the cucumber and the glass ribs.
Step 6: The Aromatic Finish
Place a large sprig of mint in the palm of your hand and give it a firm “slap” with your other hand. This awakens the scent. Tucked it into the side of the glass. Add the dehydrated blood orange wheel to the rim and finish with a delicate sprinkle of dried rose petal dust over the surface of the ice.
Professional Mixology Secrets for Home Bartenders
- Temperature Control: Always chill your glassware in the freezer for 10 minutes before assembly. This encourages the formation of those beautiful condensation droplets on the outside of the glass.
- The Clarity Secret: If you don’t have a clear ice mold, boil distilled water twice before freezing it. This removes much of the dissolved air that causes cloudiness in standard ice cubes.
- Balance the Acid: If your raspberries are particularly tart, add an extra 1/2 tsp (2.5ml) of hibiscus syrup. If the drink feels too sweet, a tiny squeeze of fresh lime will brighten the entire profile.
- Effervescence Maintenance: Never over-stir Non Alcoholic Mocktails containing sparkling water. A single, gentle upward fold with a bar spoon is all you need to integrate the flavors without losing the bubbles.
Prep Ahead & Freshness Guidelines
While these Non Alcoholic Mocktails are best enjoyed immediately to appreciate the vigorous carbonation, you can prepare the components in advance. The hibiscus syrup can be made and stored in the refrigerator for up to two weeks.
You can muddle the raspberries and juice the blood oranges up to 4 hours before serving. However, do not add the sparkling water or the cucumber ribbon until the moment of service, as the cucumber will wilt and the water will go flat, ruining the crisp texture and visual appeal.
Elevated Pairings for a Complete Experience
These botanical mocktails pair beautifully with light, sophisticated appetizers. The floral notes of the hibiscus and rose complement the sweetness of fruit-forward desserts like strawberry cheesecake dump cake.
For a savory contrast, serve this spritz alongside salty snacks. The effervescence cleanses the palate perfectly between bites of rich treats like salted caramel rice krispie treats. If you are hosting a larger gathering, consider offering a variety of non-alcoholic sangria options alongside this individual spritz for a diverse beverage menu.
Frequently Asked Questions
Yes, you can substitute the hibiscus simple syrup with a concentrated hibiscus tea infusion sweetened with a monk fruit or stevia liquid blend. Ensure the infusion is concentrated enough to maintain the deep ruby color.
The secret to a gradient is liquid density. Always place the heaviest, highest-sugar ingredients (like hibiscus syrup and muddled fruit) at the bottom and pour lighter liquids (like sparkling water) slowly over the back of a spoon or large ice cubes.
Slapping the mint sprig against your palm ruptures the herb’s oil glands, releasing its refreshing aroma onto the surface of the drink without bruising the leaves, which can create a bitter taste.
You can make them at home by slicing blood oranges thinly and drying them in a dehydrator or a low-temperature oven (200°F/95°C) for 3-4 hours, or you can purchase them at specialty cocktail supply stores.
Clear ice is aesthetically superior because it lacks the trapped air bubbles that make ice look white. This allows light to pass through the drink, making the sunset-orange colors glow and the carbonation bubbles more visible.
The Ultimate Hibiscus Raspberry Botanical Spritz Recipe
Non Alcoholic Mocktails: The Botanical Hibiscus and Raspberry Spritz
Ingredients
Equipment
Method
- Place fresh raspberries in the ribbed crystal glass and muddle until they form a jammy pulp.
- Pour the hibiscus syrup over the raspberries to create the dense ruby base layer.
- Slide the shaved cucumber ribbon into the glass, pressing it against the sides in a spiral shape.
- Add two large clear ice cubes, then gently pour the blood orange juice over the ice.
- Top with sparkling mineral water, pouring slowly to maintain the vigorous bubbles and the gradient effect.
- Slap the mint sprig and tuck it into the glass. Add the dehydrated orange wheel and a dusting of rose petals.
Notes
Avoid stirring vigorously to preserve the distinct sunset gradient layers.
Join the Community of Enthusiastic Home Cooks
Creating professional-grade Non Alcoholic Mocktails at home is a rewarding way to elevate your hosting game and enjoy mindful drinking. The combination of botanical syrups, fresh garnishes, and high-quality carbonation ensures that you never feel like you’re missing out on the cocktail experience.
If you enjoyed this recipe, please leave a comment below and let us know how your gradient turned out! Don’t forget to follow us on Pinterest for more visual recipe inspiration and share your sunset-orange creations with the community. Happy mixing!


