There is something undeniably nostalgic about the combination of toasted marshmallows, melty chocolate, and honeyed graham crackers. These s’mores blossom cookies capture every ounce of that campfire magic but elevate it into a sophisticated, soft-baked masterpiece that you can make in your own kitchen.
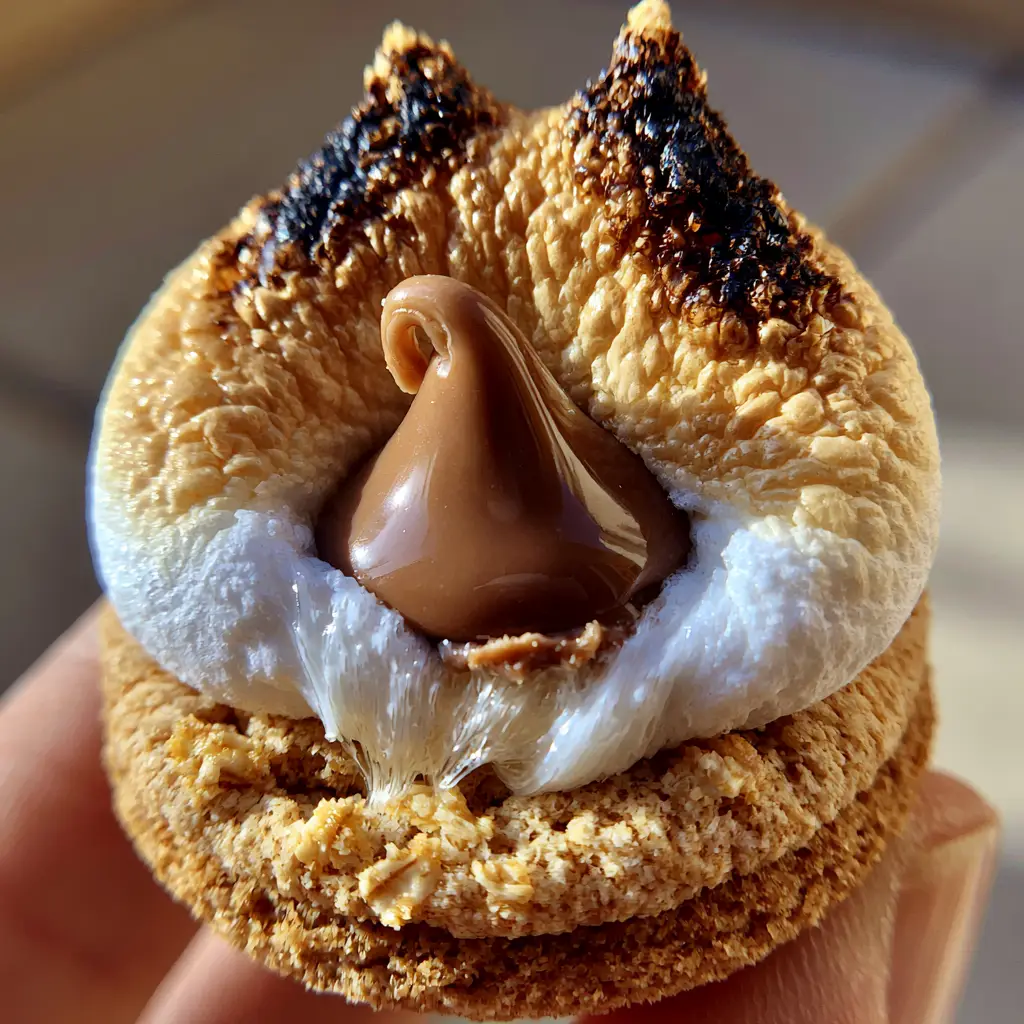
Forget the basic peanut butter version; we are diving deep into a texture-rich experience. This recipe features a thick, chewy graham cracker base, a marshmallow that looks like it was kissed by a mountain bonfire, and a glossy chocolate center that slumps perfectly into the gooey peaks.
When you hold one of these cookies, you’ll feel the slight resistance of the soft-baked crumb followed by the sticky, pulled texture of the marshmallow. It is a sensory journey that combines the crunch of fine graham dust with the velvet richness of milk chocolate.
Why You Will Obsess Over These Marshmallow-Topped Wonders
- The Perfect Texture Gradient: You get a soft, chewy cookie base contrasted with a sticky, stretchy marshmallow and a snap of milk chocolate.
- Authentic Campfire Flavor: By using real graham cracker crumbs in the dough and charring the marshmallows, we achieve that genuine smoky-sweet profile.
- Visually Stunning Results: With their charred peaks and slumped chocolate kisses, these cookies look like they walked off a professional food stylist’s set.
- No Chilling Required: Unlike many gourmet cookies, this dough is ready for the oven immediately, satisfying your cravings in under 30 minutes.
The Essential Pantry List for Toasted S’mores Perfection
To achieve the specific visual and structural results of these s’mores blossom cookies, every ingredient serves a forensic purpose. We aren’t just baking; we are engineering the perfect bite.
Unsalted Butter (1 cup / 227g): High-quality butter provides the fat necessary for a tender crumb. Ensure it is softened to room temperature so it creams effectively with the sugars to create air pockets.
Light Brown Sugar (1 cup / 200g): The molasses content in brown sugar is what gives our base that “soft-baked” chewiness. It also complements the honey notes found in the graham crackers.
Granulated White Sugar (1/2 cup / 100g): This helps the edges of the cookie crisp up slightly, providing the structural integrity needed to hold a heavy marshmallow and chocolate kiss.
Large Egg + One Yolk: Using an extra yolk adds fat and emulsifiers. This results in a richer, denser cookie that mimics the texture of a graham cracker without being dry.
All-Purpose Flour (2 cups / 250g): This provides the protein structure. We balance it with cracker crumbs to ensure the cookie doesn’t become too cakey.
Graham Cracker Crumbs (1.5 cups / 125g): We use finely pulsed crumbs directly in the dough. This ensures every single bite tastes like an authentic s’more base.
Large White Marshmallows: You need the full-sized version here, not minis. We will be cutting them in half to create a wide “landing pad” for the chocolate kiss.
Milk Chocolate Kisses: For that classic aesthetic, the Hershey’s milk chocolate kiss is non-negotiable. Its high sugar content allows it to “slump” slightly when placed on the hot marshmallow.
Foundational Science: Don’t forget 1 tsp (5g) of baking soda for lift, 1/2 tsp (3g) of sea salt to balance the sugar, and 2 tsp (10ml) of pure vanilla extract for aromatic depth.
Must-Have Kitchen Tools for the Perfect Char
To get that “extreme close-up” quality seen in our photos, you need the right gear. A standard baking sheet is a given, but a few other tools make the difference.
A kitchen torch is the best way to achieve those dark, caramelized charred spots on the marshmallow peaks. If you don’t have one, your oven’s broiler will work, but you must watch it like a hawk to avoid total melting.
I also recommend a 2-tablespoon (30ml) cookie scoop. Consistency is key for blossom cookies; if the bases are uneven sizes, the marshmallows will slide off during the toasting phase.
Step-by-Step Mastery: Building the Graham Cracker Base
1. Creaming for Structure
In a large bowl or stand mixer, beat the softened butter, brown sugar, and granulated sugar for at least 3 minutes. You are looking for a pale, fluffy texture; this creates the “soft-baked” foundation that supports the heavy toppings.
2. Incorporating the Golden Elements
Add the egg, extra yolk, and vanilla extract. Scrape down the sides of the bowl to ensure the fats and liquids are perfectly emulsified. If you love this flavor profile, you might also enjoy my s'mores chocolate chip cookies for a different take on the classic.
3. The Graham Cracker Fold
Whisk together the flour, graham cracker crumbs, baking soda, and salt. Gradually add the dry ingredients to the wet. The dough should be thick, pliable, and smell strongly of honey and toasted grain.
The Secret to the “Blossom” Technique: Toasting and Slumping
4. Precision Baking
Scoop the dough into balls (about 2 tablespoons each) and roll them in extra graham cracker dust. Place them on a parchment-lined sheet and bake at 350°F (175°C) for 8-10 minutes. They should be slightly underbaked in the center but set at the edges.
5. The Marshmallow Crown
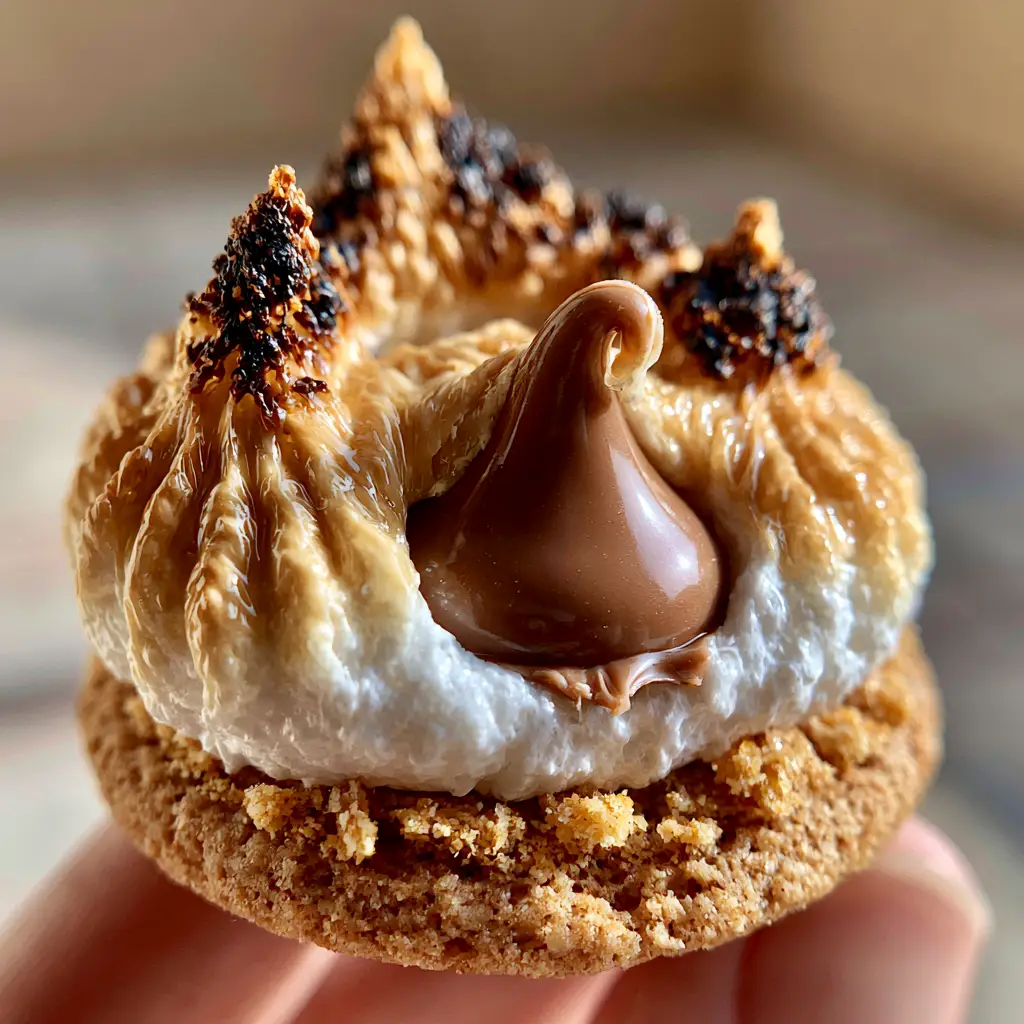
Immediately upon removing the cookies from the oven, press half a large marshmallow (cut side down) onto the center of each cookie. Turn your broiler to high or grab your kitchen torch. Heat the marshmallow until it puffs and develops a gradient of golden brown with dark, charred spots.
6. The Final Chocolate Slump
While the marshmallow is still sticky and molten, press a milk chocolate kiss into the center. The residual heat will cause the base of the chocolate to melt slightly, creating that “glossy, slumped” look. If you prefer a more contained chocolate experience, check out my chocolate chip cookie cups.
Expert Tips for Bakery-Quality Results
- The “Spoon and Level” Method: Always measure your flour and graham crumbs by weight or by spooning them into the cup. Packing them down will lead to dry, crumbly cookies.
- Freeze Your Kisses: If you find the chocolate is melting too much and losing its shape, pop the chocolate kisses in the freezer for 15 minutes before pressing them into the marshmallows.
- Wait for the “Set”: Let the s’mores blossom cookies cool on the pan for at least 10 minutes. The marshmallow needs time to transition from “liquid” to “sticky” so it doesn’t slide off.
- The Dusting Finish: For that final visual flair, sprinkle a pinch of fine graham cracker dust over the cookies while the chocolate is still wet.
Serving Suggestions and Flavor Pairings
These cookies are a showstopper on their own, but they pair beautifully with other summer-inspired treats. Since they are quite rich, I love serving them alongside a refreshing butterfly pea lemonade to cleanse the palate.
If you are hosting a dessert party, consider a “Cookie Cup” theme by adding snickerdoodle cookie cups to the tray. The cinnamon notes in the snickerdoodles perfectly complement the graham cracker base of our s’mores blossom cookies.
Storage and Freshness Guide
Room Temperature: Store these in a single layer in an airtight container for up to 3 days. Do not stack them, or the marshmallows will stick together and ruin the beautiful charred peaks.
Reheating: If the marshmallow becomes too firm, a 5-second blast in the microwave will revive that gooey, “pulled” texture. Be careful not to overheat, or the chocolate kiss will turn into a puddle.
Freezing: You can freeze the baked cookie bases, but I do not recommend freezing them with the marshmallow and chocolate attached. The marshmallow texture becomes spongy and unpleasant upon thawing.
Frequently Asked Questions
Absolutely! While milk chocolate is traditional for s’mores, a dark chocolate kiss adds a sophisticated bitterness that balances the sweet marshmallow perfectly.
You can, but you won’t get the same visual ‘blossom’ effect. Large marshmallows provide a wider base for the chocolate kiss to sit on, creating that iconic gooey look.
Set your oven to broil and place the cookies on the top rack. Watch them constantly; it only takes 30-60 seconds for them to go from golden to burnt!
Store them with a piece of white bread in an airtight container. The bread will release moisture, keeping the graham cracker base soft and chewy.
This usually happens if the marshmallows are placed on the cookies while they are too hot, or if the marshmallows are too cold. Press them down firmly and toast immediately.
The Official S’mores Blossom Cookies Recipe
S'mores Blossom Cookies: The Ultimate Soft-Baked Campfire Treat
Ingredients
Equipment
Method
- In a stand mixer, beat softened butter, brown sugar, and granulated sugar until light and fluffy (about 3 minutes).
- Mix in the egg, egg yolk, and vanilla until fully combined and smooth.
- In a separate bowl, whisk flour, graham cracker crumbs, baking soda, and salt. Gradually add to the wet ingredients until a soft dough forms.
- Scoop 2-tablespoon portions, roll into balls, and place on a lined baking sheet. Bake at 350°F (175°C) for 8-10 minutes until edges are set.
- Remove from oven and immediately press half a marshmallow onto each cookie. Use a kitchen torch to toast until golden brown with charred peaks.
- Press a milk chocolate kiss into the molten marshmallow. Let cool on the pan for 10 minutes to allow the 'slump' to set.
Notes
Join the Karen Cooks Community!
I hope these s’mores blossom cookies bring a bit of campfire joy to your home! If you made these, please leave a comment below and tell me—did you use a torch or the broiler for that perfect char?
Don’t forget to follow me on Pinterest for more dessert inspiration and share your bake photos with me. Happy baking!


